DfE Integration
Maytas can integrate with the Department for Education's (DfE) new Manage Teacher Continuing Professional Development service. Our integration allows you to manage your participants via Maytas, stay up to date with additions and changes made by the DfE and submit and track milestones as a participant progresses through their learning.
A new licence is required for the DfE integration - please contact your account manager for more information.
Setup
Configuration options must be set before using the integration:
-
In Maytas, click the M5 button at the top left and select Options.
-
Go to Other on the left (under the Maytas 5 header).
-
In the DFE section, tick the boxes for each config option and enter the values as follows:
-
API Token - This is the token for ECF. It can be obtained from the DfE by emailing them at: continuing-professional-development@digital.education.gov.uk
-
Url for NPQ endpoints - For a TEST system, this should be:
https://npq-registration-separation-web.teacherservices.cloud/api/v3
A URL for a live system is not available at the time of writing. Please contact the DfE for updates at: continuing-professional-development@digital.education.gov.uk
-
API Token for NPQ endpoints - This can be obtained from the DfE by emailing them at: continuing-professional-development@digital.education.gov.uk
-
Url for API - This is the URL for ECF. For a TEST system, this should be:
https://sp.manage-training-for-early-career-teachers.education.gov.uk/api/v3
For a LIVE system, this should be:
https://manage-training-for-early-career-teachers.education.gov.uk/api/v#
where # is replaced with the version number (e.g. v1, v2, etc). Only one version is maintained at a time, so it is recommended to contact the DfE at continuing-professional-development@digital.education.gov.uk to ensure you are using the correct version. See here for further information on the live API URL.
-
-
Click OK.
Next, permissions must be set to access the system:
- Go to Tools | Edit Permissions.
- Select the user or group which requires permission.
- On the Modules tab, set the DFE Integration permission to Visible.
- Go to the Commands tab and expand the DFE section.
- Set each permission to Visible as required.
- Click Apply to save changes, then restart Maytas for the permission to take effect.
Finally, the DfE tabs must be made available:
- Go to Tools on the toolbar and click New / Load on the Screens panel of the ribbon.
- Scroll down and select Trainee on the left.
- Select DfE Data on the right and click OK.
- Tick the Published box on the left.
- Click Apply on the ribbon.
- Repeat the above steps for the DfE Declarations tab (also in the Trainee section).
- Go to Home on the toolbar and click the Sync button.
Downloading all participants from the DfE
To download all participants from the DfE so that learner records are generated for them in Maytas:
- In Maytas, go to Management on the toolbar.
- On the Third Party panel of the ribbon, go to DFE | Get All Participants.
-
Available ECF participants and NPQ applicants will now be downloaded.
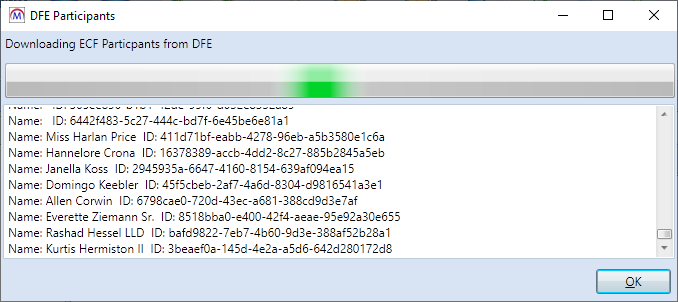
This may take a long time depending on the number of available records. Clicking OK will continue the download in the background, and progress can be checked by going to DFE | Get All Participants again.
- When the download has finished, the text No more NPQ Applicant updates found will appear at the bottom of the log. Click OK.
-
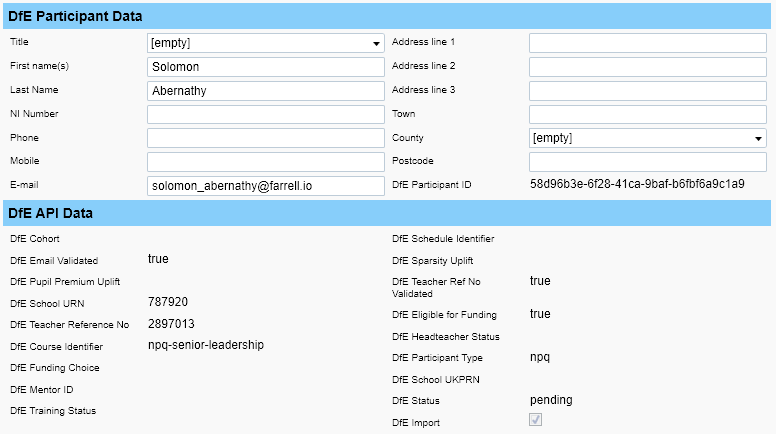
Learner records will now be available in Maytas for each downloaded participant / applicant. The imported data can be viewed on the DfE Data tab on learner records, which also includes basic Maytas learner fields that can be completed.
Downloading updates from the DfE
Rather than downloading all participants from the DfE each time, you can instead only download records which have been added or updated since the last download. To do this:
- In Maytas, go to Management on the toolbar.
- On the Third Party panel of the ribbon, go to DFE | Get Updates.
- Any added or updated records will now be downloaded.
- Click OK when the updates have finished downloading.
Searching for learners imported from the DfE
A search option can be added to Maytas to filter by learners who have been imported from the DfE. Another search option can also be added to filter by NPQ or ECF participants:
- Go to Tools on the toolbar and click Fields on the Search panel of the ribbon.
- Select Trainee on the left.
- Click the Add button on the right.
-
In the new row which appears, select TRAINEEPOT2 in the left dropdown box and DFE_IMPORT in the right dropdown box. Imported DfE participants will have a value of Y in this field.
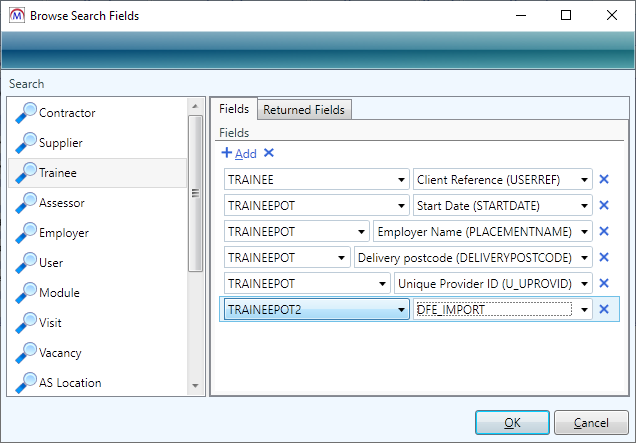
- Add another row and select TRAINEEPOT2 in the left dropdown box and DFE_PARTICIPANT_TYPE in the right dropdown box. NPQ participants will have a value of npq, whereas ECF participants will have a value of ect or mentor.
- Click OK.
-
Go to Home on the toolbar and expand the Advanced section under the search box.
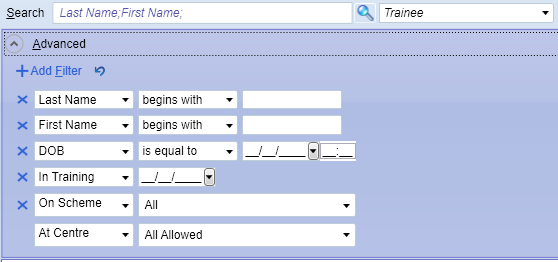
- Click Add Filter.
-
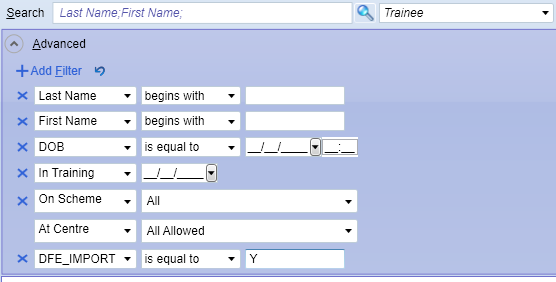
In the new row that appears, select DFE_IMPORT, then set the other boxes to is equal to and Y. This will filter by learners imported from the DfE.
-
Add another row and set it to DFE_PARTICIPANT_TYPE. Set the middle dropdown box to is equal to. You can then use the right-hand text box to enter the type of learner you want to search by (npq, ect or mentor).

Adding and uploading declarations
Declarations can be added to a learner in Maytas and then uploaded to their participant record in the DfE.
To add a declaration to a learner:
- On the learner's record, go to the DfE Declarations tab.
-
Click the
 button on the grid.
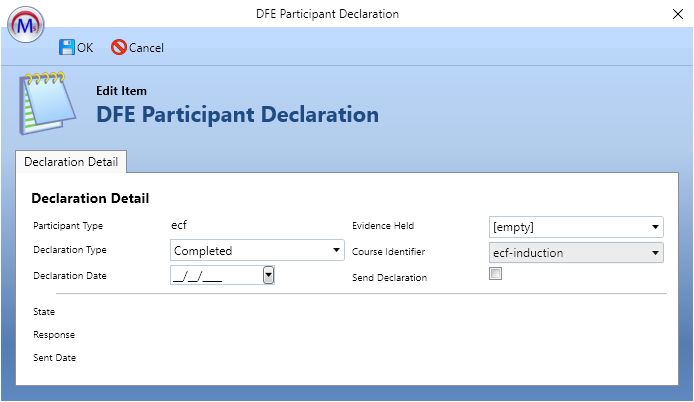
- Complete the declaration details as required. Only tick the Send Declaration box if the declaration is ready to be uploaded.
- Click OK.
- Click Apply. Additional declarations can be added as required.
To upload all declarations for the learner where the Send Declaration box is ticked:
- From the learner's record, go to Actions | DFE | Post Declarations.
-
Any declarations for the learner with Send Declaration ticked will now be uploaded. The result of each row will be displayed in the log, along with any errors.
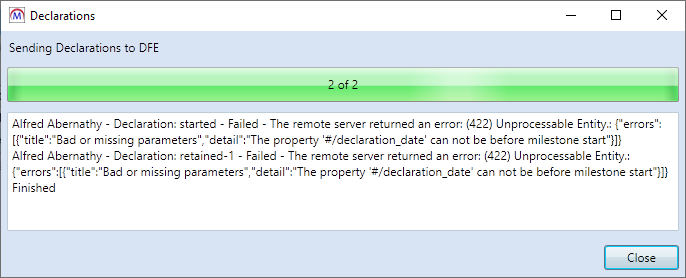
- Click Close when finished.
To bulk upload declarations for all learners:
-
Go to Management | DFE | Post Declarations. The Post Declarations window will appear.
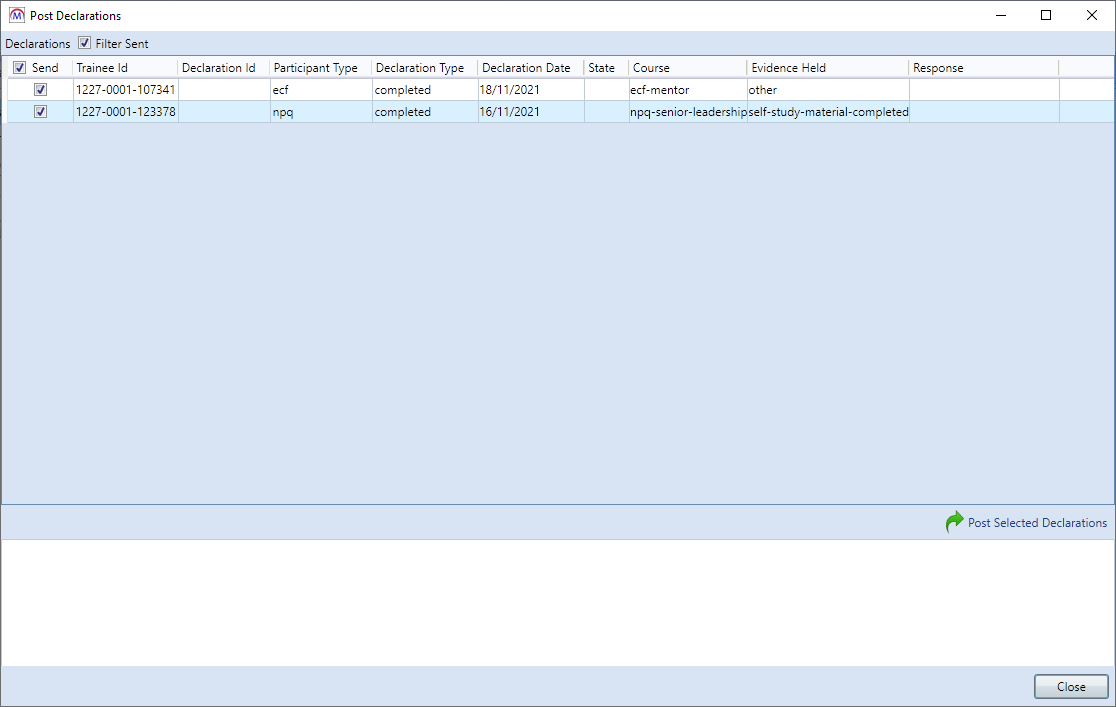
- The rows to be posted will be displayed at the top. To de-select a row so that it is not sent, un-tick the Send box.
- Click Post Selected Declarations (near the bottom right) to send the rows to the DfE.
- The status of each row will be shown in the log at the bottom of the window. Click Close when finished.
Voiding declarations
To void a learner's declarations:
-
In the learner's record, go to Actions | DFE | Void Declarations.
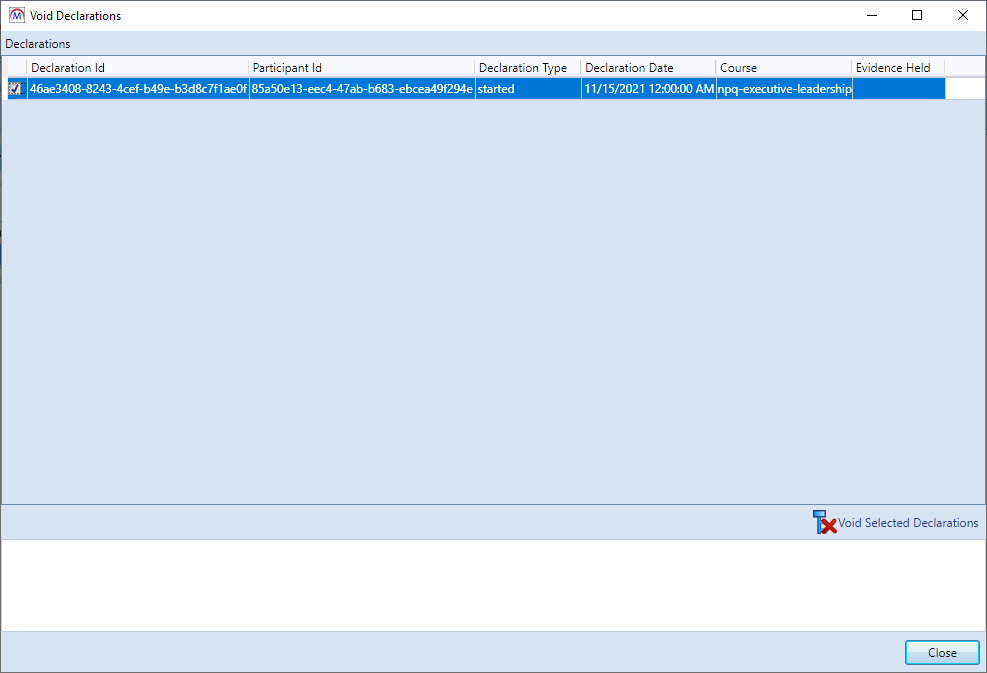
- Tick the checkbox on the left next to each declaration you wish to void.
- Click the Void Selected Declarations button near the bottom right.
- You will be asked to confirm. Click Yes to continue.
-
The selected declarations will now be processed and their status will be shown in the log at the bottom.

- Click Close when finished.
Managing courses
To manage a learner's course, from the learner's record, go to Actions | DFE | Manage Course.
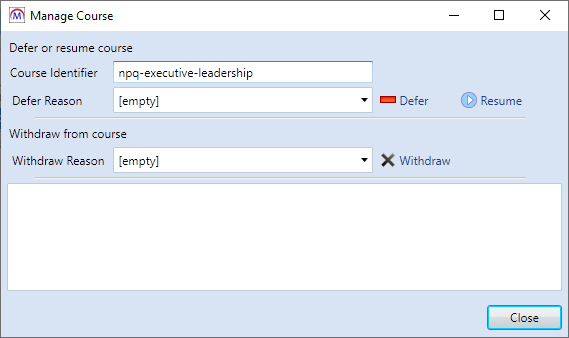
From here you can defer a course, resume a course or withdraw from a course.
To defer a course:
- Choose the Defer Reason from the dropdown list.
-
Click the Defer button.
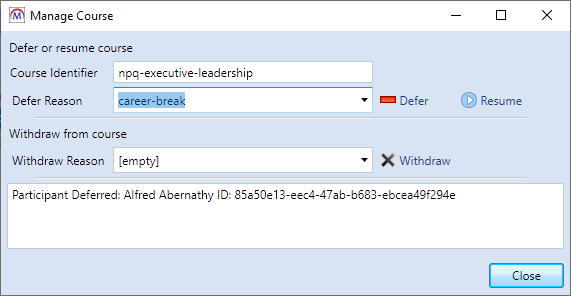
- The course will now be deferred, as indicated in the log at the bottom of the window. Click Close.
To resume a deferred course:
-
Click the Resume button.
- The course will now be resumed, as indicated in the log at the bottom of the window. Click Close.
To withdraw from a course:
- Choose the Withdraw Reason from the dropdown list.
- Click the Withdraw button.
-
You will be asked to confirm. Click Yes to continue.
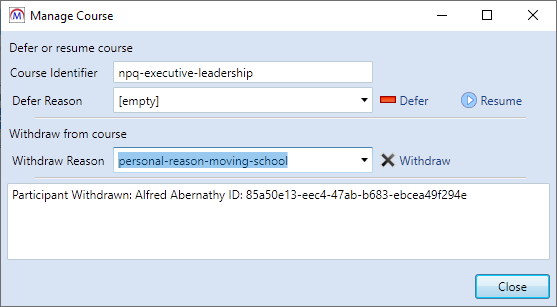
- The course will now be withdrawn, as indicated in the log at the bottom of the window. Click Close.
ECF participants have an additional option to change the course schedule:
-
Choose the schedule you wish to apply to the course from the Schedule Identifier dropdown box.
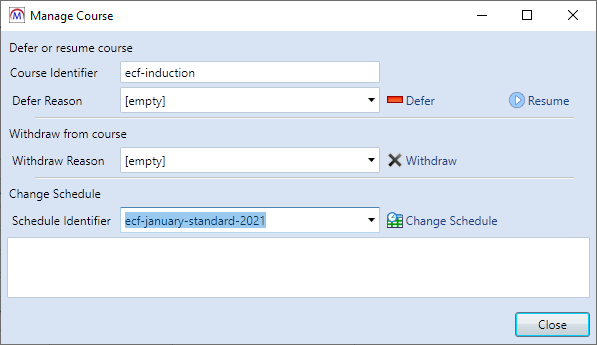
- Click the Change Schedule button. If the learner has existing declarations that would be invalidated by changing the schedule, this will be indicated in the log. It can be rectified by voiding the declarations.
- The selected schedule will now be applied to the course. Click Close.
Accepting or rejecting applications
This option is only available for NPQ applicants, not ECF participants.
To accept or reject an NPQ applicant for an individual learner:
-
In the learner's record, go to Actions | DFE | Accept/Reject Application.
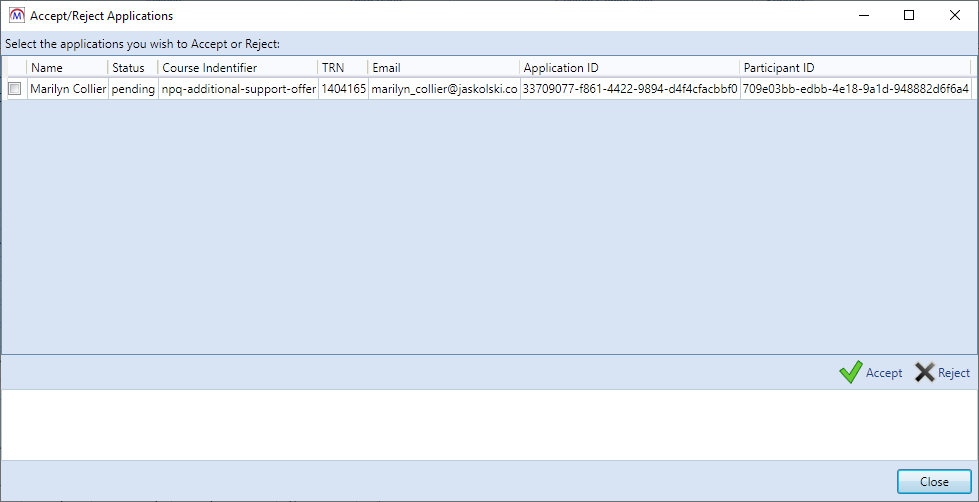
- Tick the checkbox on the left next to each row you wish to accept or reject.
- Click the Accept or Reject button near the bottom right.
- You will be asked to confirm. Click Yes to continue.
- The selected applications will now be processed and their status will be shown in the log at the bottom. Click Close when finished.
To accept or reject applications in bulk:
-
Go to Management | DFE | Accept/Reject NPQ Applications.
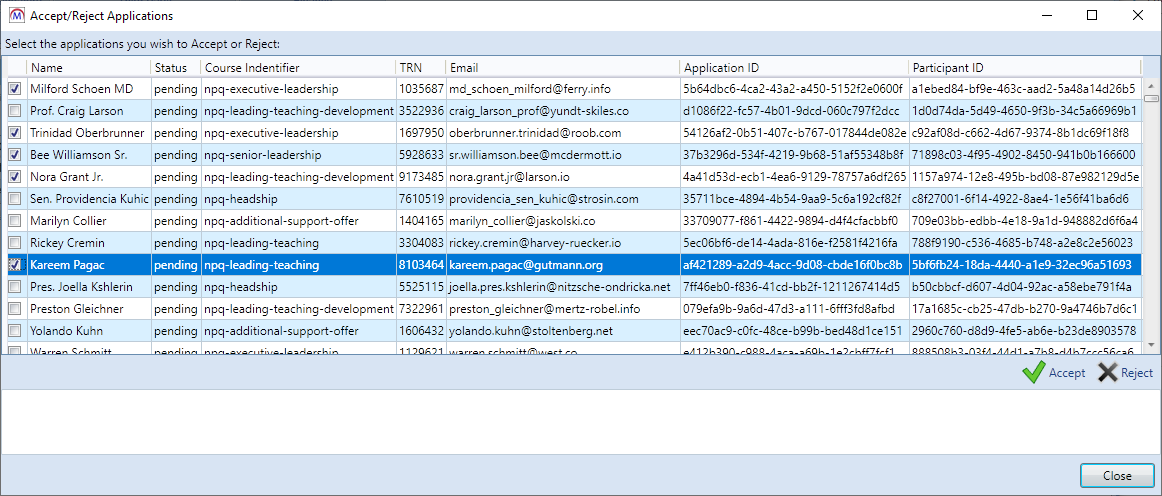
- Tick the checkbox on the left next to each row you wish to accept or reject.
- Click the Accept or Reject button near the bottom right.
- You will be asked to confirm. Click Yes to continue.
-
The selected applications will now be processed and their status will be shown in the log at the bottom.

- Click Close when finished.
DfE Outcomes
DfE outcomes for NPQ participants can be downloaded from the DfE for matching participants and new outcomes can be uploaded from Maytas to the DfE.
There are several points of consideration when uploading outcomes:
-
Only outcomes with a state of Passed or Failed can be uploaded.
-
Outcomes can only be uploaded to a learner with a completed declaration.
-
Existing outcomes on the DfE system cannot be changed - only new outcomes created in Maytas can be uploaded to the DfE.
A permission must be set to allow outcomes to be downloaded and uploaded:
- Go to Tools | Edit Permissions.
- Select the user or group which requires permission.
- Go to the Commands tab.
- Expand the DFE section.
- Set the Post Outcomes permission to Visible.
- Click Apply and restart Maytas for the change to take effect.
Downloading outcomes
To download all available outcomes:
-
Go to Management | DfE | Get Outcomes.
-
Available outcomes will now be downloaded. Click OK when it has finished.
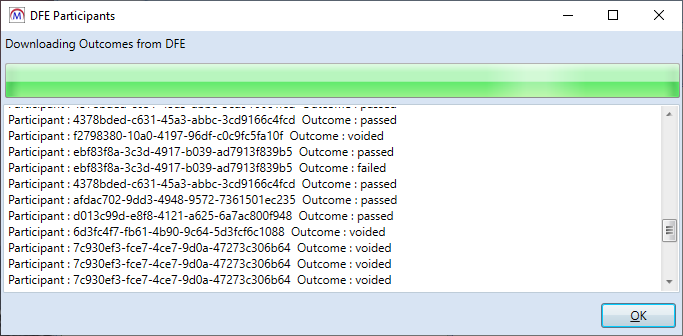
-
The outcomes can then be viewed on a learner's DfE Declarations tab.

Creating new outcomes
To create a new outcome in Maytas:
-
Open the learner record and go to the DfE Declarations tab.
-
On the DfE Outcomes grid, click the
 button.
 -
Complete the details in the new row as required and click Apply.
Uploading outcomes
To upload outcomes for a specific learner:
-
Open the learner record and go to the DfE Declarations tab.
-
Tick the Send Outcome box for each outcome that you wish to upload and click Apply.

-
On the Actions toolbar, go to DFE | Post Outcomes.
-
The outcomes will now be uploaded to the DfE participant record. Click Close when finished.
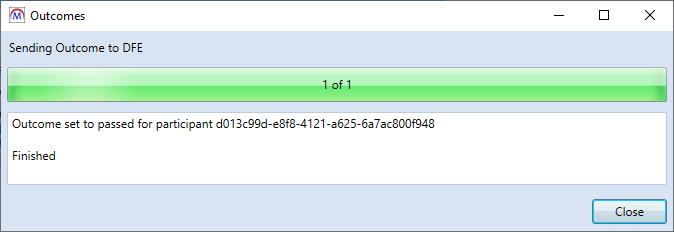
To upload all available new outcomes for all learners:
-
Go to DFE | Management | Post Outcomes.

-
Using the Send checkbox, tick or untick the outcomes to send, then click Post Selected Outcomes.
-
The outcomes will then be uploaded to the DfE participant records. Click Close when finished.
Funded Place
The DfE integration can download and upload data for the Funded Place field, which is stored in TRAINEEPOT2.DFE_FUNDED_PLACE.
If a learner's Funded Place setting needs to be changed, this can be done as follows:
-
Open the learner's record in Maytas.
-
Go to DFE | Change Funded Place.
-
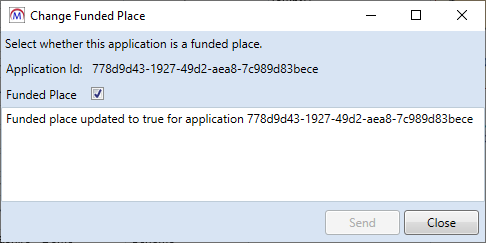
A window will appear displaying the learner's application ID and their current Funded Place setting (ticked or unticked). Change the Funded Place checkbox as required and click Send.
-
If successful, a message will appear indicating that the Funded Place has been updated in the learner's DfE record.
The Funded Place field is only relevant to learners who start from autumn 2024 onwards. If you attempt to change the Funded Place for a learner who is not eligible, the field will not be updated and a message will display stating that the field is not needed for the learner.
Log of Requests and Responses
The DfE service records all requests and responses to and from the DfE API in the DFE_REQUEST_LOG table.