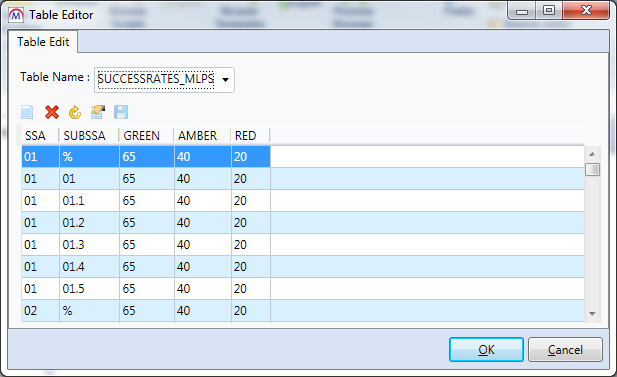
Table Editor
The Table Editor allows an advanced user to directly add, edit and delete data in a table format. The editor must first be made available by an admin user:
- In Maytas 5, go to Tools | Edit Permissions.
- Select the user or group that requires access to the editor.
- Go to the Commands tab.
- Scroll down and expand the Table Editor section.
- Set the Edit Lookups permission to Visible.
- Click Apply and restart Maytas.
The user(s) can then access the editor by going to Tools | Table Edit (on the General panel of the ribbon).

Select the table you wish to edit from the dropdown box. The list of available tables is determined by a system config – information on adding tables to the list is at the end of this section.
The data shown is the 'raw' data as it is stored in the database. For lookup fields, this means the short string value is displayed rather than the long string value. It is important to keep this in mind when editing data, since entering a long string value for a lookup field here may cause problems (e.g. if you enter Male instead of M for the gender field, the ILR and LLWR tabs will not recognise Male as a short string and will therefore display nothing for gender).
If you are unsure what a field does or what the effects of editing it will be, please seek advice from Maytas support before changing it. It is also strongly advised that you take a backup before editing data in the Table Editor.
To edit data, simply click the cell you wish to edit and start typing. When finished, click any other cell then click the  button to save.
To add a row, click the  button and enter the data in the row (please note that you may need to scroll to the bottom to see the blank row). Each table will have a primary key (or keys) – these fields must be completed, otherwise you may receive an error when saving.
To delete a row, select the row and click the  button. Click Yes on the message that appears to confirm deletion.
Some tables will have a large amount of data. To filter the displayed data:
- Click the
 button.
 - A dropdown box will appear. Choose the field you wish to filter on from the box.
- Enter the data you wish to filter on in the text box.
- Click the
 button at the end of the row to apply the filter.
 - You can add additional filters by clicking the
 button.
Please note that the filter will include rows which contain the entered text – e.g. if you filtered a firstname field by the text an, it would include Andrea, Sandy and Ian.
To add to the list of available tables, a system config option must be modified. Please see section 1 above for information on giving access to the new system config editor.
To edit the config:
- In Maytas 5, click the M5 button at the top left of the window and select Options.
- Under the Maytas 5 section, select Admin.
-
The config is under the General section, with the text Allow you to edit data in the specified table(s). There may be tables already listed in the textbox (e.g. SUCCESSRATES_MLPS).
If the checkbox for the config is not ticked, tick it to activate the config.
- You can add additional tables by separating them with a comma (e.g. SUCCESSRATE_MLPS,TRAINEE,TRAINEEPOT). If you are unsure of a table name, please contact Maytas support.
- Click OK when finished.