Validation Rule Builder
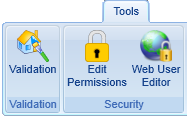
The Validation Rule wizard allows you to create basic validation rules for learners. To access the wizard, go to Tools on the toolbar and click Validation.
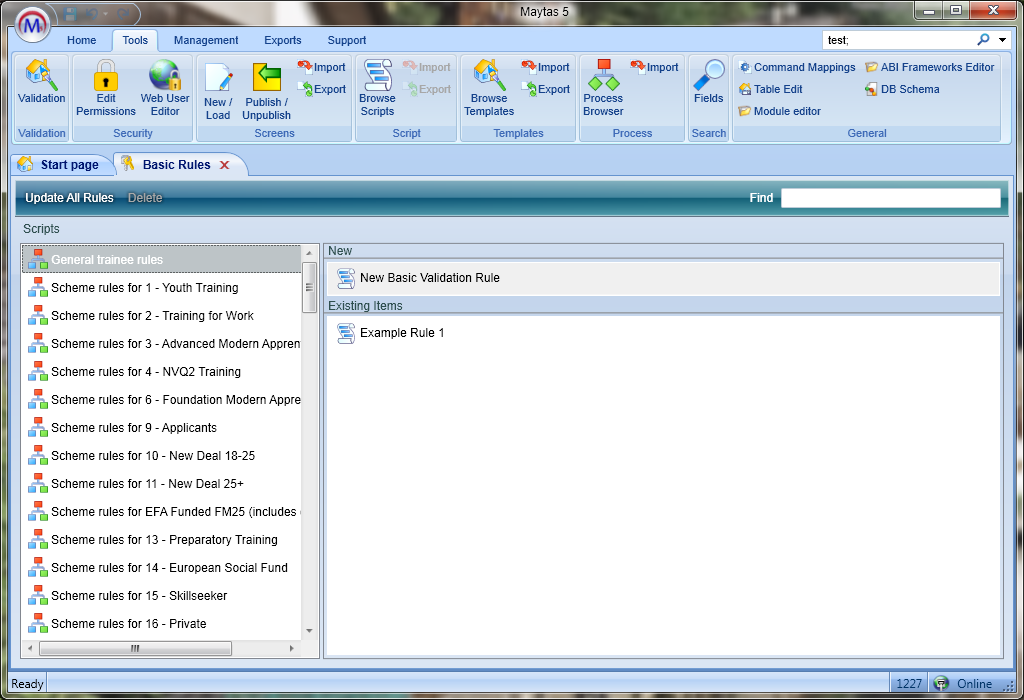
Custom validation rules are grouped by schemes, which are listed on the left. If you don’t want a rule to be scheme-specific, choose the General trainee rules category at the top of the list. To create a new rule, double-click New Basic Validation Rule on the right. This will launch the wizard.
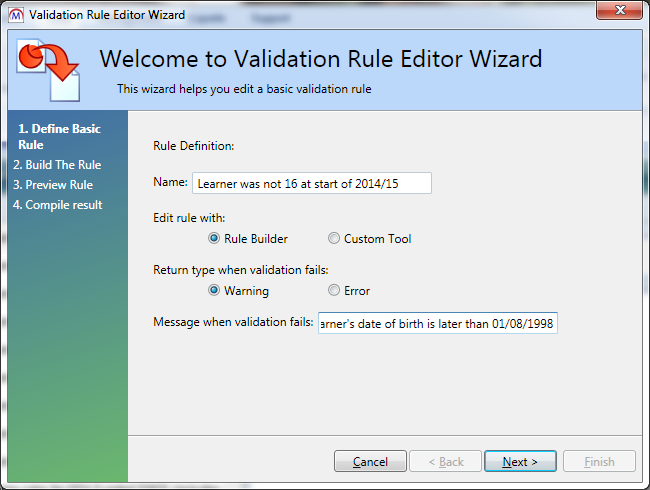
For this example, we will create a basic rule to warn the user when a learner’s date of birth is after 01/08/1998 (i.e. the learner was not 16 at the start of the 2014/15 contract year).
- Complete the details on the first screen:
- Name – Enter a name for the rule.
- Edit rule with – Choose Rule Builder to create the rule using the tools in the wizard. The Custom Tool option lets you manually write the validation script (please note that this is intended for advanced users and is beyond the scope of this tutorial).
- Return type when validation fails – Choosing Warning will alert the user when the rule is broken but will still let the data be saved. Choosing Error will alert the user and not allow them to save until the data is corrected.
- Message when validation fails – This is the message that is displayed to the user when the rule is broken.
- Click Next.
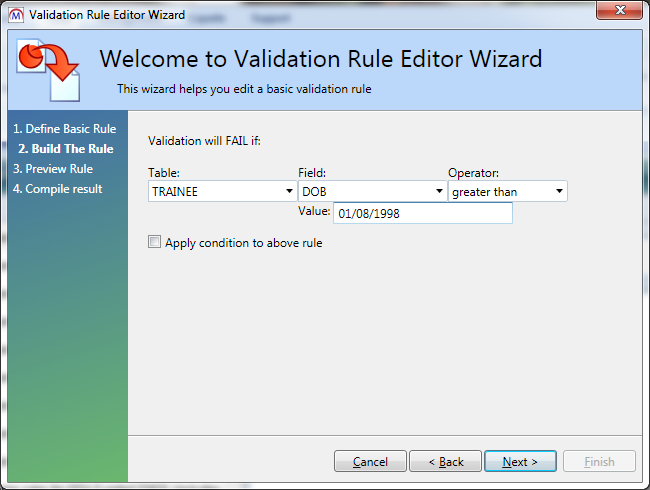
- This screen lets you specify the condition which must be met for the rule to trigger. First, choose the table and field for the relevant data – in this case, TRAINEE and DOB, for the learner's date of birth.
- Next, choose the operator to be applied to the data (e.g. equals, greater than, is empty, etc). For this example we want the rule to trigger when the date is the DOB field is after 01/08/1998, so choose greater than.
-
The Value box will appear. This is the value to compare the data in the field against. Enter 01/08/1998.
-
An additional condition can be added to the rule by ticking the Apply condition to above rule box. Another row of table, field and operator boxes will appear. If two conditions are specified, both conditions must be true for the rule to trigger.
For this example we only need the one condition, so click Next.
- A preview of the rule and the Iron Python script that is generated for the rule can be viewed here. Click Next to continue.
- Click Finish.
- The rule will now be created. Click Sync on the ribbon to sync the rule with the main database.
The rule will now appear for learners whose date of birth is after 01/08/1998:

After every Maytas 5 upgrade, the Update All Rules button on the validation rule editor must be clicked to refresh the custom validation rules.

Apply Multiple Conditions Per Rule
The validation rule builder allows you to apply more than one condition to each rule, which provides more flexibility for bespoke validation. To do this:
- In Maytas, go to Tools | Validation.
-
Choose a rule area on the left and double-click New Basic Validation Rule.
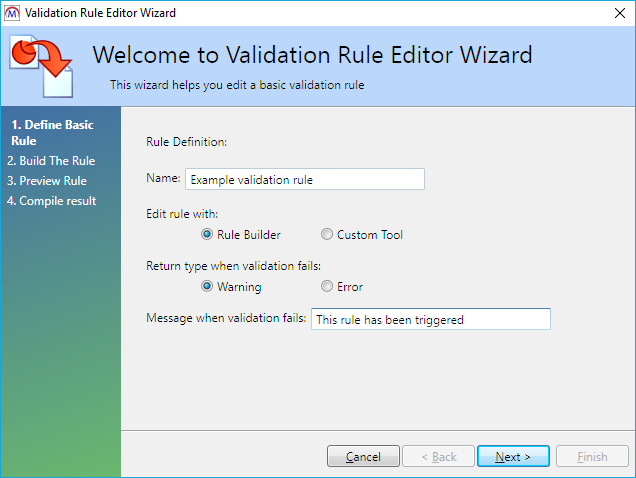
- Enter a name and a message for the rule. Ensure that Rule Builder is selected for this example and choose either warning or error.
-
Click Next.
-
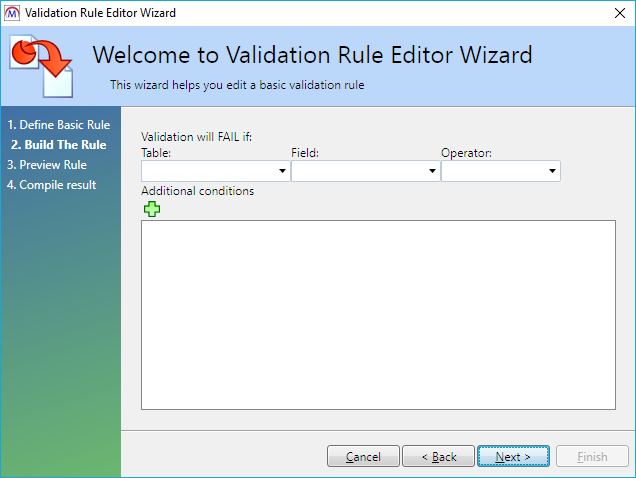
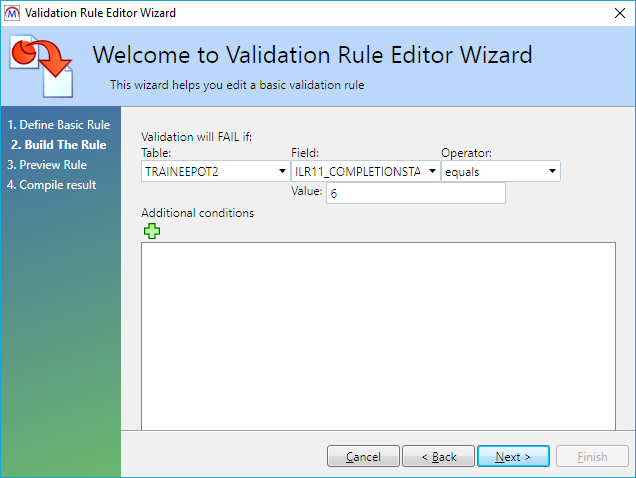
The rule conditions are specified on this screen. Choose the Table, Field and Operator for the first rule and enter a value if relevant (e.g. for equals / not equals).
-
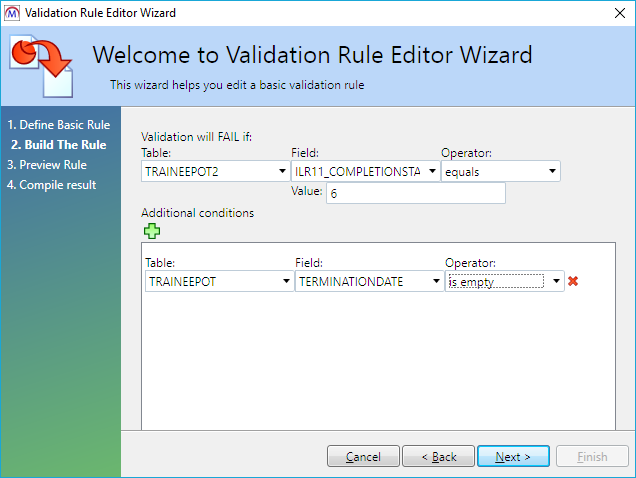
To add additional conditions, click the
 button, then select the Table, Field and Operator (and value if relevant) as before.
-
Add additional conditions as required. When finished, click Next.
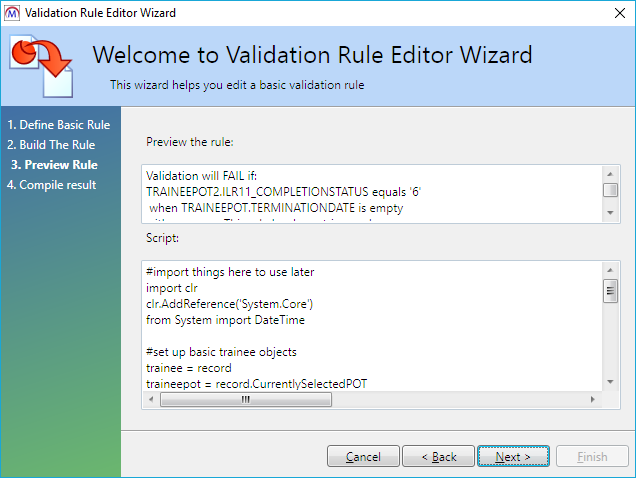
- You will see a summary of the rule. Click Next when ready.
- Click Finish.
- Sync Maytas for the rule to be propagated to all clients.