Awarding Organisations
The Awarding Organisations module allows you to generate a file containing a list of learners (in the City & Guilds format) which can be sent to an awarding organisation to register and certify learners on a qualification.
To enable the module:
- Go to Tools | Edit Permissions.
- Select the user or group which requires permission.
- On the Modules tab, set ABI to Visible.
- Click Apply.
- Restart Maytas for the change to take effect.
Interface Overview
To open the Awarding Organisations interface, go to Exports on the toolbar and click Awarding Organisations.

The interface will open.
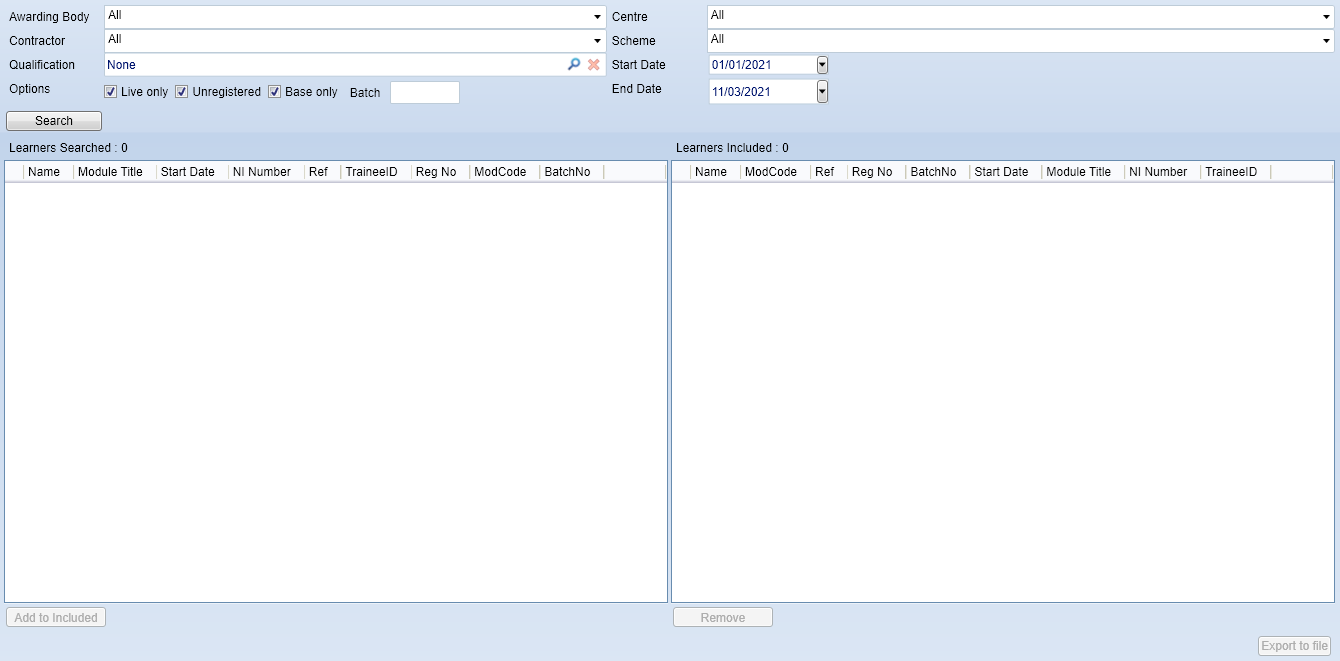
The options at the top can be used to narrow down the list of results which will appear when the Search button is clicked. From this list of results, you can then choose which learners you want to include by selecting them and clicking the Add to Included button, which will move them over to the right. Finally, click Export to file to output the learners on the right to a file.
Details of the search options are as follows:
- Awarding Body - Filters by the selected awarding body.
- Centre - Filters by the selected centre.
- Contractor - Filters by the selected contractor. The list of available contractors is limited by the selected centre.
- Scheme - Filters by the selected scheme.
- Qualification - Filters by the selected qualification.
- Options
- Live only - When ticked, only learners and objectives without a POT termination date and a module completion date will be included.
- Unregistered - When ticked, only objectives without a batch number (TRMODULE.BATCHNO) will be included.
- Base only - When ticked, only base modules will be included. If un-ticked, objectives at all levels will be included.
- Batch - A batch number can be entered here to only show the results from that batch.
- Start Date / End Date - Filters by objectives with a start date between these dates (inclusive).
Example
-
Select search options as required. For this example we will filter by awarding body, centre and contractor, as well as setting the start date to the start of the contract year.

Note that leaving the Qualification as None will show all qualifications.
-
Click the Search button. The list of results matching the search criteria will appear.
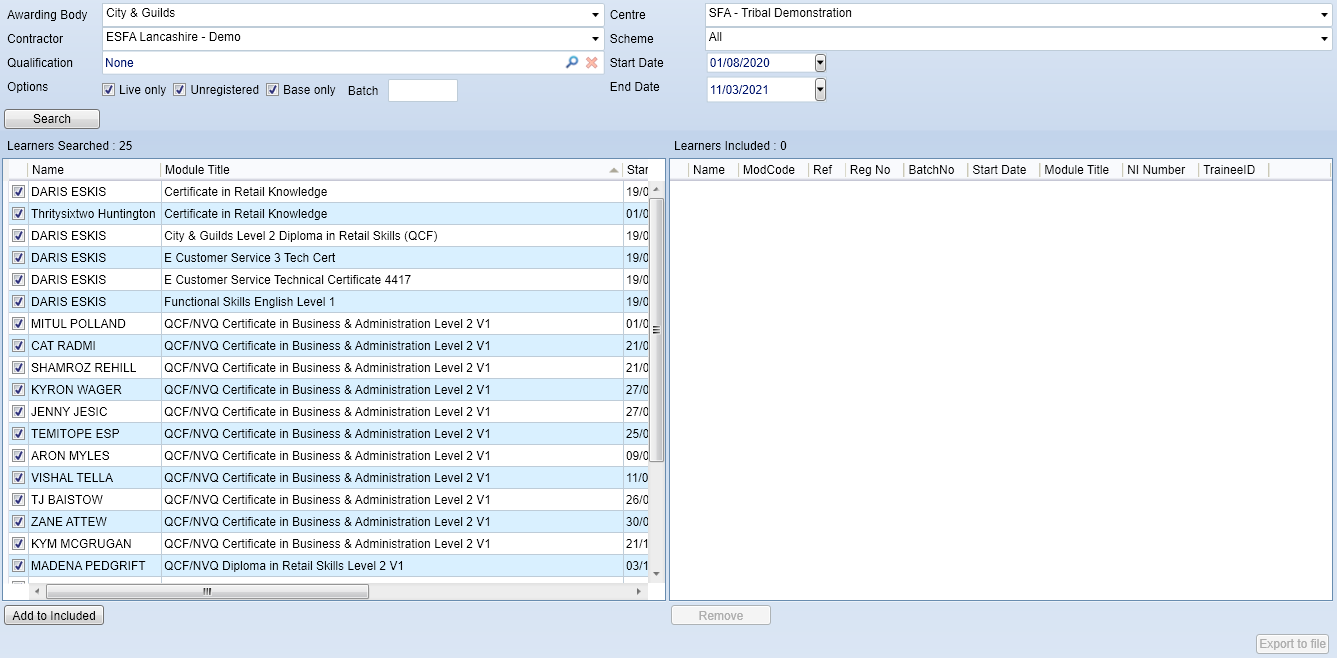
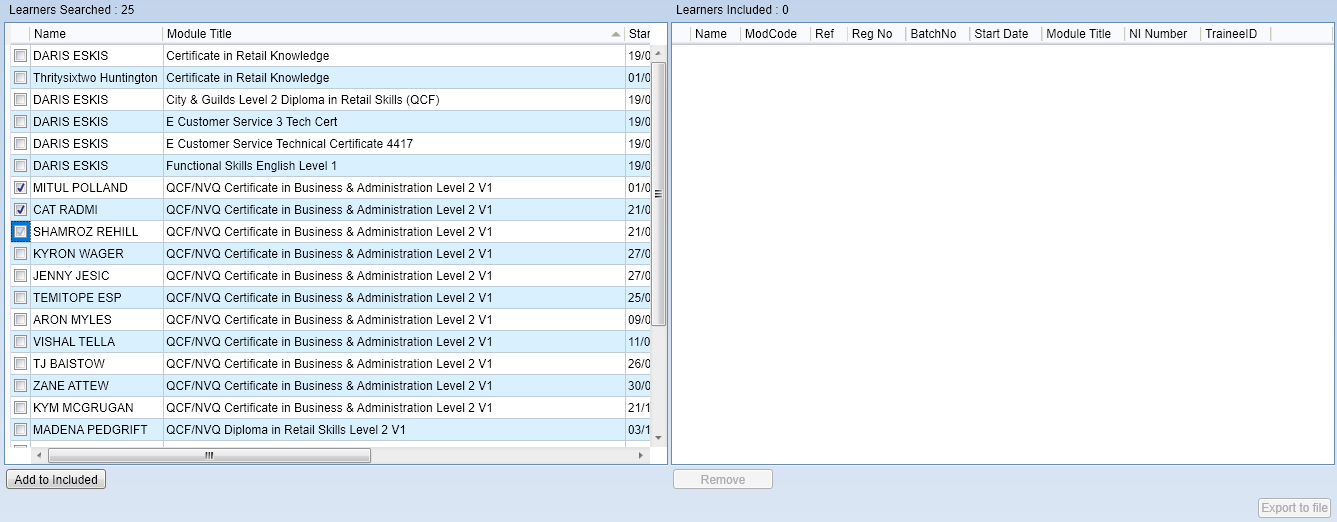
- By default, all results will be selected, as indicated by the tickboxes at the left of each row. However, for this example we only want to include several learners on the right to be exported. First, right-click one of the rows and select De-select All. This will un-tick all rows.
-
Next, tick the rows to be included on the right (i.e. those to be exported).
-
Click the Add to Included button (at the bottom-left). The selected rows will appear on the right.
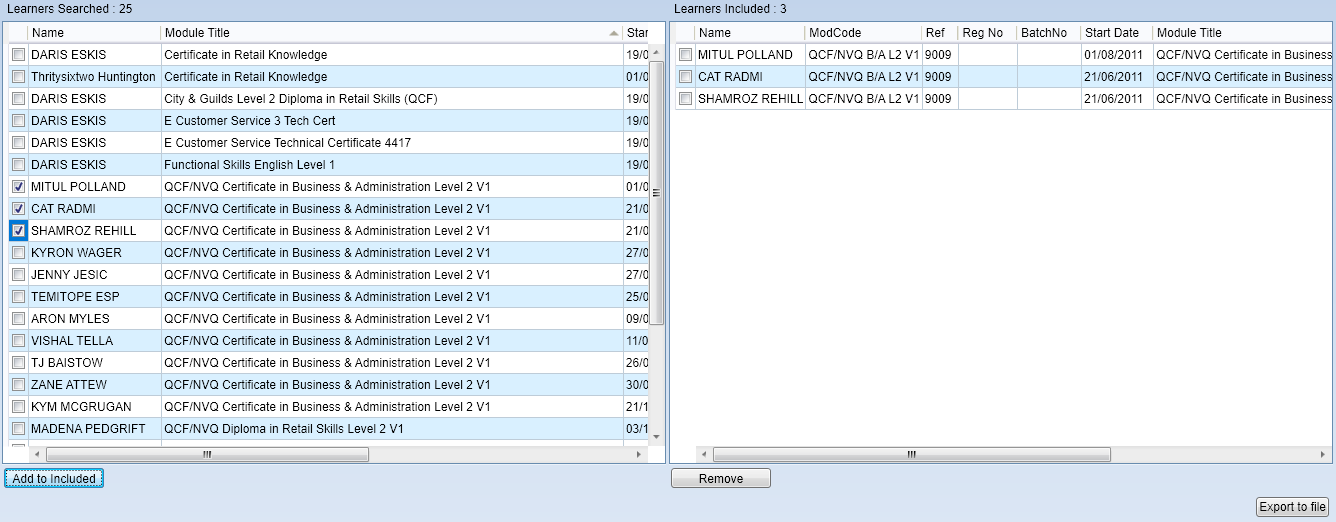
If you want to remove a row from the right (i.e. not export it), you can tick the box for that row and click the Remove button.
- Click the Export to file button (at the bottom-right) to export the rows on the right.
-
A pop-up window will appear. Here you can enter the centre number, internal centre reference and batch number that you want to be recorded in the database against each objective in the batch. Click OK when ready.
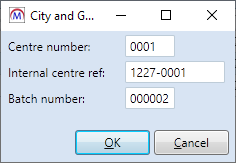
- You will be prompted to enter a file name and choose where to save the export file. Click Save when ready.
-
When the file has saved, the interface will now show the exported rows on the left, with the batch number entered in the search options. The batch number will also be recorded against each row to show that they were exported in that batch.

Pack Editor
The Pack Editor can be used to group objectives under a single route for use with the Awarding Organisations module. To open the Pack Editor in Maytas 5, go to Exports on the toolbar and click Pack Editor.

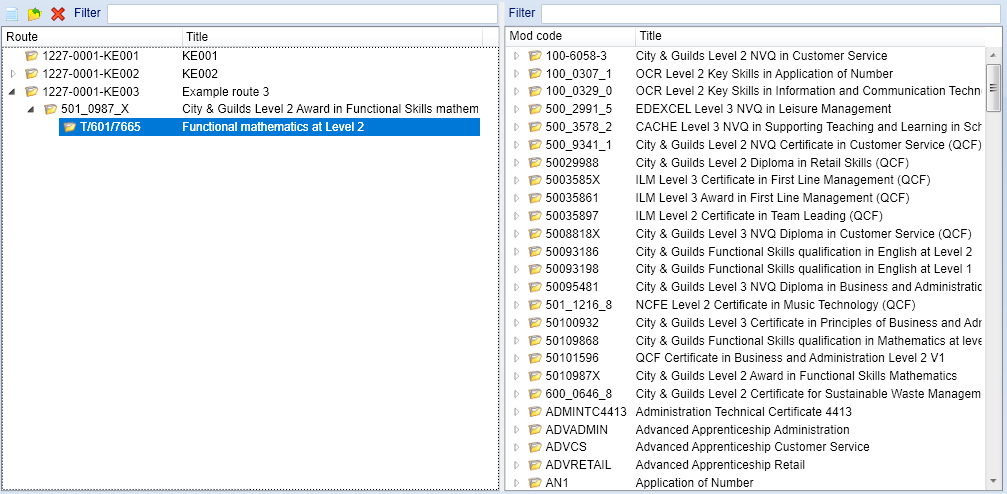
Create a Route
-
Click the
 button.
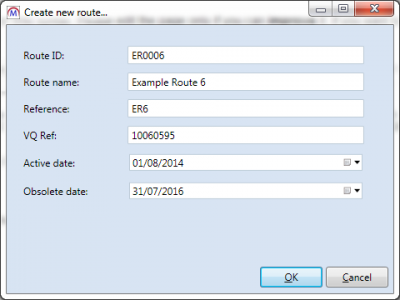
- Enter a route ID and route name. You can also optionally enter a reference number, VQ (i.e. aim) reference and active / obsolete dates.
- Click OK when finished.
The route will now be shown on the left side of the screen.
You can add modules to a route simply by dragging the module from the right-hand side of the screen onto the route (click OK on the message that appears). The route can then be expanded to see the modules underneath it. If you need to remove certain parts of the module, this can be done by selecting the relevant module, unit or element and clicking the  button (click OK to confirm).