5.15 Maytas Release Notes
Note regarding submissions
We would like to remind providers to create a submission early and check for any errors using reports from the appropriate software (i.e. the FIS or LLWR-Inform). Welsh providers should also remember to download their ULI file. After submission to the ESFA or DfES, providers should check that data has submitted correctly using the available reports. Providers should check that all their expected starts and completions are submitted correctly, and that start and outcome payments correctly match the PFR or ACE funding reports.
Our support desk gets extremely busy in the days prior to the submission deadlines, and although we try and prioritise submission-related queries, we cannot guarantee assistance if queries are sent late. If you do encounter any issues, please ensure that you contact Maytas Support as soon as possible, as we can only rectify issues of which we are aware. We also recommend checking Maytas.net regularly for information on any known issues and solutions. Tribal cannot be held responsible for any issues caused by your failure to comply with this advice.
Technical specification
The latest Maytas and e-track technical specification can be found here.
Once the upgrade has been completed, the version number should be checked to ensure it has been successful.
- Start Maytas and go to Support on the toolbar.
- Click About.
- The version numbers should read 181.20 / 5.15.6655.1. If you have any other version, please ensure you have followed the upgrade instructions correctly. If you require assistance, please contact Maytas Support.
It is the responsibility of customers to ensure that users carry out any required user acceptance testing and sign off on the upgrade.
Complete the Upgrade
Features Added in the Upgrade
These are the main updates in the upgrade:
- Winning PCRs for 5.15
- GDPR learner data extract
- GDPR learner data deletion
- Fixes to a number of issues
Reports Library 1.0.2.7 is also included in the upgrade but must be installed separately. This is detailed in the Upgrade Guide. If you are a hosted customer, please contact the Service Desk to arrange for the reports library update to be applied.
Re-Import the FIS Data Sets
The FIS data sets must be re-imported for this upgrade, even if they were imported in a previous upgrade.
It is essential that the latest aim information is imported into Maytas for use by the ILR export. This should be done by importing the relevant information directly from the Data Service’s Funding Information System (FIS). To do this, you must have the FIS installed and correctly configured (please refer to the Data Service’s instructions for setting up the FIS).
Please ensure you have the latest version of the FIS with the 2018/19 components installed.
Once the FIS is installed and configured, the information can be imported as follows:
- Perform a sync in Maytas 5, then restart Maytas 5.
-
Go to Exports | Uploads | Upload FIS Data Sets.
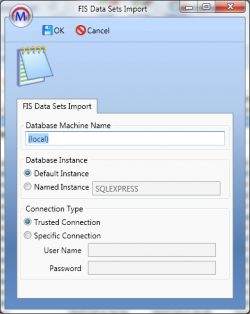
- There are three items to configure:
- Database Machine Name – If the FIS is installed on the same machine that you are using for Maytas 5, this can be left as (local). Otherwise, enter the machine name of the SQL server where the FIS database is held.
Database Instance – If the SQL server holding the FIS database has a named instance (e.g. MACHINENAME\INSTANCENAME), select Named Instance and enter the instance name. Otherwise leave this as Default Instance.
If you have no named instance and Default Instance does not work, you may need to select Named Instance and leave the instance name blank.
- Connection Type – This is the login for the SQL server holding the FIS database. Trusted Connection will use Windows authentication. If you wish to specify the login details, select Specific Connection and enter the credentials.
- Click OK. The FIS data will now be imported.
- If you have an Adult Skills budget contract and a transition factor, this must be entered on the contract:
- Go to Management on the toolbar and click Contracts on the ribbon.
- Select the relevant contractor, then select the Adult Skills contract on the right.
- Click the
 button.
 - Go to the Uplifts tab.
- Enter the ASB Transition Factor and click OK.
- Click Apply to save the change.
Import Latest Postcode Data
The latest postcode file available from the ESFA should be imported into Maytas. The 2017/18 postcode file can be downloaded from here:
https://www.gov.uk/government/publications/uplift-factors-and-postcode-files
Once downloaded, the file can be imported as follows:
- Go to the Exports tab.
-
Click the Uploads button and select Upload Postcodes | Upload Post Code Data (2017/18).

- Browse to and select the downloaded zip file and click Open.
- The file will now be imported. Click OK on the confirmation message which appears.
Note on the Funding Cache
By default, the funding cache will update overnight so that funding information in Maytas uses the newly-imported FIS and postcode information. Please check with your system administrator if you are unsure if or when the funding cache is updated on your system. You can also manually set the funding cache to update by going to Management | Profiles and clicking the Funding Cache button, though please be aware that this may take a long time and may use a large amount of system resources, which could affect performance for other users on the system.
Maytas 5 Version 5.15.6655.1 Release Notes
GDPR Features
The General Data Protection Regulation (GDPR) comes into effect on 25th May 2018 and will apply to data stored in the Maytas database, as well as data contained in associated learner files (e.g. evidence files for e-track). To help you comply with the GDPR, two new features are available:
- GDPR learner data extract – This is a report which can be exported to a .csv file to produce all a learner's data from the Maytas database upon request.
- GDPR learner data deletion – This is a tool to delete all a learner's data from the Maytas database upon request (as per the 'right to be forgotten').
There are some exceptions to how these work, detailed below.
Please note that GDPR compliance with regards to Maytas data is YOUR responsibility, and these tools are provided only to assist with that. If you are in any doubt as to your compliance with the GDPR, we recommend seeking proper legal advice.
GDPR Learner Data Extract
The GDPR learner data extract is a report which retrieves all a learner's data from the database and presents it in five columns, showing the table name, column name, row number, the data as stored in the database and the lookup value (if applicable). The row number is used to distinguish between rows when a learner has multiple rows in the same table; for example, if a learner has two rows in TRAINEEPOT then you would see the data for each column in row 1, followed by the data for each column in row 2.
The report is intended to be exported to a .csv file, as this is compliant with the format required by the GDPR. This is why the report has minimal formatting.
The report must first be imported:
- Go to Home on the toolbar and click Import on the Reports panel of the ribbon.
- Click Add Files.
- Browse to the Maytas 5\Extras\Module Reports folder of the upgrade, select GDPR Learner Extract.m5rep and click Open.
- Click Finish. When the report has imported, click Finish again.
The report can be run by going to GDPR | GDPR Learner Extract in the Reports Library. You will be presented with the following parameters:
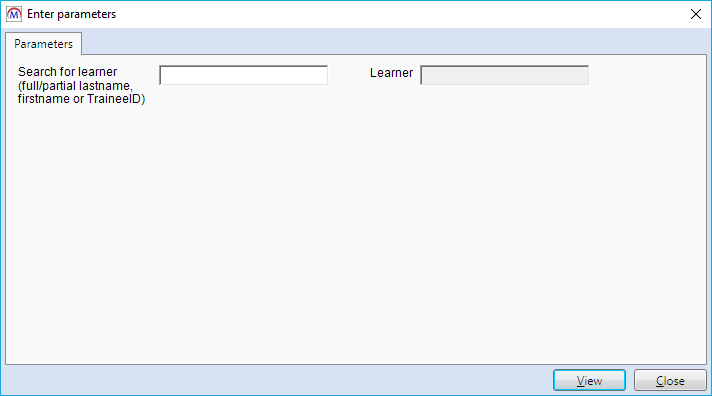
Enter a search term for the learner (this can be a full or partial name or the Trainee ID) and press tab on the keyboard. You can then select the learner from the list in the Learner parameter. Click View to run the report.
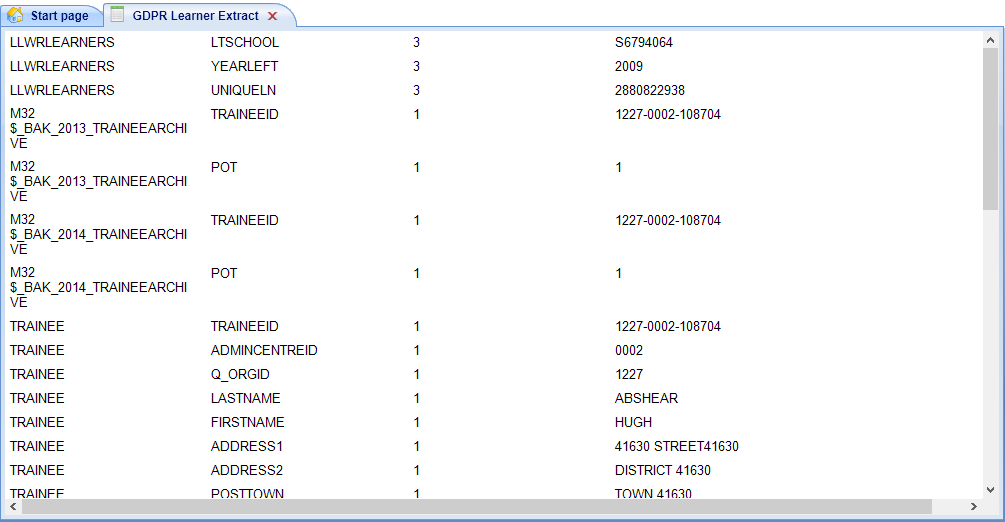
Click Export | CSV (comma delimited) to export the report to .csv.
The list of tables included is generated as follows:
- Tables which have a TRAINEEID column;
- Tables which have a USERNAME column;
- Tables which have a LearnerReferenceNumber or LearnRefNumber column;
- PLANEVENTS, if the learner has rows in TRPLANEVENT;
- VISTS, if the learner has rows in TRVISIT.
Note that for PLANEVENTS and VISITS, rows are only included if the learner is the only learner assigned to the event / visit. If multiple learners are assigned to an event / visit then it is excluded from the results, as it would have the potential to include data regarding other individuals. The GDPR makes allowances for excluding requested data if it would compromise data privacy or security.
While we have designed the learner data extract so that it should produce all the required data and only the required data, the scope and complexity of the data in question and the possibility of bespoke tables/columns means it is possible for some data not to be identified automatically, or for erroneous data to be included. Therefore, it is essential that you review the extract before sending it to the learner to ensure that:
- it contains all required data relating to the learner;
- it does not contain any data which would compromise the privacy of other individuals or the security of your system;
- it does not contain any business-sensitive data which the learner should not have access to;
- it does not contain any data which you otherwise believe should not be included.
Special Cases
There are several special cases in how learner data is identified or handled:
- Any column where the value is null or blank is excluded.
- The PFR tables, QSR tables and FM25 funding tables use learner reference number to identify the learner, taken from TRAINEEPOT.SERIALNUMBER. If a learner has multiple learner ref numbers associated with them, all of them will be taken into account.
- Tables which have a USERNAME column but no TRAINEEID column will use USERNAME, providing the learner has a row in M32$_WEBUSERS.
- M32$_WEB_USERCHANGES checks for where KEYVALUES begins with the TRAINEEID.
- COMMUNITYTOPIC and COMMUNITYPOST use CREATEDUSERNAME compared against M32$_WEBUSERS.USERNAME.
- COMMUNITYUSERTASK uses COMMUNITYUSER compared against M32$_WEBUSERS.USERNAME.
- LETTERS checks for the TRAINEEID value stored in LETTERS.EVENTKEY1.
- LLWRLEARNERAWARD_DELETE, LLWRLEARNERPROGACTIVITY_DELETE, LLWRLEARNERPROGRAMME_DELETE and LLWRLEARNERS_DELETE use LEARN_ID compared against TRAINEE.LLWR_LEARNID.
- DESTINATIONS_SURVEY_ATTEMPT uses EMAILEDUSED compared against TRAINEE.EMAIL.
- WEBJOURNALS uses OWNERTRAINEEID compared against TRAINEEID.
- M5$_PROFILE_MEASUREMENT_ITEM_DETAILS checks for the TRAINEEID in ITEMKEY1, 3, 4, 5 or 6 (not ITEMKEY2, as that is an integer column).
GDPR Learner Data Deletion
The GDPR learner data deletion tool deletes all data in the database associated with the learner (with some exceptions, detailed below). This must first be enabled in the permissions editor:
- Go to Tools | Edit Permissions.
- Select the user or group which requires permission.
- Go to the Commands tab.
- Expand the GDPRDelete section.
- Set the permission GDPR Delete to Visible.
- Click Apply and restart Maytas for the permission to take effect.
To use the GDPR deletion tool:
- Open a learner record.
-
Go to Delete | GDPR Delete.
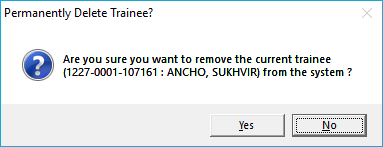
-
You will be prompted to confirm deletion of the learner. Click Yes to continue.
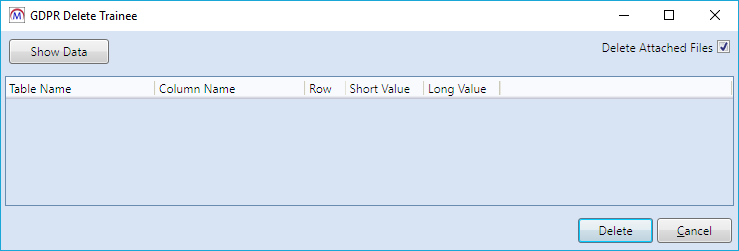
-
Before the deletion is performed, it is essential to review the data which will be deleted. To do this, click Show Data. Please be aware that this may take a while.
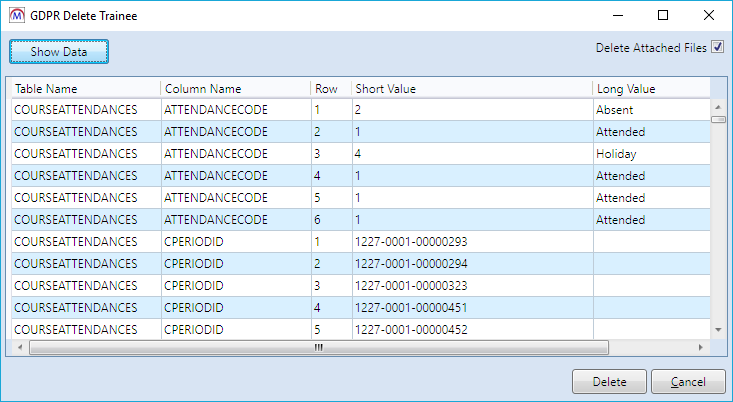
The list of data to be deleted is produced using the same methods used to produce the GDPR learner data extract (see above for details).
-
By default, the Delete Attached Files checkbox at the top-right is ticked, which will delete any files from the learner’s contact log, journal, e-track messages, e-track portfolio, objectives, file store and visits. If you want to keep these files, un-tick the box.
Before continuing, ensure that the listed data is safe to delete, as the deletion is irreversible.
- Once you are satisfied that the data can be deleted, click Delete.
- You will be asked to confirm a final time. Click Yes to proceed with deletion.
- Once the learner has been deleted, restart Maytas. Continuing without restarting Maytas may result in errors in certain parts of the system.
It is possible for the list of data to be deleted to not automatically identify learner data in bespoke tables / columns (e.g. if they do not have TRAINEEID or USERNAME columns). If you identify data not included in the generated list which also requires deletion, this must be performed manually.
Exceptions
The following data is not included in the list for deletion:
- Visits or events where other learners are also assigned. This data should not be deleted as it still pertains to the other learners. However, the TRVISIT or TRPLANEVENT record for the learner in question will be deleted.
- Any learner data which cannot be automatically identified using the learner’s TRAINEEID, USERNAME or SERIALNUMBER. All relevant data from standard tables is taken into account, so this should only apply to bespoke tables.
Difference Between Delete and GDPR Delete
There is an existing Delete tool on the learner ribbon which is different to the GDPR Delete tool.
The existing Delete tool ONLY removes date from a fixed set of core tables relating to the learner or POT record, but other data associated with the learner will remain (e.g. data from the ILR or LLWR export tables). This means it is not GDPR compliant in terms of deleting an individual's data on request.
The GDPR Delete tool removes ALL a learner's data, minus the exceptions detailed above. Please note that it is your responsibility to ensure that this is GDPR compliant.
Also, please note that if a learner record has previously been deleted using the existing tool, the GDPR Delete tool cannot be used to remove any remaining data. Please contact Maytas Support if you require assistance with deleting data for learners in this situation, as this can be done via scripts providing the correct TRAINEEID can be identified.
Note on Profiling
It is possible that deleting a learner may result in incorrect profiling totals in existing profile measurements where the learner is included. In these circumstances, running a new profile measurement should resolve the issue.