Lookup Editor
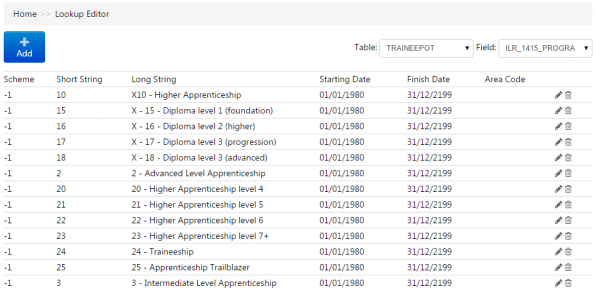
The lookup editor allows you to add, edit or remove lookups for fields. To access the editor, go to Lookup Editor on the toolbar.

Select the table and field from the dropdown lists at the top of the screen. If the field has any existing lookups, these will be listed.
To add a new lookup to the field, click the Add button. Complete the following fields:
- Scheme - This can be used to make the lookup only appear for a certain scheme. The default value of -1 will show the lookup for all schemes.
-
Short String - This is the value that will be stored in the database. It should be kept as short as possible (e.g. a number or a string up to three characters long at most). It should also be unique for that field - i.e. any given field should not have two lookups with the same short string.
It is also important to ensure the short string values are not longer than the field you are adding lookups to. For example, if a field is 2 characters long, it cannot have lookups of 3 characters.
- Long String - This is the value displayed to users.
- Start / End Date - These determine the date range for which the lookup applies (please note that these dates MUST be entered for all lookups).
- Area Code (optional) - This can be used to filter lookups based on area codes assigned to centres. Please contact Maytas Support for more information.
Click Save when finished.
To edit a lookup, click the  button at the end of the row. You can then amend the data as required (click Save when finished).
To delete a lookup, click the  button at the end of the row. Click OK to confirm deletion.
Ordering of Lookups with a Display Index
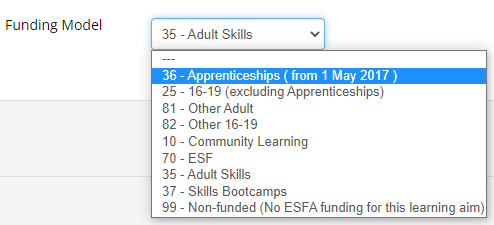
Lookups which have a display index entered against them are ordered in Maytas Hub based on the display index, rather than alphabetically. If no display index is set against a lookup, they will continue to be ordered alphabetically.
The display index can be set in Maytas 5 as follows:
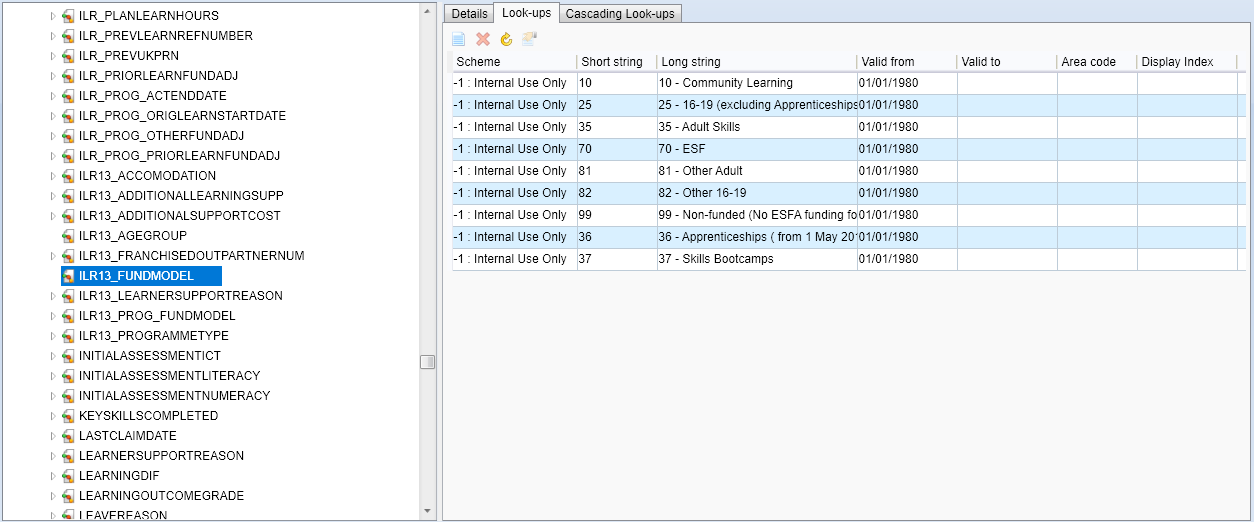
- Go to Tools on the toolbar and click DB Schema on the General panel of the ribbon.
- Expand the table structure on the left and select the field for which you wish to set the display index.
-
Go to the Look-ups tab on the right.

-
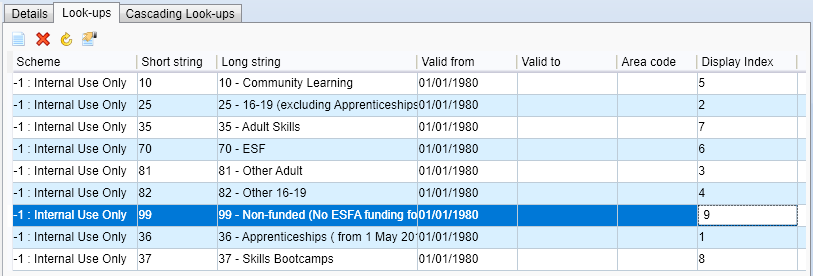
For each lookup, enter the Display Index. There should be a number for each row, which will determine the order of the lookups.

- Click Apply, then go to Home on the toolbar and click the Sync button.
The lookups will now be ordered in Maytas Hub based on the display index.
