Web User Editor
The web user editor lets you add and configure user records, including user permissions. To access it, go to Web User Editor on the toolbar.
If you wish to locate an existing user, enter the search details and click Locate. To create a new user, click the Add New Web User button. For this example, we will add a new user.

- Enter the user name, password and password confirmation.
- The Disable account box can be ticked to prevent an account from logging in, but this is not likely to be required when creating a new user.
- Tick the Force password change at next login box if you want the user to change their password when they login.
- Tick the Email password link box if you want the password to be emailed to the user.
- Enter the first name, last name, mobile number and email address for the user.
Further details can be set by expanding the groups at the bottom of the screen (i.e. Details, Permissions, Report Permissions, Associated Record and Custom Tabs).
Details
Here you can enter the name and mobile number for the user.
Permissions
This determines the permissions that are set for the user.
Administration
| Permission | Description |
|---|---|
| Allow Add Assessor | Allows the user to add assessor records |
| Allow Add Employer | Allows the user to add employer records |
| Allow Add Trainee | Allows the user to add trainee records |
| Allow Delete Assessor | Allows the user to delete assessor records |
| Allow Delete Employer | Allows the user to delete employer records |
| Allow Delete Events | Allows the user to delete assessment events |
| Allow Delete from Portfolio | Allows the user to delete evidence files from portfolios |
| Allow Delete Visit Files | Allows the user to delete visit files |
| Allow Delete Visits | Allows the user to delete visit records |
| Allow Trainee Delete | Allows the user to delete trainee records |
| Edit locked TRMODULE | If a TRMODULE record is set to be locked (via setting a status), this permission allows the user to change the TRMODULE regardless of the status |
| Edit Quals | Enables the ability to add materials and assessment templates to qualifications |
| Edit Submitted Registers | Allows the user to modify registers after they have been submitted |
| Edit Templates | Allows the user to edit the notes templates within the visit screen |
| Offline Administrator | Allows an e-track Offline user to sign-up learners from any centre |
| Web Administrator | Enables system options including settings, application settings, lookup editor, web user editor and adding news items |
Assessor
| Permission | Description |
|---|---|
| Assessment Approval | Allows the assessor to approve assessments from other assessors |
| Digitally Sign Document | Allows the user to sign documents with the Digital Signatures module |
| Internal Verifier | Enables the IV options, including IV Planning |
| Learner Account Admin | Allows the creation of web users from the learner summary screen |
| Restrict adding TRModule | Prevents the user from being able to add objectives to a learner |
| Restrict adding visits | Prevents the user from being able to add visits |
| Restrict editing TrEmployer links | Prevents the user from being able to edit the start and end dates on existing TrEmployer links in Maytas Hub (new links are not affected and can be completed as normal) |
| Restrict deleting TrEmployer links | Prevents the user from being able to delete TrEmployer links in Maytas Hub |
| Restrict Base Module Editing | Restricts the user from editing the details of base modules |
| Restrict to Caseload | Prevents the user from searching for any learners outside of their caseload |
| Restrict to Centre(s) | Restricts the user so they can only search for learners in centres they are associated with by TRASSESSOR links |
| View Registration Details | Enables the Open Reg Details button which displays a screen to enter registration details |
Assessor Editor
| Permission | Description |
|---|---|
| Allow Manage Assessors | Access to the Assessor editor |
| Allow Manage Teams | Enables the Manage Teams option, which allows the user to view and transfer assessors between assessor teams |
Communities
| Permission | Description |
|---|---|
| Admin Communities | Allows the user to perform administrative functions in the Communities module |
Courses
| Permission | Description |
|---|---|
| Course Attendance | If the courses module is used, enables the course attendance marker |
Employer Editor
| Permission | Description |
|---|---|
| Allow Manage Employers | Access to the Employer editor |
| Restrict to trainee links | Limits the employers available in the Employer Editor to those linked to learners in an assessor's caseload. Without the permission set, an assessor can access all employers in the Employer Editor. |
Registers
| Permission | Description |
|---|---|
| Enable Registers | Allows the user to view and modify registers |
Tasks
| Permission | Description |
|---|---|
| Allow Task Administration | Allows the user to create user-specific tasks |
Report Permissions
This allows you to choose the report permission groups which the user has access to.
Associated Record
Users accounts can be linked to a trainee, assessor or employer record. To link the user to an existing record, choose the type of record from the box at the bottom-left (assessor, trainee or employer), enter the search term and click Locate. Click the Associate button next to the appropriate record in the results.
Alternatively you can create a new trainee, assessor or employer record to associate the user with.
Custom Tabs
Here you can specify which custom tabs are visible for a user. Tabs are grouped by the relevant area (e.g. Application Forms, Assessor Editor, etc).
Grid Permissions
If a custom tab contains a grid, extra permissions are available to restrict adding, editing and deleting rows on a grid in Maytas Hub. This is done per user and tab as follows:
-
Click Custom Tabs to expand that section.

-
The Edit Grids column will have a + button for any tab that has a grid on it. Click the + to expand the grid permissions.

-
Tick the top box to make the tab visible, which will then allow you to select the grid permissions to Add Rows, Edit Rows and Delete Rows as required.

- Click Save.
New Trainee Centres
This determines the centres in which a user can create new trainee records, providing they have the Add Trainee permission set. Tick each centre as required.
Associating Maytas Users with Web User Accounts
Maytas user accounts can be associated with a web user account via Maytas Hub:
- Go to Web User Editor on the sidebar.
- Search for and open the required user or group.
-
Click Associated Record to expand that section.

-
Click Associate Record (note that this button will not appear if the web user account is already associated with a record).

- Select Maytas User (Last name; First name) from the dropdown box.
-
Enter search terms for the Maytas user's name and click Search.

-
Click the Associate button next to the correct row in the results. The association will now be displayed.
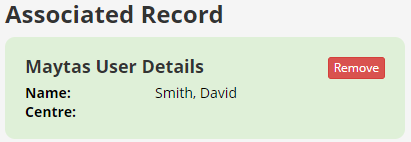
- Click Save.
Permission Groups
Permission groups are available for web user accounts with certain types of links to users or records. The groups are:
- Data Administrator - Requires a web user account associated with a Maytas user account (see above).
- Assessor - Requires a web user account associated with an assessor record.
- Recruiter - Requires a web user account associated with a Maytas user account (see above).
- Skill Scan & OTJ - Requires a web user account associated with a Maytas user account (see above).
Users in these groups only have permissions to the following features:
| Permission | Data Administrator | Assessor | Recruiter | Skill Scan & OTJ |
|---|---|---|---|---|
| Search for learners | ✓ | ✓ | ✓ | |
| Edit learners | ✓ | ✓ | ||
| Add learners | ✓ | ✓ | ||
| Complete learner forms | ✓ | |||
| Access custom tabs | ✓ | ✓ | ||
| Add/edit learner to assessor links | ✓ | ✓ | ||
| Add/edit learner to employer links | ✓ | ✓ | ||
| Access off-the-job (OTJ) functions | ✓ | ✓ | ||
| Access skill scan functions | ✓ | ✓ | ||
| Access the diary | ✓ | |||
| Browse caseload | ✓ | |||
| View learner summary | ✓ | |||
| Drill down into progress | ✓ | |||
| Add/edit visits | ✓ | |||
| Carry out assessments | ✓ | |||
| Access the journal | ✓ | |||
| Send messages | ✓ | |||
| Manage tasks | ✓ | |||
| Edit and invoke workflows | ✓ | |||
| Access/edit communities | ✓ | |||
| Perform IQA and IQA planning | ✓ | |||
| Run reports | ✓ | |||
| Manage course attendance | ✓ | |||
| Assign qualifications to learners | ✓ | |||
| Access learner history | ✓ | |||
| Manage assessor team | ✓ | |||
| View GIS | ✓ | |||
| Search for assessors | ✓ | |||
| Edit assessors | ✓ | |||
| Add assessors | ✓ | |||
| Search for employers | ✓ | |||
| Edit employers | ✓ | |||
| Add employers | ✓ |
To set a permission group:
- Go to Web User Editor on the sidebar.
- Search for and open the required user or group.
- Click Permissions to expand the list of permissions.
- Select the required group from the Permissions Group dropdown box. Note that only certain groups will appear, depending on the requirements detailed above.
- Click Save.
Clone Web User Groups
Web user groups can be cloned and saved under a different name, so that variations on groups with similar permissions can be set up without having to create each group from scratch. This requires the Web Administrator permission.
- Go to Web User Editor on the sidebar.
-
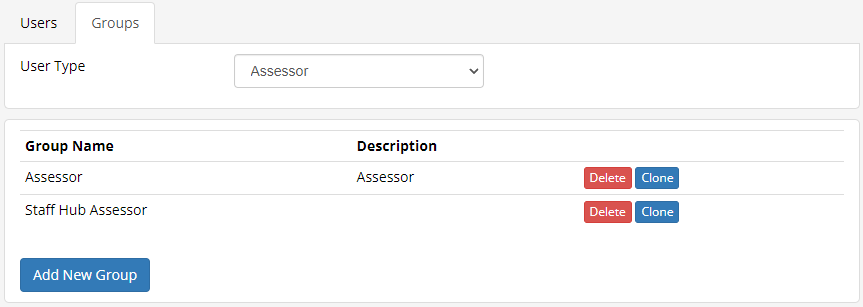
Go to the Groups tab.
-
Click the Clone button next to the group you wish to clone.
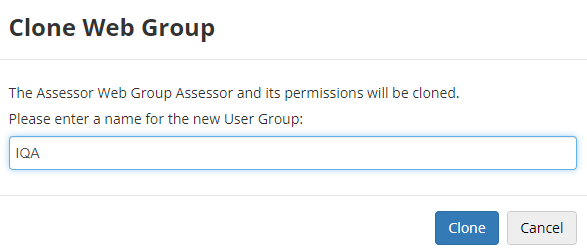
- Enter a name for the new group and click Clone.
- The new group will now be created.
Default Permissions Group
Assessor, Trainee, Employer and Employer Contact user types can be assigned a default permissions group, so that new users of that type are added to the default group. This must enabled via a system configuration option:
-
Go to Settings on the sidebar.
-
Click the System Configuration button.
-
Go to Admin on the left (under the Maytas Hub Online header).
-
Locate the General section on the right.
-
Tick the box for the permission Apply default permission group to created users and select the user types you wish to enable the default permissions groups for.
-
Click Save.
To set a default permissions group:
-
Go to theWeb User Editor on the sidebar.
-
Click the Groups tab.
-
Select the User Type you wish to set a default group for from the dropdown box.
-
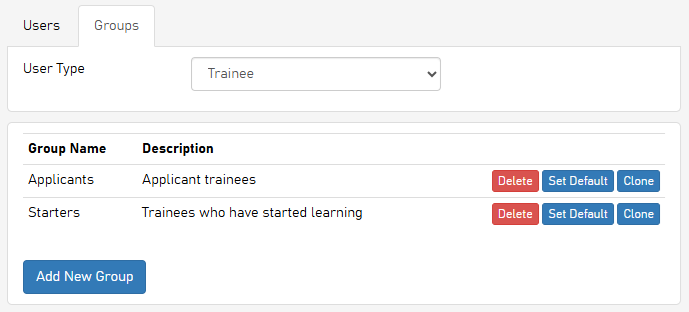
A list of any existing permission groups for that user type will be displayed.
To set an existing group as the default, click the Set Default button for that group. Click OK on the confirmation message.
To create a new group and set it as the default:
-
Click the Add New Group button.
-
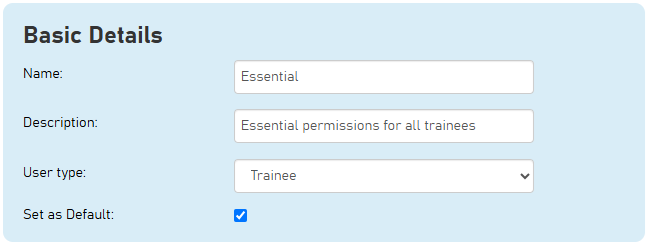
Enter a name and description and select the required user type, then tick the Set as Default checkbox.
-
Click Save.
-
Set the permissions as required and click Save.
-
When you return to the Groups tab, the group will now show as the default for the relevant user type.

-
When a new user of the relevant type is created, they will now have the default permissions group assigned to them.

Locked User Administration
The Restricted Web User Editor permission gives a user the ability to lock and unlock accounts, but no other admin functionality.
This first requires a config option to be set:
- In Maytas Hub, go to Settings on the sidebar.
- Click the System configuration button.
- Go to Admin on the left (under the Maytas Hub Online header).
- Tick the box for the Number of failed logins before account is locked setting on the right (in the General section).
- Enter the number of permitted failed logins before accounts are locked.
- Click Save.
To set the permission:
- Go to Web User Editor on the sidebar.
- Search for and select the user who requires permission.
- Click Permissions to expand that section.
- Under the Administration header, tick the Restricted Web User Editor permission.
- Click Save.
The user can then lock and unlock accounts as follows:
- Go to Web User Editor on the sidebar.
-
Search for the user account you wish to lock or unlock. Note that there is a dropdown box in the search options which defaults to Show all accounts, but this can be changed to show only locked or only unlocked accounts.

- Click the Lock or Unlock button as required at the end of the user's row.
- You will be asked to confirm your choice. Click OK to confirm.
- The user account will now be locked or unlocked, as selected.
Web User Accounts for Employer Contacts
Employer contacts can be given a web user account so that employers can effectively have more than one Maytas Hub user.
-
Go to Web User Editor on the sidebar.
-
Click Add New Web User.
-
Complete the Account Details and Basic Details as required.
-
Click Associated Record.
-
Click the Associate Record button.
-
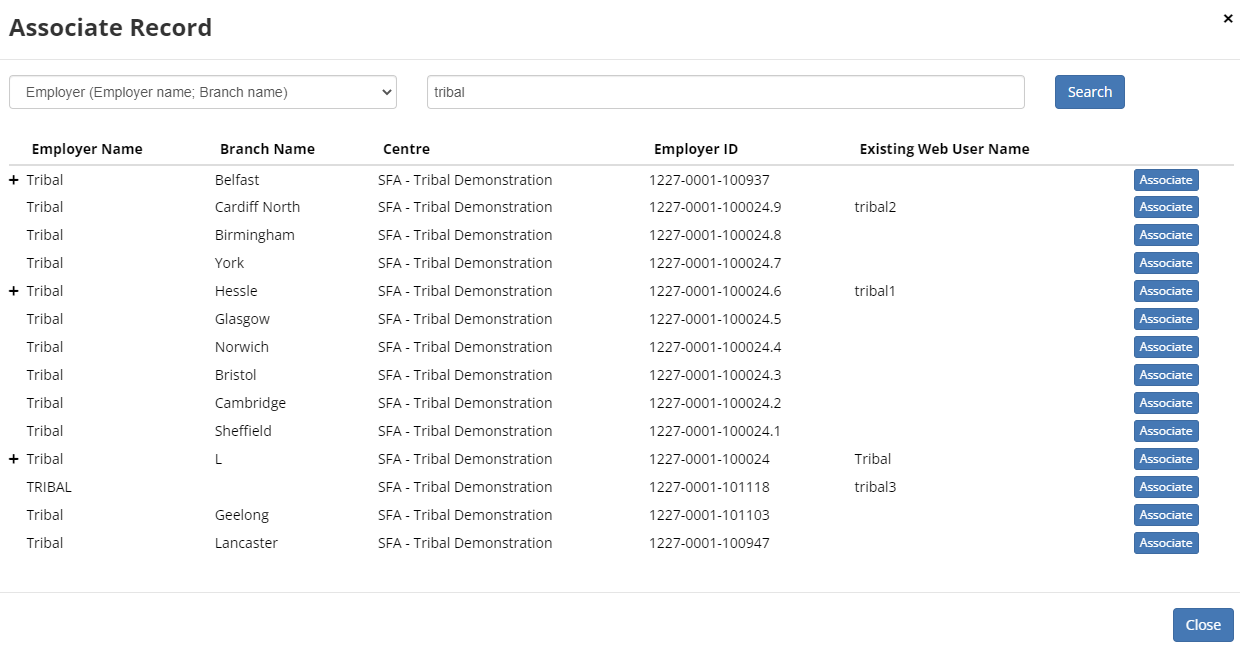
Select Employer from the dropdown box and search for the contact's employer.
-
Employers that have contacts will show a + button to the left. Click the + to show the contacts.

-
Click the Associate button for the contact you wish to associate with the web user.
-
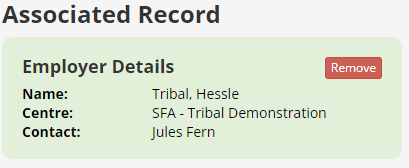
Click Save. The employer contact will now be associated with the web user. You can remove this association by clicking the Remove button.
Restrict to Key Contacts
Web user accounts associated with an employer contact can be restricted to only viewing learners that have the user as their key contact:
-
Go to Web User Editor on the sidebar.
-
Search for and open the user or group that requires permission.
-
Click Permissions to expand that section.
-
Under the Employer Contact header, tick the Restrict to Key Contacts permission.
-
Click Save.
View Details - Resend Email
The email field that is used for determining the recipient address when sending out password reset emails can be set in a configuration option.
By default (i.e. if the config is not set), the field TRAINEE.EMAIL is used.
Any field used for email addresses can be specified from the tables TRAINEE, TRAINEEPOT, TRAINEEPOT2, TRAINEEINFO, TRAINEEDETAILS or TRFRAMEWORK.
To specify the field to use:
-
Go to Settings on the sidebar.
-
Click the System Configuration button.
-
Go to Admin on the left (under the Maytas Hub Online header).
-
Locate the General section on the right.
-
Tick the box for the permission Trainee Resend Email Field and enter the table and field name for the email field to use as the recipient address when sending out password reset emails. This should be in the format TABLE.FIELD, e.g. TRAINEE.EMAIL.
-
Click Save.
Reset Password
The Web User Editor includes a Reset Password button on each user's account which will email the user a password reset link.
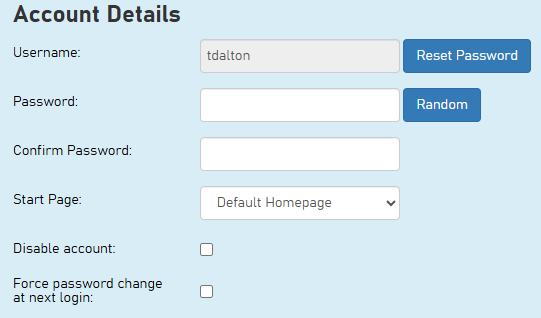
When the button is clicked, you will be asked to confirm the email address that the reset link will be sent to.

When the Confirm button is clicked, the password reset link will be emailed to the user.
The body of the email that is sent out is defined by the existing password recovery configuration option:
-
Go to Settings on the sidebar.
-
Click the System Configuration button.
-
Go to Admin on the left (under the Maytas Hub Online header).
-
Locate the General section on the right.
-
Ensure the box is ticked for the permission Email body for password recovery and edit the body as required.
-
Click Save.