Browse Trainees
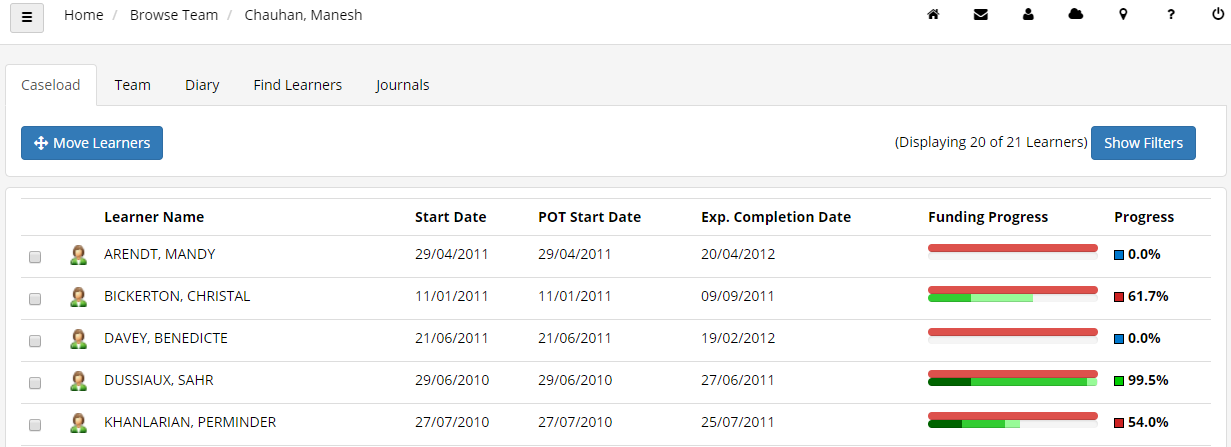
The Browse Trainees screen displays all the learners in the assessor's caseload and allows you to locate and view a learner’s details, visits and progress. It can be accessed by going to Browse Trainees on the toolbar.

At the top of the Caseload tab, there is a checkbox which allows you only show live learners. To show all learners, un-tick the box.
A progress overview is shown for each learner in the caseload. To view a learner’s profile, simply click the learner’s row. To edit a learner's basic details, click the Edit button at the end of the row.
To search for a learner, click the Find trainee tab. Here you can search for a learner by entering their name, National Insurance number, post code or learner ID and clicking Locate. For more advanced search options, click Show Advanced. This lets you search by:
- the learner's start date being earlier than, later than or equal to a specified date,
- the termination date being empty or earlier than, later than or equal to a specified date,
- the learner's assessor, either by name or assessor ID.
Bulk Assignment of Trainees to Assessors and Modules
It is possible to assign multiple trainees to an assessor at the same time. Modules can also be assigned to trainees in bulk. To do this:
- Go to Learners on the taskbar.
- Click Find Learners.
-
Enter search terms to search for specific learners or simply click Search to list all learners.

- Tick the box to the left of each learner you wish to assign, then click Assign.
- There are three possible actions:
- Assign to Me - Assigns the learners to your assessor record.
- Assign to Assessor - Assigns the learners to another assessor:
- A window will appear. Select the assessor from the dropdown box (if you need to select an assessor from another team, untick the Select from team box).
- Select the Link Details tab.
- Select the assessor link type and enter the start date of the association between the learners and the assessor.
- Click Assign, then click OK.
- Assign Modules - Allows you to choose a set of modules to assign to the learners:
- A window will appear. Use the filters to find the relevant modules and click Filter.
- Select a base module on the left and select the units you wish to include on the right.
- Click Add Module.
- Add more modules as required, then click Assign.
Next Planned Review on Caseload Screen
The caseload screen can show each learner’s next planned review. Additionally, the visit short string used for this can be specified in a config setting. To enable this:
- Go to Settings on the toolbar and click System configuration.
- Select Assessor Login on the left and scroll down to the General section on the right.
- Tick the box for the config List of extra columns to show on the caseload screen if it is not already ticked.
- In the list on the right, tick Next Planned Review.
- Scroll down to the Visits section.
- Tick the box for the config Visit Type used for Planned Reviews.
- Select the visit type from the dropdown box.
- Click Save.
This will show the Next Planned Review column on the caseload screen. The column shows the earliest visit of the specified type without an actual date, and if the planned date is in the past then the date will be highlighted red to make it easy to see at a glance which learners have overdue reviews.

Additional Dates on Browse Caseload Screen
Assessor managers have the option of displaying the POT start date and expected completion date on the Browse Caseload screen. To enable these:
- Select Settings on the sidebar and click System configuration.
- Select Assessor Login on the left and scroll down to the General section on the right.
-
There are two configs to choose from (one of these should be set, not both):
-
Use POT start date and ILR planned end date in the assessor caseload grid - This will display the POT start date and the planned end date from the ILR main aim (which uses TRAINEEPOT.FUNDINGEXPIRYDATE04). If the planned end date is not entered, the POT expected completion date is used instead (TRAINEEPOT.EXPCOMPLETIONDATE).
-
Use POT start and expected completion dates in the assessor caseload grid - This will display the POT start date and expected completion date (TRAINEEPOT.EXPCOMPLETIONDATE).
-
- Tick the box next to the config you wish to use and set the toggle button to ON.
- Click Save.
- Select Settings on the sidebar and click Reload (in the Tools section).
The dates will now be visible on the Browse Caseload screen.

Jump To Menu
The Caseload and Find Learner screens have a configurable option to directly jump to a particular screen for a learner, rather than having to open the learner record and then go to that screen. Custom learner screens can also be included in the Jump To menu.
To enable the Jump To menu:
- Go to Settings on the sidebar.
- Click the System configuration button.
- Go to Admin on the left (under the Maytas Hub Online header).
- In the General section, tick the box for the Standard trainee tabs available on the Jump To menu setting on the right.
-
Tick each option you want to include on the Jump To menu.

- Click Save.
-
The Caseload and Find Learner screens will now replace the edit button for each learner with the Jump To menu, where you can select which screen to go directly to.

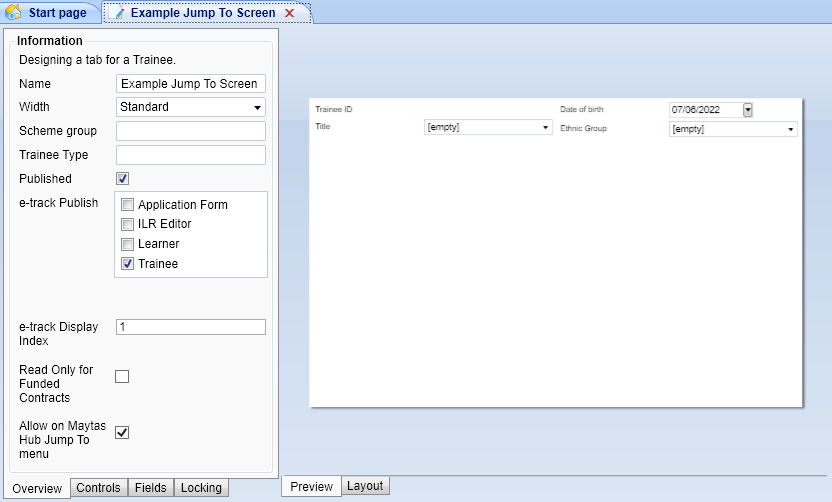
To include a custom screen from the Screen Designer in the Jump To menu:
- In Maytas 5, go to Tools on the toolbar and click New / Load on the Screens panel of the ribbon.
- Open the learner screen you wish add to the Jump To menu.
-
Tick the Allow on Maytas Hub Jump To menu checkbox (at the bottom left).

- Click Apply to save the changes.
- Go to Home on the toolbar and click the Sync button. The screen will now be available on the Jump To menu in Maytas Hub.
Configurable OTJ Column on Caseload
The Browse Learners / Caseload screen can be configured to show an OTJ Summary column, which displays a progress bar of a learner's recorded off-the-job training activity compared to their calculated required OTJ hours (as shown on the learner's Off The Job Training tab).

The calculation used to produce the progress bar percentage is:
( (Off the job calculator - OTJ hours remaining) / Off the job calculator) x 100
e.g. if the OTJ calculator showed 80 required hours and there were 40 OTJ hours remaining, the progress bar would be at 50%.
If the Planned Hours Override field on the Off the Job Training screen is entered, it will be used in place of the value in Off the job calculator.
You can also hover over the progress bar to view the remaining and total hours.

To add the OTJ Summary column to the caseload screen:
- Go to Settings on the sidebar.
- Click the System configuration button.
- Go to Assessor Login on the left (under the Maytas Hub Online header).
- In the General section, tick the box for the List of extra columns to show on the caseload screen setting and then tick the OTJ Summary option in the list of extra columns.
- Click Save.
Terminated Learners in Search Results
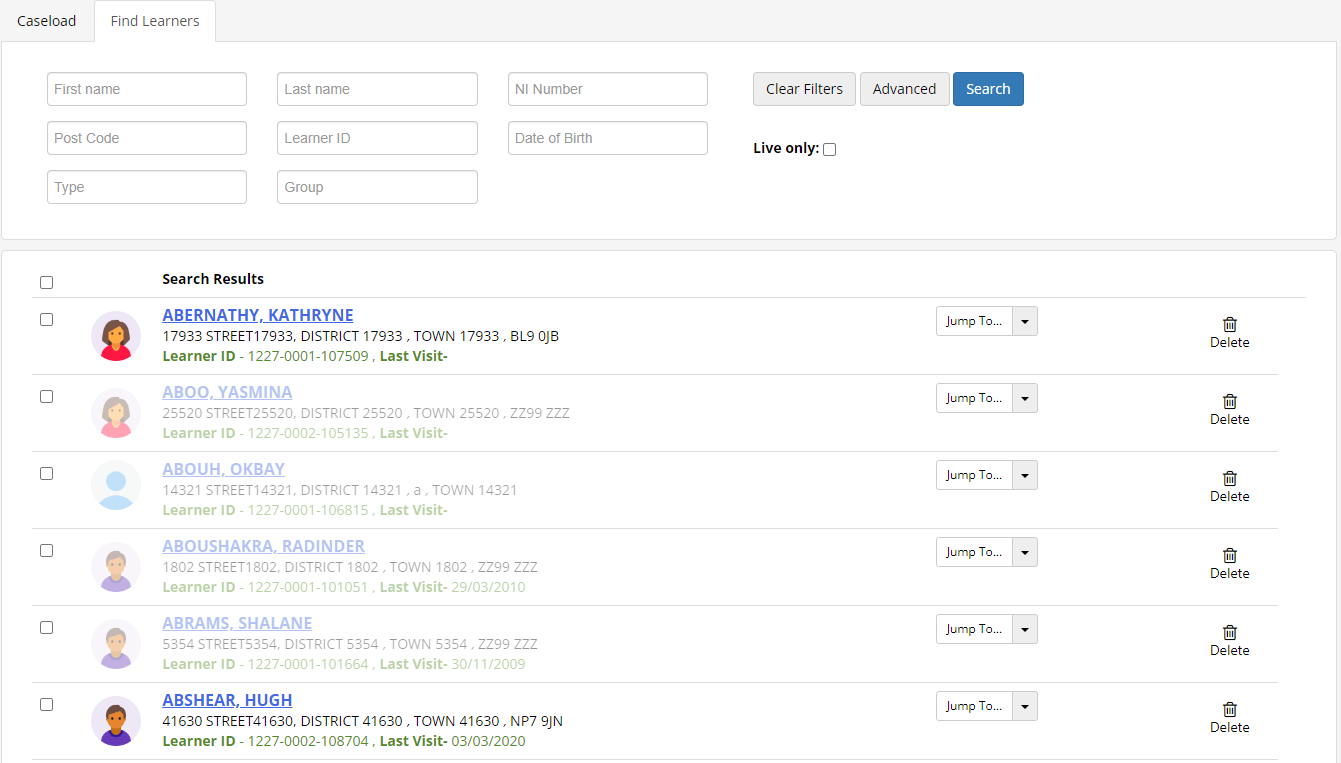
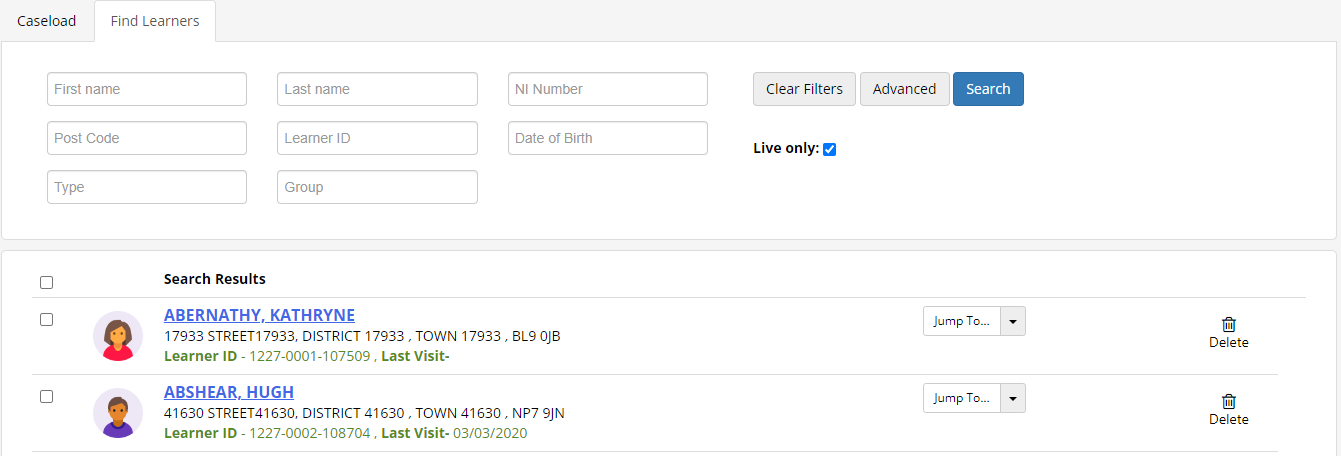
The Find Learners tool lets you easily see which learners in the results are live and which are terminated, as well as being able to filter by only showing live learners.
To access the Find Learners tool, go to Browse Learners on the sidebar and click the Find Learners tab.
By default, when you search for a learner you will see both live and terminated learners in the search results. The details for terminated learners are faded.

If you only wish to see live learners in the results, tick the Live only box at the top, then click the Search button again.
