Learner Journey
The Learner Journey module is a streamlined view of a learner's important events on a month-by-month basis, available for assessor and learner users. The following events are included:
- Visits
- Objective target dates
- Data collection forms
- Skill Scans
- Learning plan targets
- Tasks
By default, only outstanding and overdue items are shown, but completed items can also be shown.
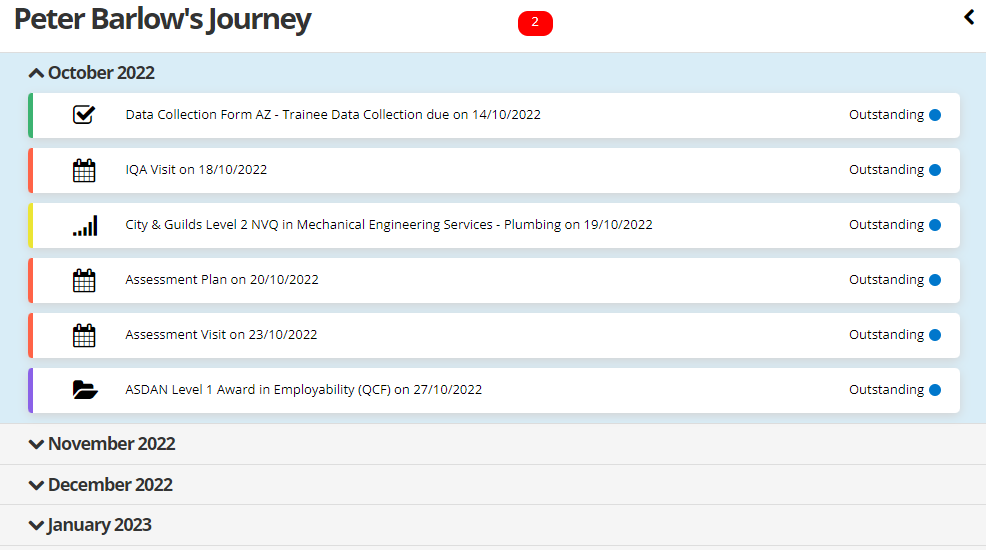
Viewing the Journey
When you first open the Learner Journey, the current month will be expanded and all other months will be collapsed. To expand a month, click the  button next to the month, and to collapse a month, click the
  button.
By default, only the current and future months are shown for learners with a live POT. To display past months, click the arrow button at the top right to show the Filters panel, then tick the Show Past Periods box.
Each item within a month can be selected to view its basic details, which will appear in a panel on the right.

Some items will have additional options on the right - e.g. on the IQA Visit example above, the Message Learner envelope can be clicked to open a new message for the learner and the Open Visit button can be clicked to view the full details of the visit.
Once you have finished viewing an item, click the  button next to it to hide the panel.
If the learner has any overdue items, these will be indicated at the top-centre of the screen (such as the  button in the example above). Clicking the button will show the overdue items.

Filters
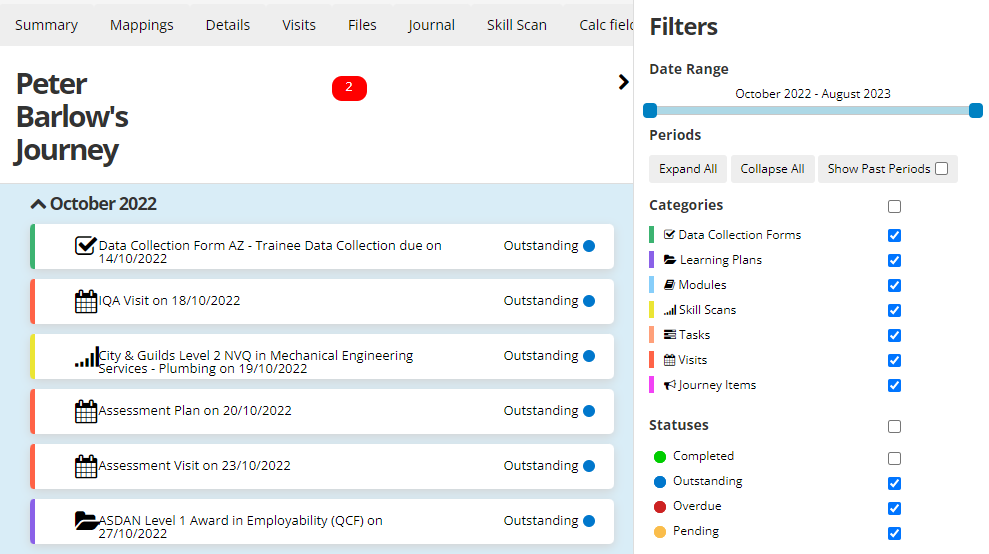
The Filters panel includes options for configuring what you want to see on the Learner Journey. To access the Filters panel, hover over (or click) the  button at the top right of the screen (the panel can be closed by hovering or clicking on the arrow again).
-
Date Range - The buttons on either side of the slider can be used to limit the months shown.

- Periods - These options allow you to expand all periods, collapse all periods or show past periods.
- Categories - These let you choose which categories to include. The box at the top (across from the Categories header) lets you select or de-select all options.
- Statuses - These let you choose which item statuses to include. The box at the top (across from the Statuses header) lets you select or de-select all options.
Add Item Button
An Add Item button can be enabled on the Learner Journey screen which allows you to quickly add any of the items which can appear on the Learner Journey.
To enable the button:
- Go to Web User Editor on the sidebar.
- Search for and select the user that requires permission.
- Click Permissions to expand that section.
- In the Assessor section, tick the Allow Add Journey Items permission.
- Click Save.
The button will now be available at the top-right of the Learner Journey screen. Clicking it will open a panel on the right where you can choose which type of item to add, which will then take you to the relevant wizard for adding the item.

The Journey Items option at the bottom of the list lets you add a simple custom item which only appears in the Learner Journey.
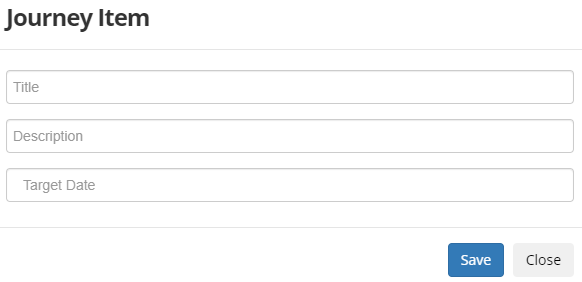
This will then appear in the month set by the Target Date.
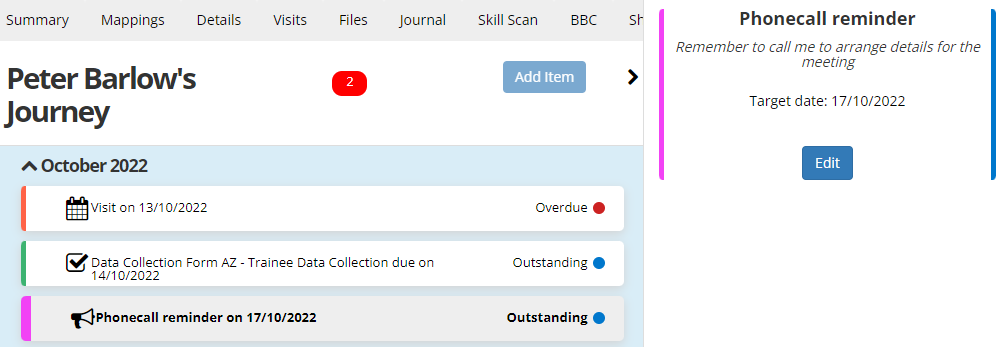
When the learner selects this in their Learner Journey, they will have a button to complete and comment on the note.
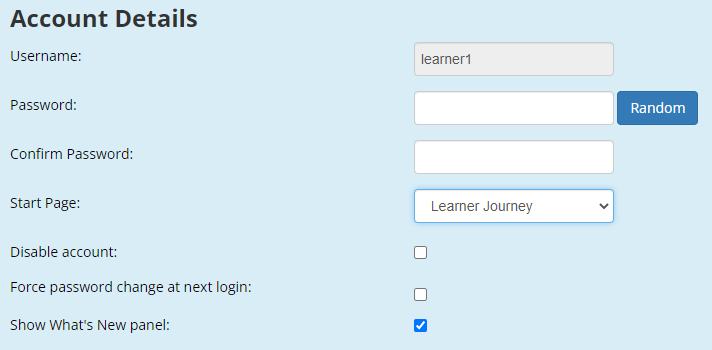
Learner Journey as Learner Homepage
The Learner Journey screen can be set as the homepage for learner logins:
- Go to Web User Editor on the sidebar.
- Search for and select the learner.
-
In the Account Details section, select Learner Journey from the Start Page dropdown box.
- Click Save.
Risk Level
Learners can be graded as high, medium or low risk in the Learner Journey.
The Risk Level column must first be enabled with a configuration option:
- In Maytas Hub, go to Settings on the sidebar.
- Click the System configuration button.
- Go to Assessor Login on the left (under the Maytas Hub Online header).
- Scroll down on the right to the General section.
- Locate the List of extra columns to show on the caseload screen option and tick the Risk Level box.
- Click Save.
The Risk Level column will now appear on the Caseload screen.

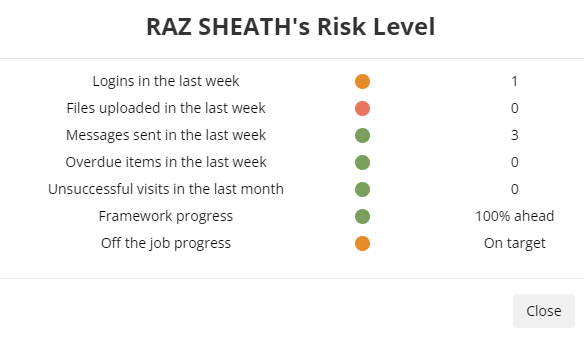
Clicking on the risk level will show a breakdown of the risk factors used to determine the overall risk level.
Risk Level Calculation
A risk level is assigned to each risk factor, all of which are amalgamated into an overall risk level for a learner. The risk factors for each learner are as follows:
| Risk Factor | High Risk | Medium Risk | Low Risk |
|---|---|---|---|
| Logins in the last week | 0 | 1-2 | 3+ |
| Files uploaded in the last week | 0 | 1-2 | 3+ |
| Messages sent in the last week | 0 | 1-2 | 3+ |
| Overdue learner journey items in the last week | 3+ | 1-2 | 0 |
| Unsuccessful visits in the last month | 3+ | 1-2 | 0 |
| Framework progress | Below expected progress | On target | Above expected progress |
| Off the job progress | Actual hours below expected hours | On target | Actual hours above expected hours |
Each factor is then given a risk score:
-
High risk = 1
-
Medium risk = 3
-
Low risk = 5
When the risk scores are totalled, the overall risk level for the learner is determined as follows:
| Total risk score | Overall risk level |
|---|---|
| 15 or less | High |
| 16-25 | Medium |
| 26+ | Low |
Journey Items Past Planned End Date
A configuration option is available which allows the Learner Journey to show items that occurred after a learner's planned end date. When the config is enabled, the latest date the Learner Journey will show up to depends on several factors:
-
If the POT termination date is entered, the Learner Journey will show dates up until that date.
-
If the learner is still active and the learner's start date was less than a year ago, the Learner Journey will show dates up to one year after the POT start date, plus 90 days.
-
If the learner is still active and the learner's start date was a year or more ago, the Learner Journey will show dates up to the current date plus 90 days.
To set the config:
-
Go to Settings on the sidebar.
-
Click the System Configuration button.
-
Go to Learner Login on the left (under the Maytas Hub Online header).
-
Locate the General section on the right.
-
Ensure the box is ticked for the permission Extend the Learner Journey timeline past POT end date.
-
Click Save.