Messages
The Messages screen is where messages can be sent, received and viewed between Maytas Hub users. It is accessed by clicking Messages on the toolbar.
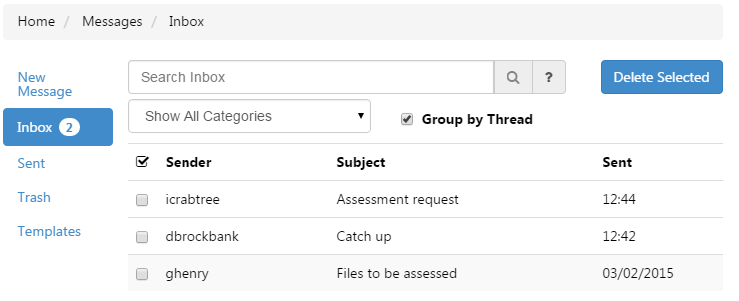
Messages can be searched by entering search terms in Search Inbox and clicking the  button. You can prefix a search term with from: to search for messages from a user (e.g. from:dmoorghen), or prefix with body: to search the bodies of emails.
Messages that are part of the same reply-chain are automatically grouped together. If you would rather see all messages chronologically, un-tick Group by Thread.
To delete emails, tick the box to the left of each email you wish to delete and click Delete Selected. Click OK to confirm.
You can also select / de-select all messages by clicking the  button.
New Message
To send a new message, click New Message.
To choose the people to send the message to, click the  button to expand the list of users. Simply click a user to add them to the recipient list. To remove a user from the list, click the
  button next to their name.
Enter a subject for the message and select the type of message from the dropdown list.
If you require a follow up, tick the checkbox and enter the number of days in which you require a response.

You can optionally choose to send an email or an SMS message as well by ticking the relevant boxes.
Enter the message body. If you wish to attach a file, click the Attach file button. Browse to and select the file and click Open, then click Upload files.
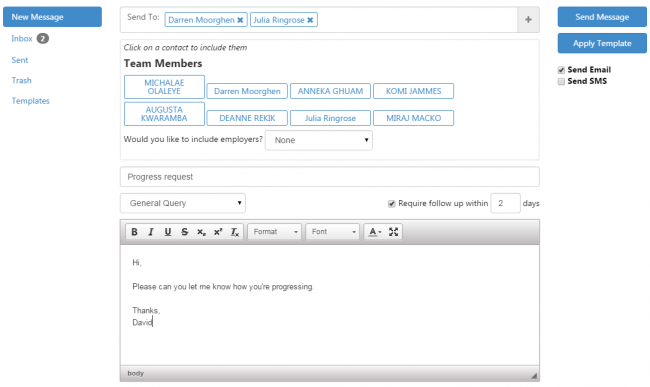
When you are finished, click Send Message.
Message Templates
It is possible to create message body templates. To do this:
- Go to the Messages screen and click Templates.
- Click the Create New Template button.
- Enter a template name, subject and message body and select the message type from the dropdown box.
- By default each template is private to the user who creates it, but assessors can make a template publicly available by ticking the Make public box.
- Click Save Template when finished.
Templates can be applied when creating a new message by clicking the Apply Template button on the right.
Assessment from Messaging
An assessment can be performed directly from messaging. To do this, a trainee should message their assessor with a message type of Assessment Request. The file(s) to be assessed should be attached to the message, then click Suggested Mappings at the bottom. This will allow the trainee to suggest mappings for the assessed file – click Add Mappings to add each mapping suggestion and then click Save Mappings.
Once the assessor has received the assessment request, the files can be assessed as follows:
- Go to the Messages screen and open the assessment request.
- Click the message attachment to view the file(s).
- Click Suggested Mappings to view the trainee's suggestion.
-
Click Assess Files.

- From here you can choose which files apply to which assessment visit (or create a new visit to assign them to). First, select a visit from the list or select Click here to add new visit.
- Tick the box next to each file which applies to the visit.
- Click Save. You will then be taken to the regular visits screen where you can amend the details of the visit or evidence if required. Please note that if you make any changes to the visit, you should also click Save on the Edit Appointment screen.
Displaying Old Messages
By default, messages sent in the old message system (i.e. from 5.08 and earlier) will not be displayed. These messages can be restored as follows:
- Go to Settings on the toolbar.
- Click System Configuration.
- Select Messages on the left (under the Maytas Hub heading).
- Tick the box next to Enable legacy messages and ensure the toggle button is set to ON.
- Click Save.
Please note that messages sent in the old system cannot be grouped as threads and will not appear in message search results.
Real-Time Message Notifications
The messaging system can be configured to display a small blue alert in the top-right corner when a new message is received. This requires a line to be added to the web.config file:
- On the server where Maytas Hub runs, browse to your Maytas Hub web folder (this will be a folder in C:\inetpub\wwwroot – If you are unsure of the exact location, please contact Maytas support for assistance).
- Open Web.Config.
-
Add the following line under the <appSettings> header:
<add key="NewMessageCheck" value="30"/>
- The number at the end of this line is how often in seconds the system will check for new messages for each user. A lower number will create a higher load for the server as it will be performing more frequent checks for each user. Therefore for systems with a large number of users, it is recommended to leave the interval at 30 seconds.
- Save the changes and close web.config.
Message Folders
Messages can be organised into folders. Folders are user-specific and are available for assessor and learner users.
To create a folder:
- Go to Messages on the taskbar.
-
Click Manage Folders.
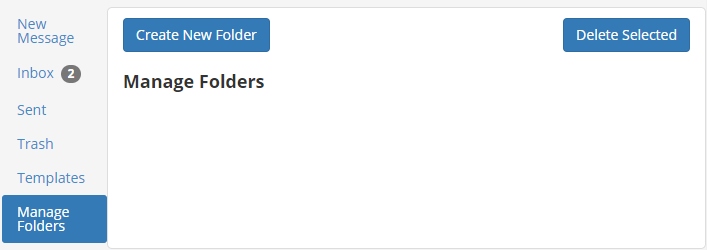
- Click Create New Folder.
-
Enter a name for the folder. You can also enter a display index, which determines the order in which folders are displayed.
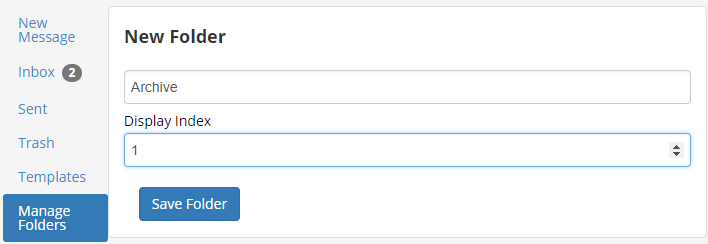
- Click Save Folder.
- The folder will appear in the Manage Folders list, and also on the left under Inbox. Click a folder to edit it. You can also delete folders from the edit screen or delete them in bulk from the Manage Folders screen by ticking the box next to the folders to delete and clicking the Delete Selected button.
To put messages in a folder:
- On the Messages screen, click Inbox.
-
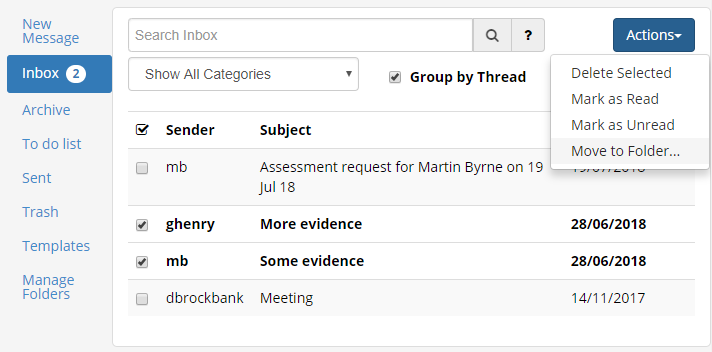
Tick the box next to each message you wish to move.
-
Click Actions and select Move to Folder…

- Select the folder to move the messages to from the dropdown list and click Move.
- A message will appear asking you to confirm the move. Click OK to continue.
-
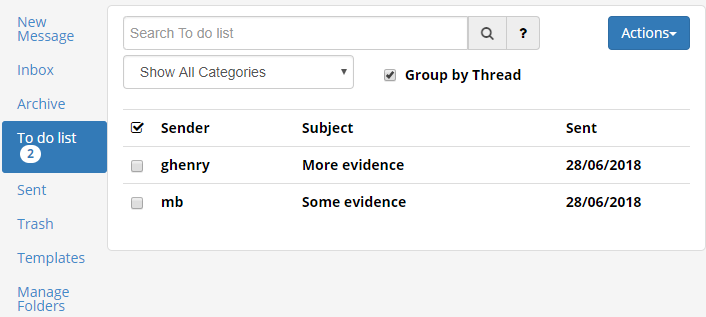
Click the folder on the left to view the moved messages.
Clear Trash
There is the option to clear your Trash folder on the messages screen, which can improve performance in Messages if there are lots of items in the Trash. It is important to understand that doing this will permanently delete messages in the Trash folder.
- Go to Messages on the toolbar.
-
Go to the Trash folder. This is where messages deleted from the inbox go.

- Go to Actions | Clear Trash.
- You will be asked to confirm permanent deletion of the messages in the trash. Click OK to continue.
- The trash folder will now be cleared.
Employer Login - Upload Learner Evidence via Messages
Employer users can upload learner evidence via Maytas Hub messages.
- Go to Messages on the toolbar and click New Message.
- Click the
 button next to Send To. You will see the list of possible recipients, which now includes your learners' assessors.
 - Select the appropriate assessor to submit evidence to.
- At the bottom of the message, tick the Submit Evidence box.
- A dropdown box will appear. Select the learner you wish to submit evidence for.
- Click the Suggested Mappings button.
-
Select the qualification you wish to submit evidence for, then select the mappings as required and click Add Mappings.
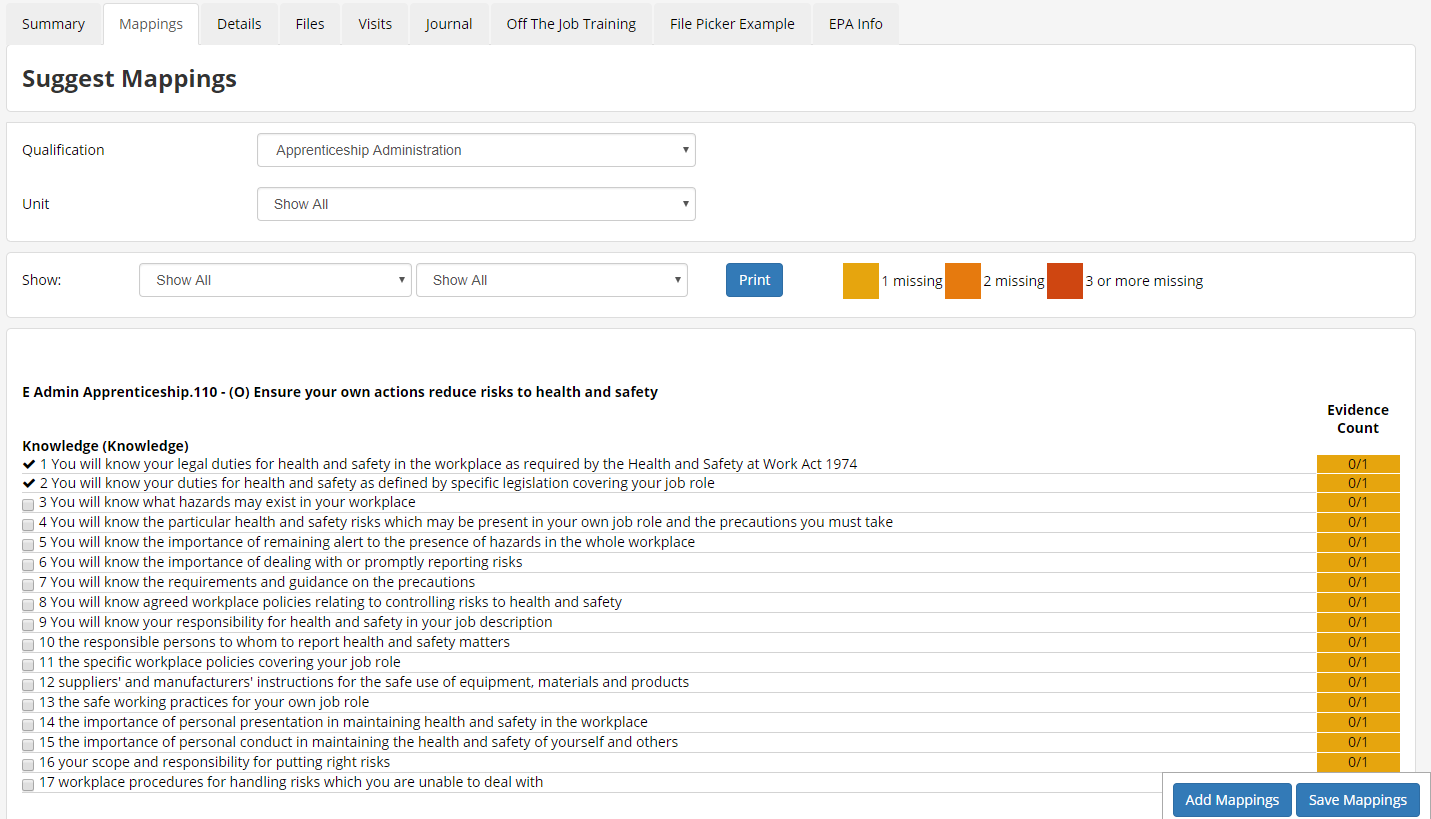
- When finished, click Save Mappings.
- You will return to the Message screen. Click Attach file. Repeat for additional files as required and then click Upload files.
- Browse to and select the evidence file and click Open.
- Complete any other required details on the message and click Send Message.
When the assessor views the message there will be options to view the evidence and suggested mappings and assess the files.

Click to download will download the evidence for inspection.
The Suggested Mappings button displays a list of the mappings suggested by the employer.
The Assess Files button lets you assign the files to a visit. First select an existing visit from the list or choose to add a new visit, then when prompted select the evidence file. Click Save. You will then be prompted to update or complete the visit as required.
Message Read Tracking
Users can see when messages they have sent have been read by the recipient(s). This can be viewed in the messages Sent folder.

The Read column at the end of each row indicates whether or not a message has been read, using the following statuses:
No icon - Indicates that the message has not been read by any of the recipients.
 Indicates that some recipients have read the message and others have not. Hovering over the icon will display the recipients who have read the message.
 Indicates that all recipients have read the message.
 Indicates that the message requires a response and the deadline has been passed without all recipients responding.
The blue and green ticks also show within the relevant messages when opened. When messages with overdue responses are opened, a list of users still to reply is displayed at the top of the message.
