Showcase Portfolio
The Showcase Portfolio is a predominantly learner-led feature which allows a learner to create a showcase of their best work. Users are able to create multiple portfolios, add existing files, add new files, remove files, move files between portfolios, amend existing showcase items, check on the details and mappings of a showcase item and export portfolio items both individually and in bulk from within the new Showcase tab.
As part of the Add to Showcase process, users are asked for some key information such as title, description, which showcase file is to be added to and item type. Due to the nature of the new Showcase tab, the tile that is presented is based entirely on the selection within the item type field. This builds up a dynamic portfolio of screens for users to view.
There is a configuration option to add a new Add to Showcase step within the Evidence Wizard so that it forms part of the learner file upload process. Users are also able to add existing files to a showcase via the Files tab.
Setup
Users must be given permissions to showcase features for them to be enabled.
For assessor users:
- Go to Web User Editor on the sidebar.
- Search for and select the assessor user.
- Click Permissions to expand that section.
- Under the Files header, tick the following permissions as required:
- Access Learner Showcase Tab
- Download files from Learner Showcases
- Allow Add/Delete Showcases
- Allow Add/Edit Showcase files
- Click Save.
For employer users:
- Go to Web User Editor on the sidebar.
- Search for and select the employer user.
- Click Permissions to expand that section.
- Under the Files header, tick the following permissions as required:
- Allow Add/Delete Showcases
- Allow Add/Edit Showcase files
- Download files from Learner Showcases
- Click Custom Tabs to expand that section.
- Under the Learner Editor header, set the Showcase tab permission as required.
- Click Save.
For learner users:
- Go to Web User Editor on the sidebar.
- Search for and select the learner user.
- Click Permissions to expand that section.
- Under the Trainees header, tick the Enable Showcase Features permission.
- Click Save.
A configuration option must also be set before learners can flag showcase files in the Evidence Wizard:
- Go to Settings on the sidebar.
- Click the System configuration button.
- Go to Learner Login on the left (under the Maytas Hub Online header).
- In the Evidence Wizard section, tick the box for the Allow learners to flag showcase files in the Evidence Wizard setting on the right and ensure the toggle button is set to ON.
- Click Save.
Showcase Screen
The Showcase screen is the central point for viewing and managing a learner's showcases. Details of each showcase can be viewed, along with their associated evidence files and mappings. Files can be added to new or existing showcases using the Add File button and the Export Showcase button can be used to download a zip file containing all information and evidence associated with the selected showcase.
To view a different showcase, select it from the Select Showcase dropdown box at the top-right of the screen.
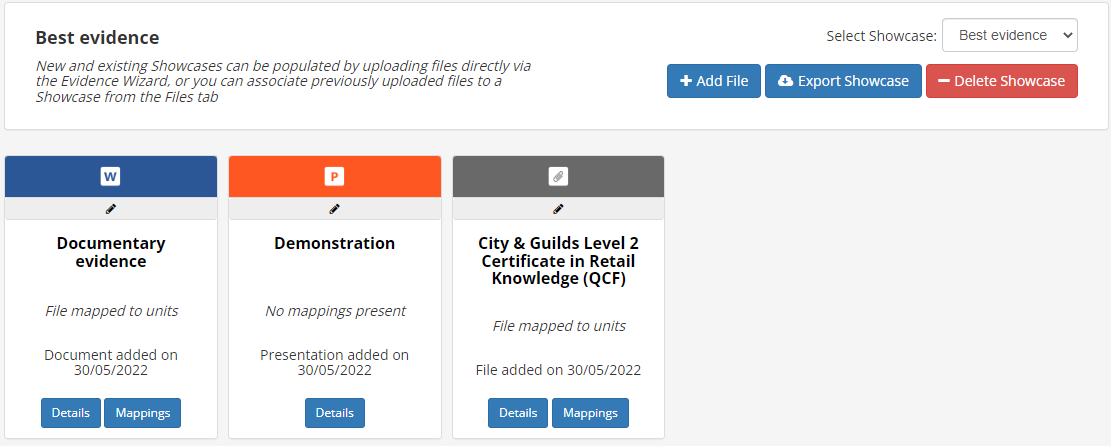
To access the screen as an assessor or employer, open a learner's record and go to the Showcase tab. To access the screen as a learner, go to Showcase on the sidebar.
Showcase screen buttons
Add File - Learners can click this button to add evidence files to a new or existing showcase via the Evidence Wizard (please see the instructions below and skip to step 2 after clicking the Add File button).
Export Showcase - Clicking this button will download a zip file that contains all information and evidence associated with the selected showcase. The showcase can then be viewed offline as follows:
- Extract the zip file to your hard drive and go to the data folder.
- Open showcase.html (you may be prompted to choose which app to use - any browser compatible with Maytas Hub will work).
-
You will then see a summary of the showcase. Clicking a Showcase File Name will open a zip file containing the associated evidence files.

Delete Showcase - Clicking this button will delete the entire showcase (you will be prompted to confirm deletion). Note that this does not delete evidence files but dissociates them from the showcase.
Viewing showcase details and mappings
To view the details of a showcase, click the Details button on one of the associated evidence collections:
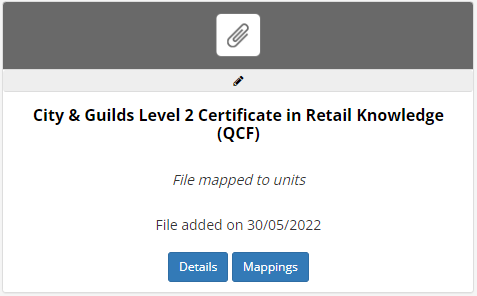
A pop-up prompt will appear.
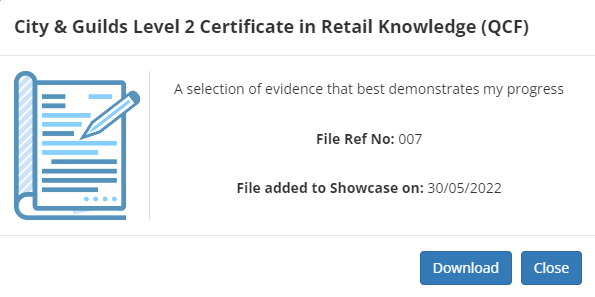
Click Download to download the associated evidence files, then click Close.
Click the Mappings button to view the objective mappings for the associated evidence (this button will not appear if the evidence was not mapped).
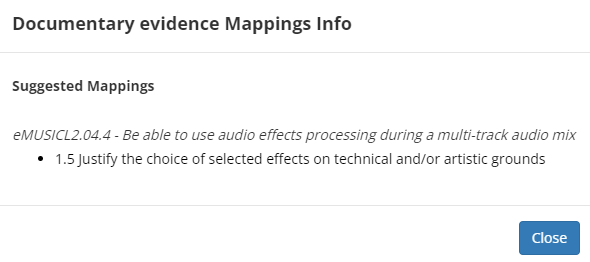
Click Close when finished.
How to flag showcase files in the Evidence Wizard
A learner can use the Evidence Wizard to add new evidence files to a new or existing showcase as follows:
- On the Maytas Hub learner home screen, click the Evidence button (in the Portfolio section). The Evidence Wizard will start.
-
On the first screen, click the Select button to add the evidence files to be uploaded, then click Next.

- On the second and third screens, map the evidence to objectives as required and click Next.
- On the fourth screen, leave a comment for the assessor if required and click Next.
-
On the fifth screen, click Yes to include the selected evidence in a showcase.

-
Additional options will appear for completion.
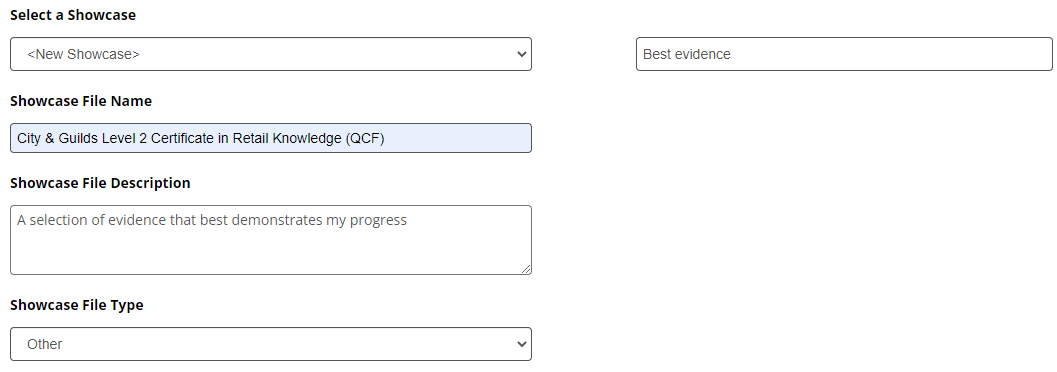
The Select a Showcase dropdown box can allow you to add the evidence to an existing showcase, or alternatively you can select <New Showcase> to add the evidence to a new showcase.
For Showcase File Name, clicking the box will display a suggested title based on objectives, and clicking the suggestion will use that title. Alternatively, a title can be entered manually.
- Once the showcase fields are completed, click Next.
-
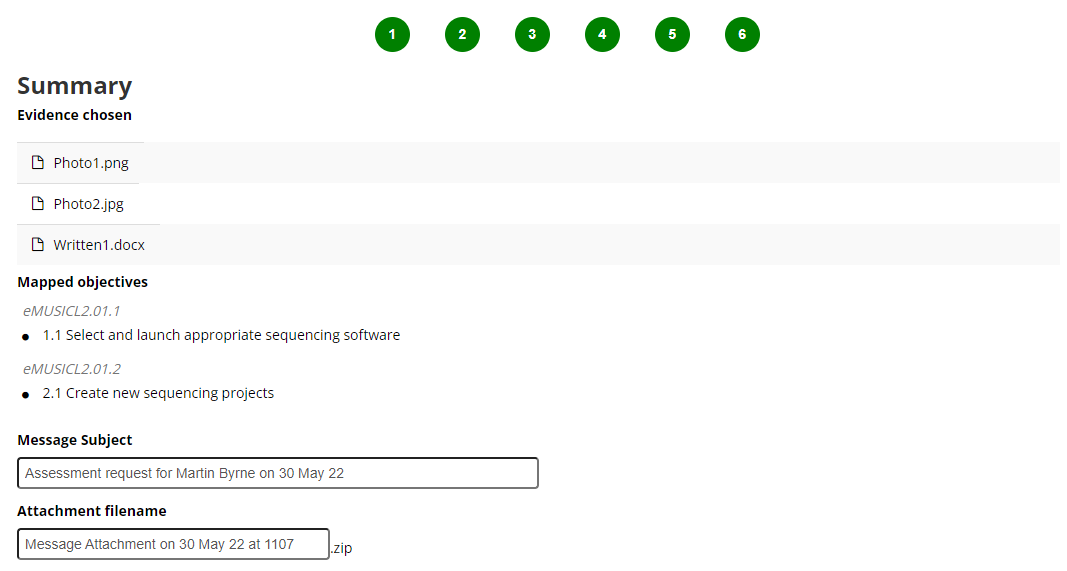
A summary of the evidence to be uploaded will be displayed. Click Finish to complete the wizard.
How to add existing evidence files to a showcase
Evidence files which have already been uploaded can be added to an existing showcase:
- As a learner user, go to Files on the sidebar. As an assessor or employer user with the Allow Add/Edit Showcase files permission, open a learner record and go to the Files tab.
-
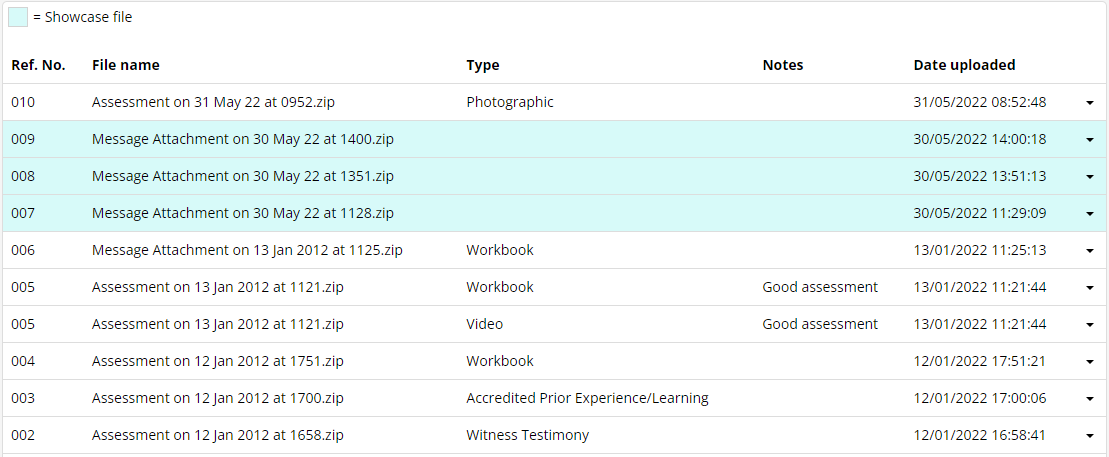
A list of uploaded files will be displayed. Files that are already associated with a showcase are highlighted in blue.
-
Click the arrow at the far right of the file you wish to add to a showcase and select Add to Showcase.

-
A pop-up screen will appear. Enter details for the file as required. The Select Showcase dropdown box can be used to select an existing showcase, or alternatively the file can be added to a new showcase by selecting the <New Showcase> option.
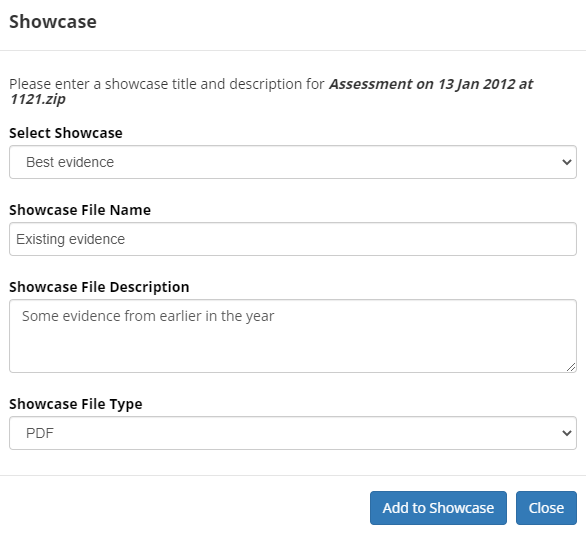
- Click Add to Showcase.
The Files screen can also be used to remove a file from a showcase:
-
Click the arrow at the far right of the file you wish to remove from a showcase and select Remove from Showcase.

- You will be prompted to confirm. Click Remove from Showcase to continue.