e-track Assess - iOS Test Case
- Create the test / dummy learner record. As a minimum, the learner should be assigned objectives with some evidenced requirements, and they should also be assigned to the assessor you will be using in e-track Assess.
- Open e-track Assess and select the learner record.
-
Tap the
 button at the top-right and select Add Visit.
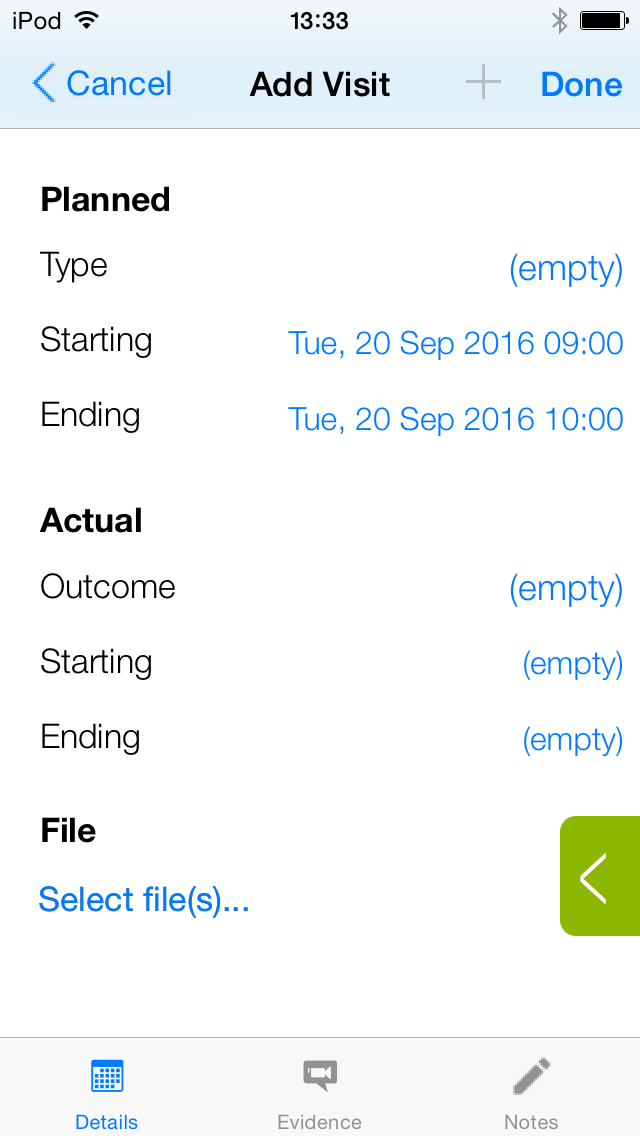
- Select a visit type tap Done at the top-right.
- Go to the Visits tab at the bottom of the screen.
- You should see the visit under the current date (or if you changed the planned date, under that date). Select the visit.
- Select an outcome and actual start and end date.
- Go to the Evidence tab at the bottom of the screen.
-
Tap the
 button at the bottom-right. This will open the media sidebar where you can assign evidence media to the visit.
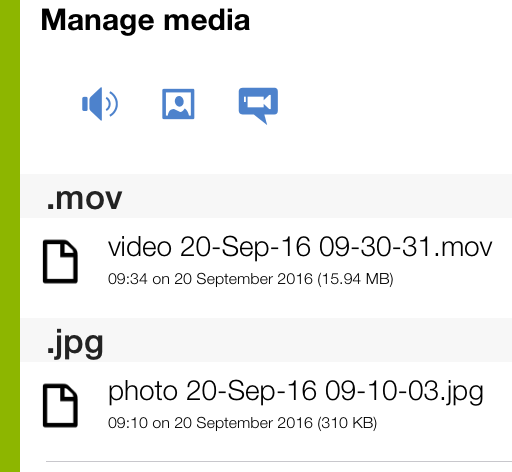
- Tap the
 button to add a photo. You will be prompted to either take a new picture or choose an existing one from the device. Choose either option to add a photo, then tap the
  button to hide the sidebar.
 -
Click the + button at the top of the screen to map the photo as evidence.
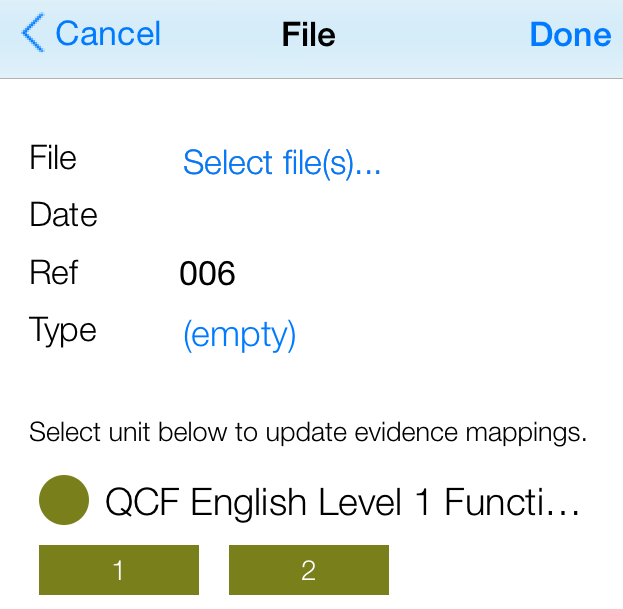
- Tap Select file(s), select the photo from the media list that appears and tap Done.
-
Select a unit and then select the evidence criteria to map for the photo (as this is an example, it can be any criteria).
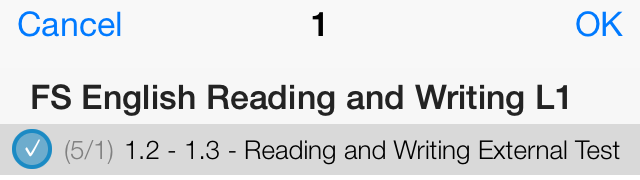
- Tap OK at the top-right of the screen.
- Tap Done at the top-right of the screen, then tap Done again to complete the visit changes.
- Tap Save at the top-right of the screen.
- Go to the Uploads tab at the bottom of the screen. You should see the uploaded photo with a Completed message underneath it.
- Finally, log into e-track and check that the visit and file are present against the learner, and that the file can be downloaded from e-track (this will confirm that the file is available on the server).