5.16 e-track Online Release Notes
User Interface Overhaul
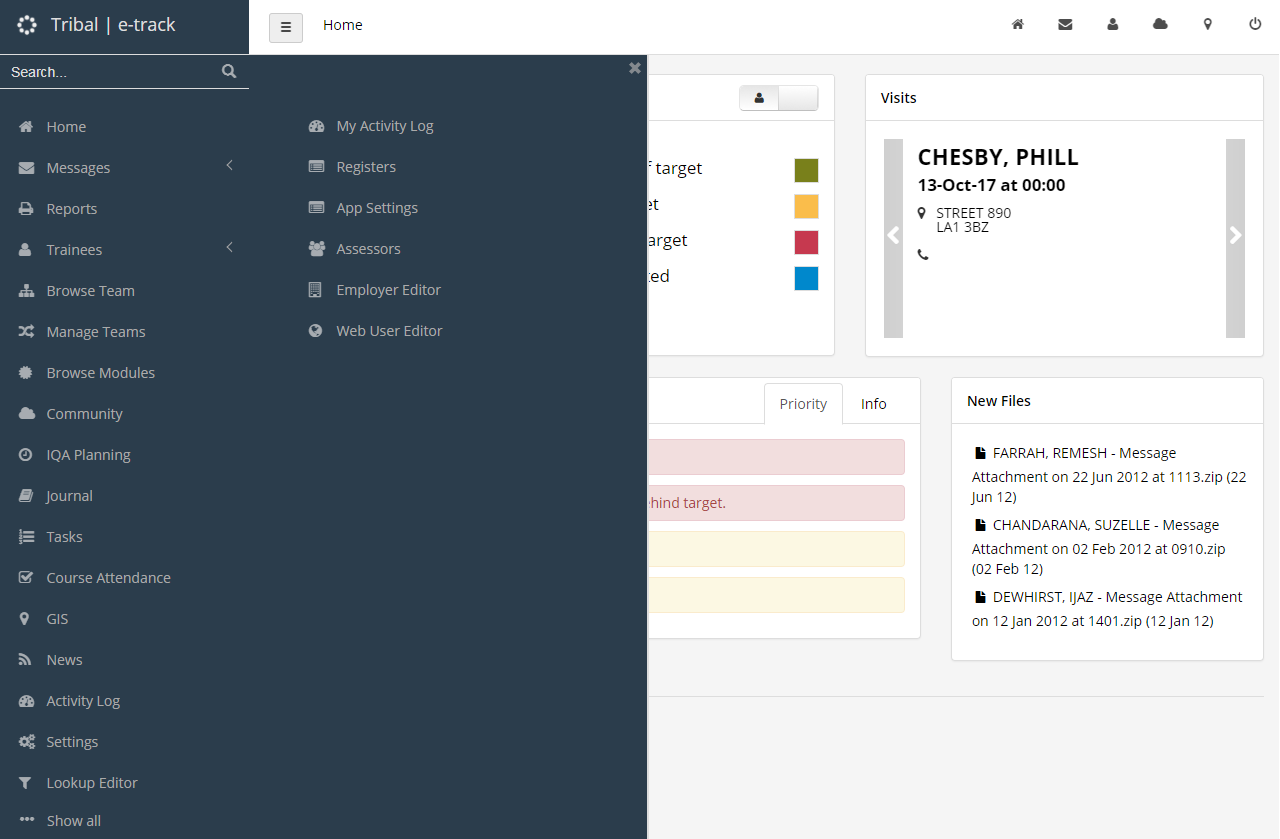
The user interface in e-track has been overhauled. The most significant change is that the menu (previously only accessible via the More button) is now a convenient sidebar that is accessible from all screens.
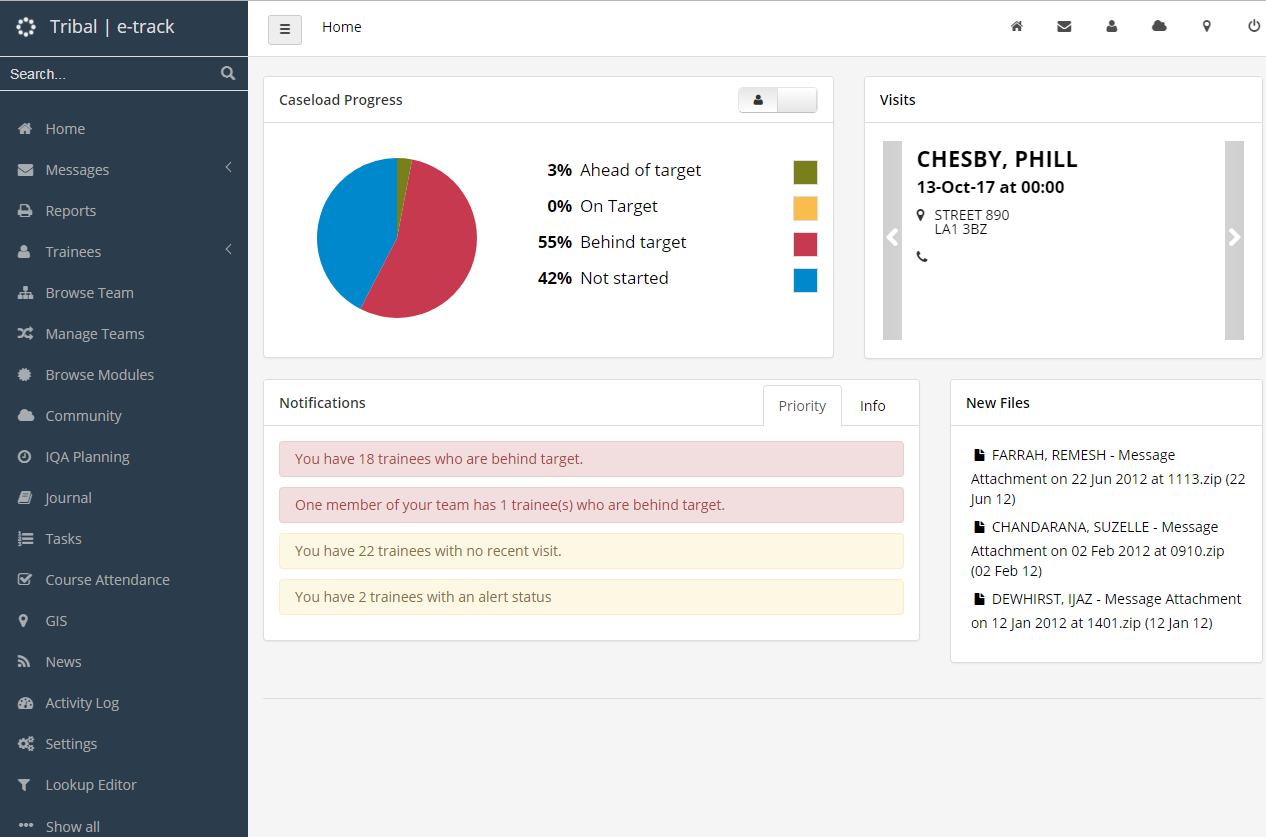
The sidebar defaults to a “full” expanded size on the home screen (shown above) and then shrinks to only show the icons when navigating other screens, which makes better overall use of screen space.
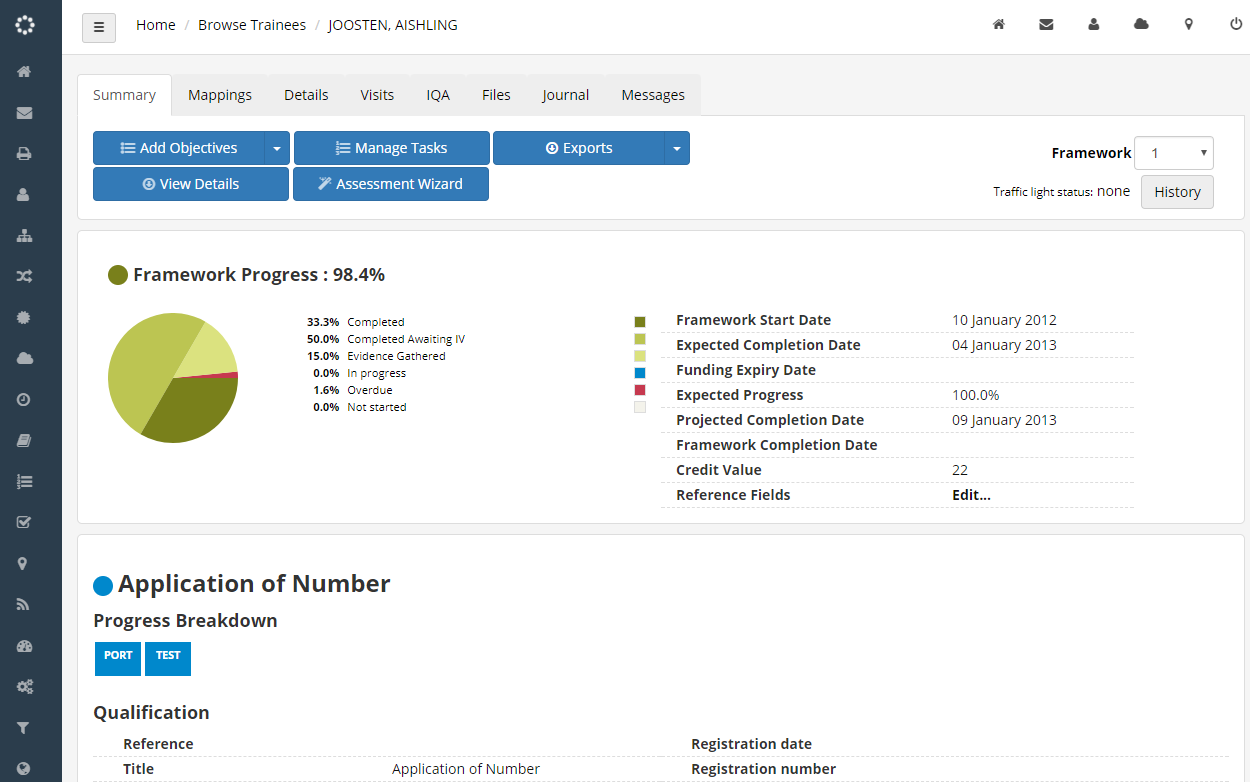
You can toggle between the full sidebar and the reduced sidebar at any time by clicking the  button at the top-left of the screen. On small screens such as phones, the sidebar is hidden to make best use of the screen and can be shown at any time with the
  button.
The Messages and Trainees menu items have sub-menus that can be shown by clicking the < button next to them.
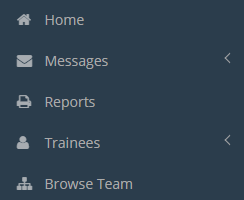
Collapsed view
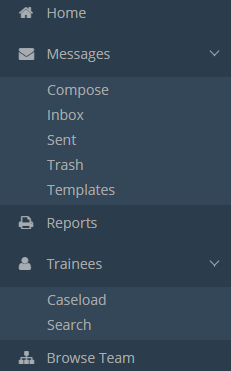
Expanded view
Additional menu items can be shown by clicking Show all at the bottom of the menu.
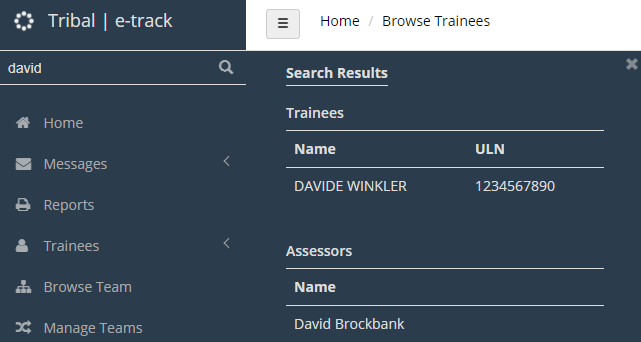
The search box at the top of the sidebar lets you quickly find trainees, assessors or employers by entering a full or partial name and clicking the  button. Click on one of the results on the right to view their record.
IQA Planning – Sample from Any Time in the Plan
A config option is now available which allows you to sample evidence from any time in the plan, rather than for a specific month. To enable this:
- Go to Settings on the toolbar and click System configuration.
- Select Assessor Login on the left and scroll down to the IV Planning section on the right.
- Tick the box for the config Eligible evidence from the plan start date and set the toggle button to ON.
- Click Save.
With the config enabled, IQA plans will show eligible evidence from the start date of the plan up to the end of the selected month. For example, if the plan starts in January and you have selected May, eligible evidence from 1st January to 31st May is shown. All eligible evidence will still conform to the appropriate plan filters (i.e. the unit or evidence type).
Task Titles
Tasks will now display the task title on the learner summary screen rather than just the task number.
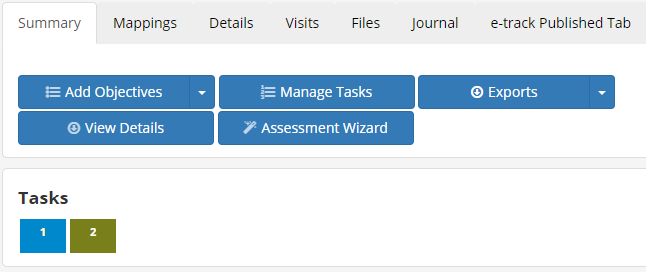
Old version
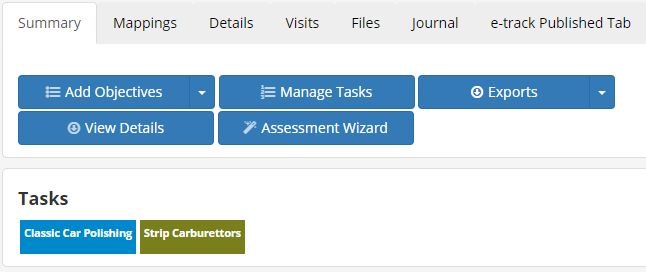
New version
Completion of Learner-Led Assessment Tasks
A simplified method for completing assessment tasks submitted by a learner is now available. The old method can still be used as well. The new method is as follows:
- The learner uploads an evidence file against a task.
-
As the learner's assessor, go to Messages on the toolbar and open the new message regarding the task.

- Click Assess Files.
- On the visit planner, go to the Tasks tab.
-
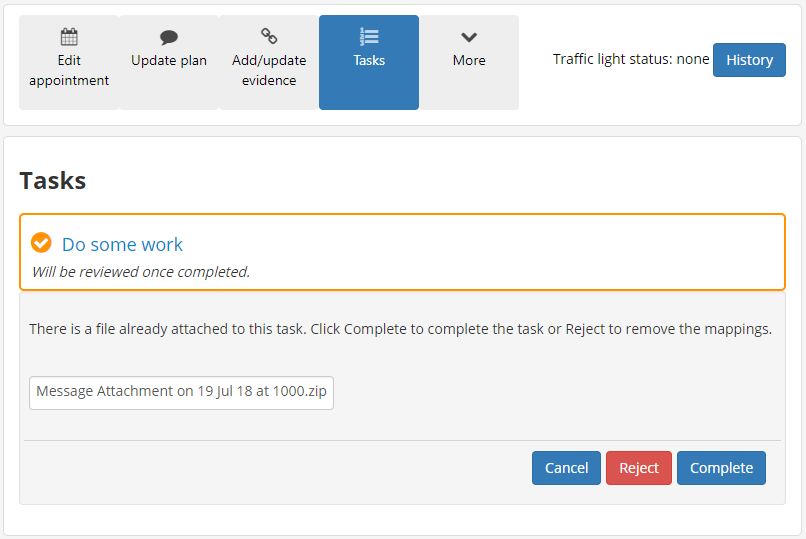
The task will be displayed amber. Click the task name to see the attached evidence filename.
-
Click Reject or Complete as required. If completed, the task will change to green; if rejected, the mappings will be deleted and the task will be un-highlighted.

- Complete and save the visit as required.
Off-the-Job Training
Several new features have been added to allow off-the-job training to be recorded.
Off-the-Job Training Tab for Assessor Login
To view the tab, open a learner record and go to the Off The Job Training tab.
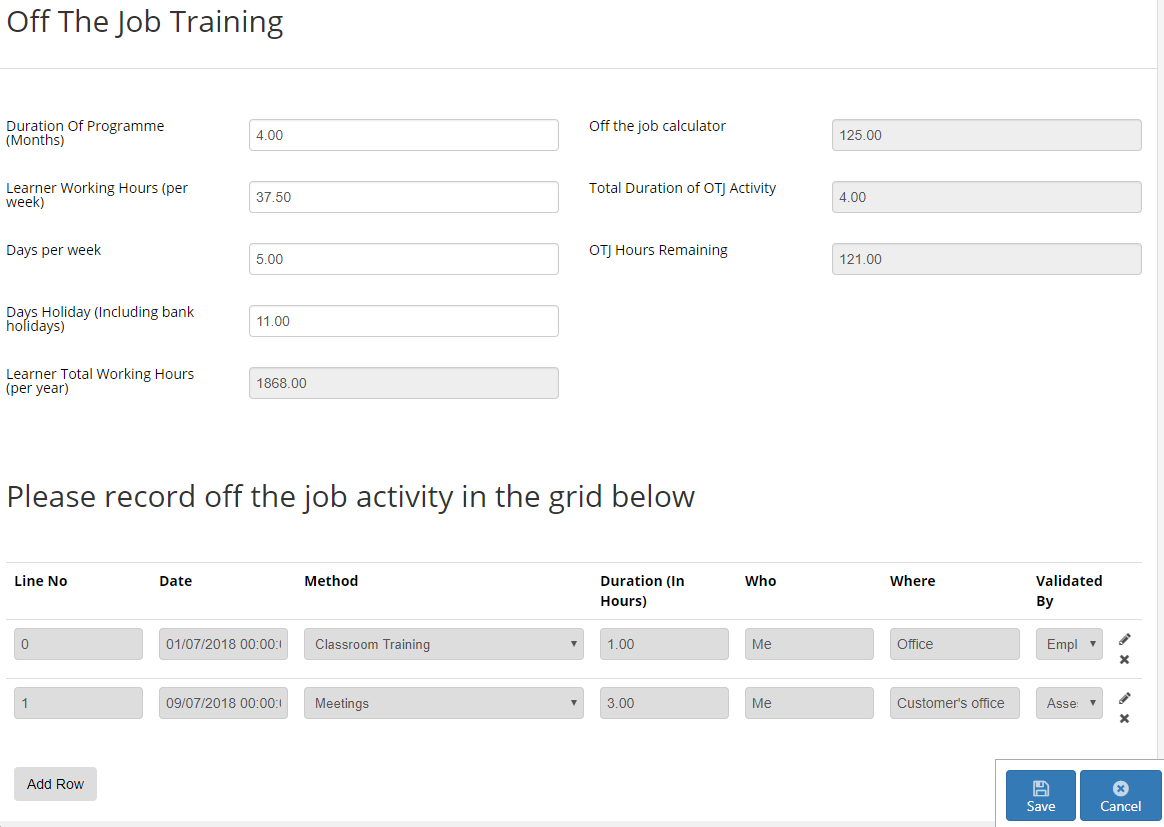
First, enter the programme duration, working hours per week, days per week and the learner’s total holiday allowance (including bank holidays) and click Save. This will populate the Learner Total Working Hours (per year) and Off the job calculator fields.
Learner Total Working Hours (per year) is derived using the following formula:
( (hours per week x 52) – (days holiday x (hours per week / days per week)) )
e.g. for the above example, the calculation would be:
( (37.5 x 52) – (33 x (37.5 / 5)) ) = 1950 – 247.5 = 1702.5 (rounded up to 1703)
Off the job calculator is derived using the following formula:
( Learner total working hours (per year) / (12 / duration of programme) ) x 0.2
e.g. for the above example, the calculation would be:
(1703 / (12 / 12) ) x 0.2 = 340.6 (rounded up to 341)
Next, click the Add Row button on the grid to add a new row. This is where off-the-job activity is recorded.
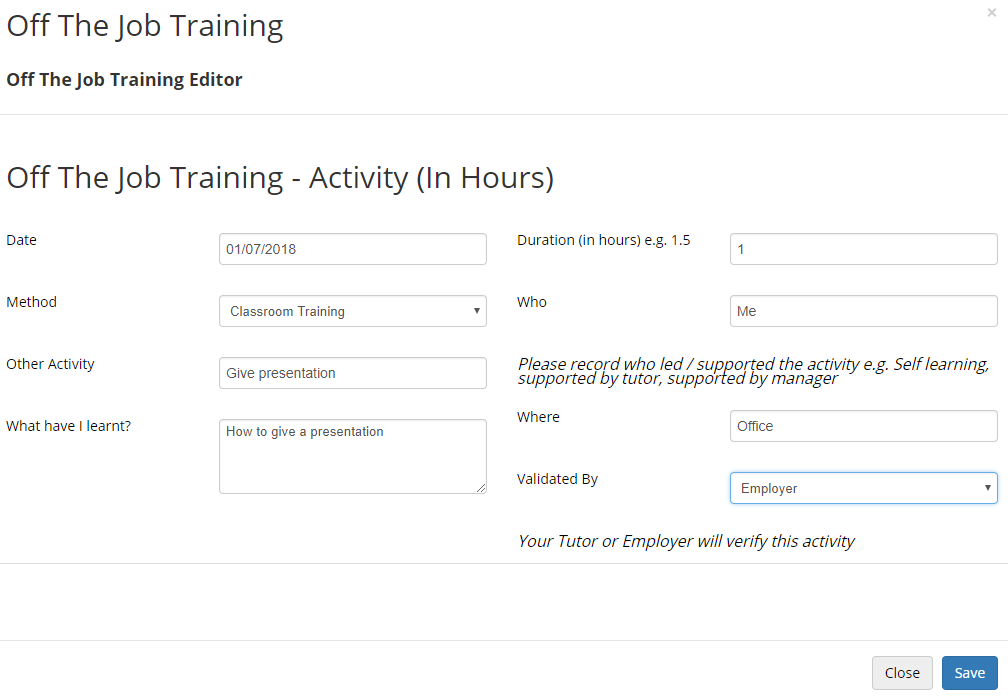
Complete the details as required and click Save. Click Save on the main screen to apply the changes. This will populate the Total Duration of OTJ Activity and OTJ Hours Remaining fields. The total duration adds together the durations entered on each row in the grid and then subtracts that figure from the Off the job calculator figure to get the hours remaining.
Off-the-Job Training Tab for Learner Login
Learners can view their off-the-job training details and add off-the-job activities. The tab must first be enabled in permissions:
- Go to Web User Editor on the toolbar.
- Search for and open the learner's user account.
- Click Custom Tabs at the bottom.
- There are two entries for Off The Job Activity (these are for displaying the details and the activity grid). Tick both boxes and click Save.
When the learner logs in, they will now see an option for Off The Job Activity on the toolbar. This is the same as the tab on the assessor login, except the fields at the top of the tab are not editable. The learner can add activity rows in the same way as described in the previous section.
Off-the-Job Training in Learning Plans
The Update Plan tab of the visits planner now has features relevant to off-the-job training.
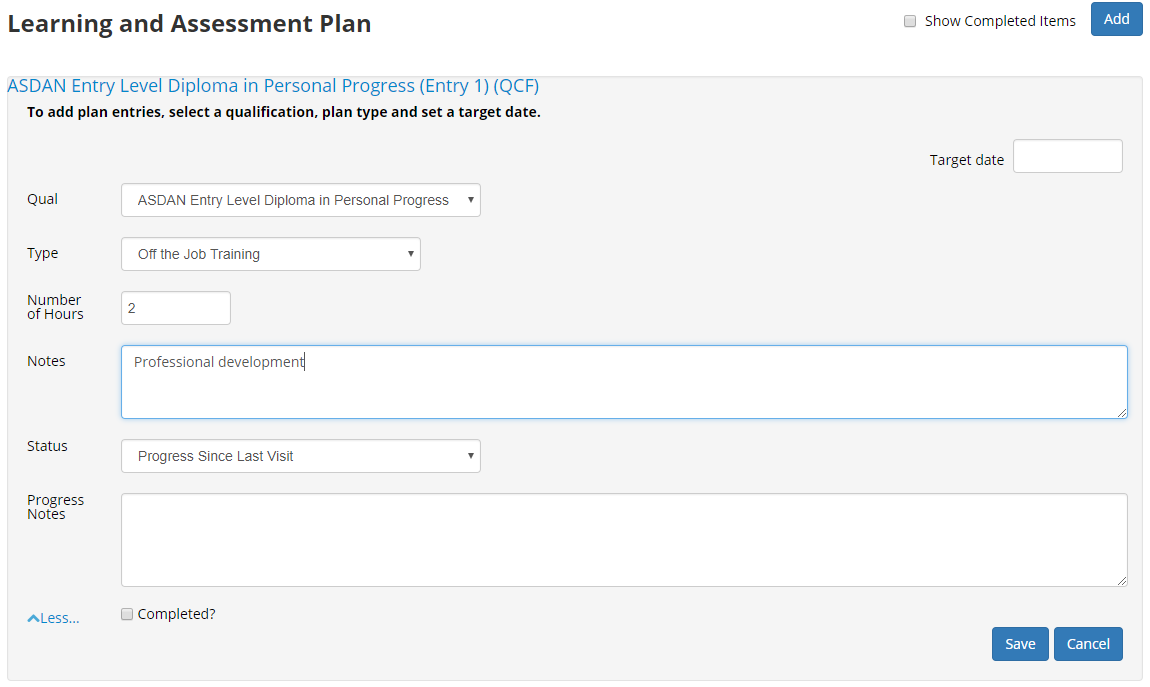
- Open a visit in the visit planner and go to the Update Plan tab.
- The Number of Hours field can be used to record off-the-job training hours. The Type dropdown box also has an option for off-the-job training.
Report Generation on App Form Completion
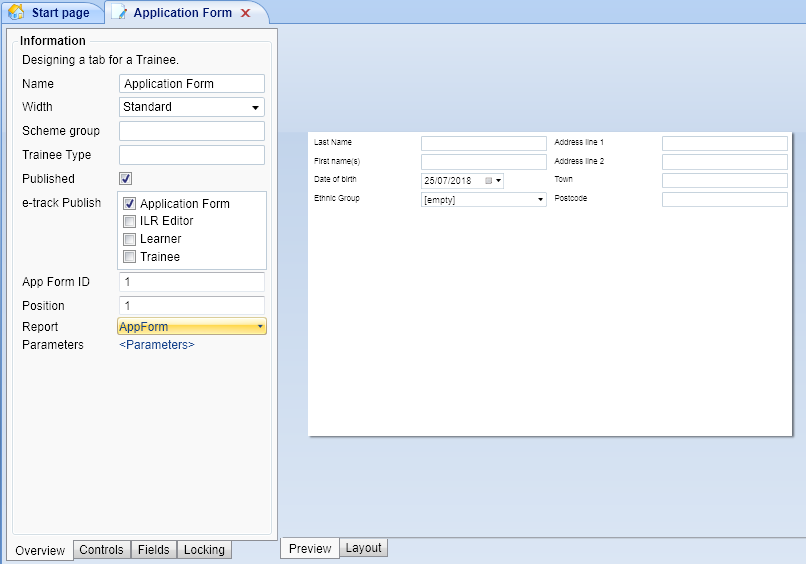
When creating an application form in the Maytas screen designer there is now an option to link it to a report so that the report is generated when the form is completed.
- In Maytas, go to Tools on the toolbar and click New / Load on the Screens panel of the ribbon.
- Browse to and open the screen for the application form.
-
There are two new fields on the Overview tab on the left of the screen designer: Report and Parameters (note that these will only be visible if the e-track Publish field is set to Application Form.
-
Click the dropdown box next to Report and click Select Report. This will open a window where you can choose the report (this may take a while to load, depending on the number of reports in the system).
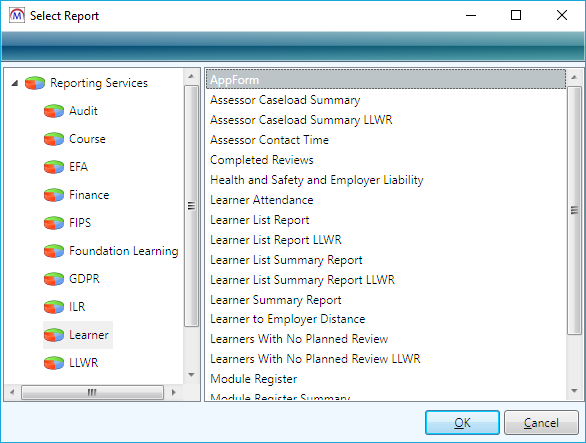
- Browse to and select the report and click OK.
-
If the report has parameters (e.g. a TRAINEEID parameter to limit the report to the learner record created by the app form), these can be set by clicking <Parameters>. This will open the Set Parameter Mappings window.
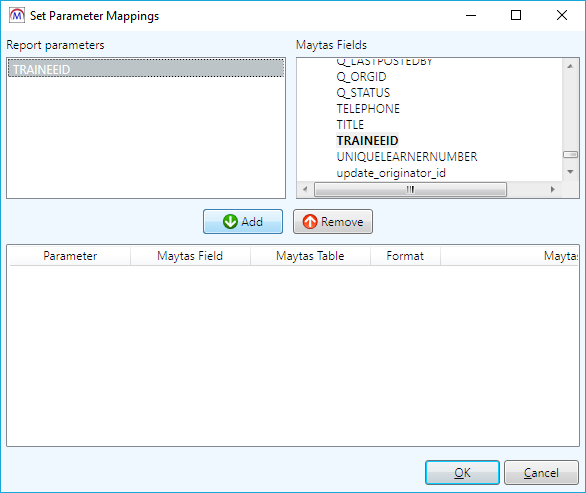
- Select the parameter in the top-left panel, then select the corresponding field to map to it from the list in the top-right panel.
- Click Add.
- Repeat steps 7 and 8 if there are additional parameters.
- Click OK.
- Click Apply to save the screen.
When the application form is completed, this will generate the linked report and place the output in the learner's file store.