Workflows (via Maytas)
Workflows created in Maytas Hub can be invoked from Maytas. This requires a permission to be set:
- Go to Tools | Edit Permissions.
- Select the user or group which requires permission.
- Go to the Commands tab.
- Expand the Workflows Integration section.
- Tick the box next to the Invoke Workflows permission and ensure the toggle box is set to Visible.
- Click Apply.
- Restart Maytas for the change to take effect.
Invoking a workflow for a learner
- Open a learner record.
-
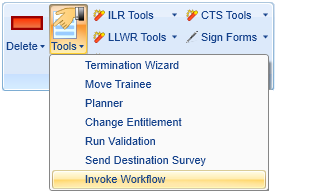
On the Actions panel of the ribbon, go to Tools | Invoke Workflow.
-
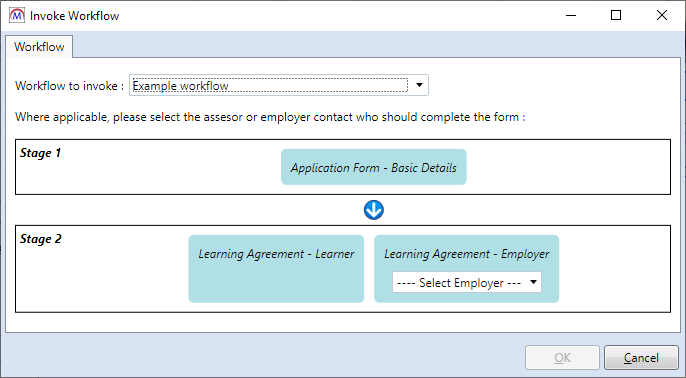
The Invoke Workflow screen will appear. Select the workflow to invoke from the dropdown box and select any options on forms as required.
- Click OK. A message will appear confirming that the workflow has successfully been added. Click OK to close the message.
- Click Apply to save the changes and invoke the workflow.
Invoking a workflow for a visit
Visit workflows can be invoked from the Diary tab on learner, assessor and employer records. However, a visit workflow can only be invoked on a learner if the learner is assigned to the selected visit.
Also please be aware that if a visit workflow is invoked on a learner and that visit has multiple learners assigned to it, the workflow will only be invoked against the first learner assigned to the visit.
- Open a learner, assessor or employer record and go to the Diary tab.
- Open the visit you want to invoke a workflow for.
- Click the
 button at the top of the visit window.
 -
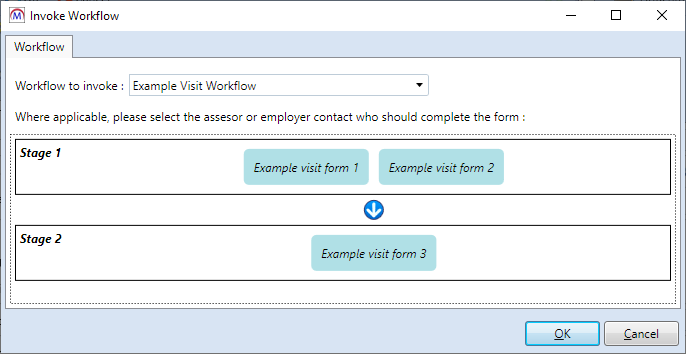
The Invoke Workflow screen will appear. Select the workflow to invoke from the dropdown box and select any options on forms as required.
- Click OK. A message will appear confirming that the workflow has successfully been added. Click OK to close the message.
- Click OK to close the visit, then click Apply to save the changes and invoke the workflow.
Workflow Completion Email
When a workflow is completed, a configurable confirmation email can be sent to all users within the workflow (including the user who invoked it) advising that it is complete, along with the date and time of completion.
To enable and configure the email:
-
In Maytas, click the M5 button at the top left and select Options.
-
Go to Admin on the left (under the Maytas Hub Online header).
-
Locate the Data Collection section on the right.
-
Tick the boxes for the two relevant config options:
-
Email body sent to selected Workflow User types upon completion of a Workflow - Enter the body of the email you wish to be sent upon completion of a workflow.
-
List of Workflow User types to email upon completion of a Workflow - Enter the user types that should receive the email (Invoker, Assessor, Employer or Trainee), with each type separated by a semicolon, e.g.:
Invoker;Assessor;Employer;Trainee
-
-
Select the required columns from the list.
-
Click OK.