Workflows
Workflows can be created in Maytas Hub for data authentication forms and visit forms. A workflow in Maytas Hub is a series of interlinked forms which can be sent to a user or users for completion in a particular sequence or series of stages. For example, you could specify that all forms in stage 1 must be completed by a learner before the forms in stage 2 can be completed by their employer.
Videos
Overview
5.20 SP2 Improvements
Setup
To configure workflows, an assessor user must be given the Edit Workflows permission:
- Go to Web User Editor on the sidebar.
- Search for and open the user or group to give the permissions.
- Click Permissions to expand the list of permissions.
- In the Data Collection section, tick the Edit Workflows permission.
- Click Save and restart Maytas Hub.
The Maytas Hub base URL config must also be set:
- Go to Settings on the sidebar and click System configuration.
- Go to Admin on the left.
- In the General section, tick the box next to the config Base URL and enter your Maytas Hub URL (e.g. https://myserver/MaytasHub).
- Click Save.
Creating a Workflow
-
Go to Data Authentication on the sidebar.
-
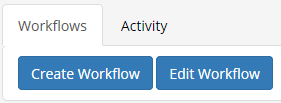
Click the Create Workflow button.

- Enter a name for the workflow and select the type of workflow (trainee or visit). For this example we will create a trainee workflow.
-
On the right side of the screen, click the
 buttons to expand the Trainee forms, Employer forms and Assessor forms sections and display the available forms.
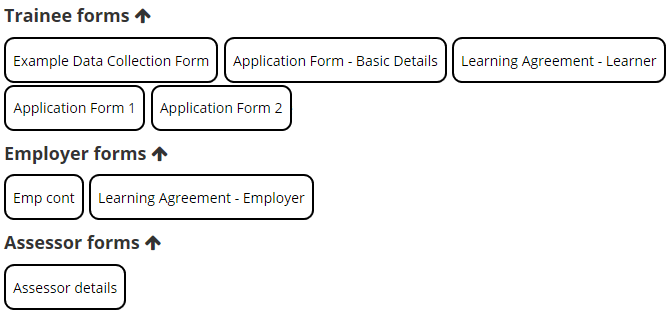
- Click and drag a form into the grey area under Forms.
-
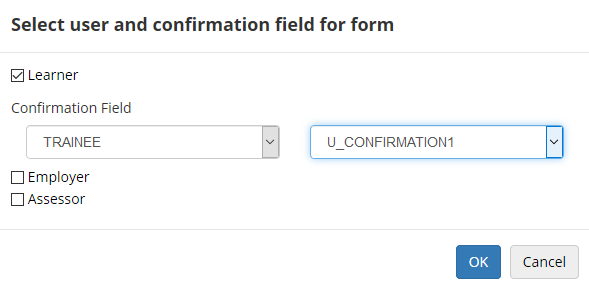
You will be prompted to select the type of user that will complete the form, along with a confirmation field for the form. Note that the field must appear on the form, and each form MUST use a different confirmation field. Only one type of user can be selected per form. Click OK when finished.
A confirmation field is a field which has been set to be tracked for auditing. More information can be found here.
-
The form will now appear green in the central area for stage 1.

At this point there are several options:
- The workflow could be saved and completed as it currently stands.
- Additional forms could be added to this stage.
- Another stage could be added with one or more forms.
For this example we will add another stage with two forms. What this means is that when the workflow is deployed, the form in stage 1 must be completed and confirmed before the forms in stage 2 can be completed.
-
Click the Add button on the left to add another stage.

Note that a Delete button appears for if you want to delete a stage.
-
Drag two more forms into stage 2. For this example we will use a learner form and an employer form.

- Tick the Published box.
- You can optionally tick the Once Only box to enforce a rule that the workflow can only be assigned to a user once.
- Click Save.
The workflow is now ready to be used.
Invoking a Workflow
Once a workflow has been set up, it can be invoked for specific users.
Currently a workflow can only be invoked from a learner record. The ability to invoke workflows that only include assessor or employer forms via an assessor or employer record is planned for a future release.
To invoke a workflow:
- Open a learner record and click the Invoke Workflow button on the Summary tab.
- Select the required workflow from the dropdown box which appears.
-
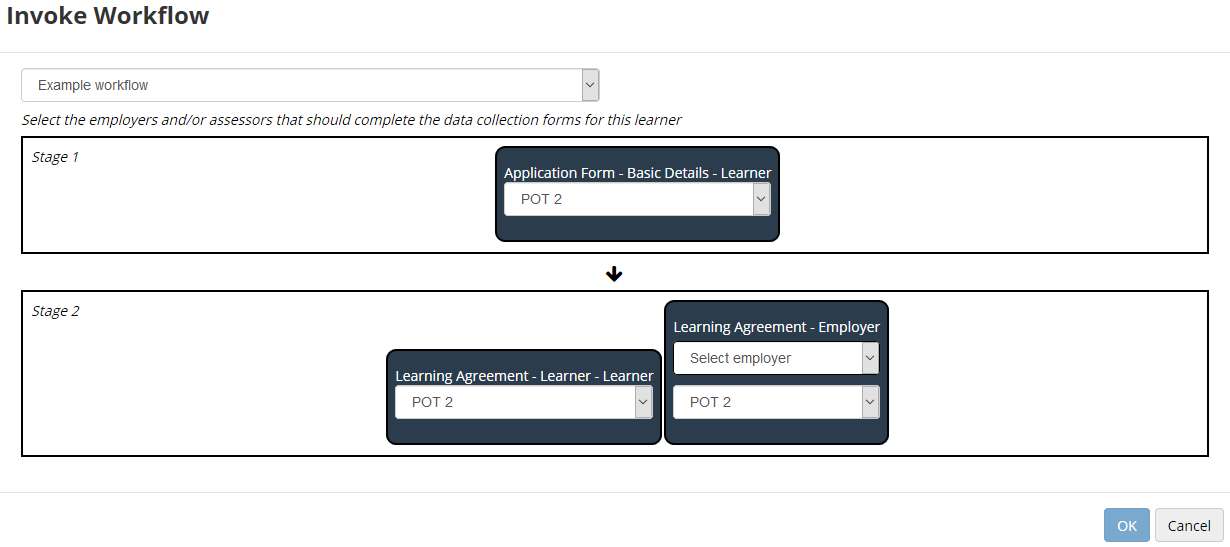
You will see the layout of stages and forms for the workflow. As the workflow is being invoked on a learner record, the workflow will automatically assign any learner forms to this learner. However, if the learner has multiple POTs then you can specify which POT a form should apply to.
Similarly, employer and assessor forms require you to choose the specific assessor or employer who should complete the form, along with the POT. If a learner has a key contact specified for an employer, the contact will be displayed with the employer name and the form will be sent to them rather than the employer user.
- Click OK once all dropdown boxes have been selected for each form.
The forms will then be added to the relevant users' data collection queues. In the example above, the application form in stage 1 would be available for the learner to complete straight away, but the learning agreement forms in stage 2 would only be available for the learner and employer to complete once stage 1 had been completed.
Invoking a Workflow from Maytas
Workflows can also be invoked from Maytas. See the Workflows (via Maytas) page for details.
Editing a Workflow
To edit an existing workflow:
- Select Data Authentication on the sidebar.
- Click Edit Workflow.
- Choose the workflow from the dropdown list and click Load.
You will see the same workflow editor as when creating a new workflow.

To move a form between stages, simply click and drag it to a different stage.
To change the confirmation field for a form, click the  button on the form, choose the field as required and click OK.
To remove a form from a workflow, click the  button and click Delete.
Data Collection Forms Activity
The status of all completed and outstanding data collection forms (including those invoked with a workflow) can be viewed by selecting Data Authentication on the sidebar and going to the Activity tab.
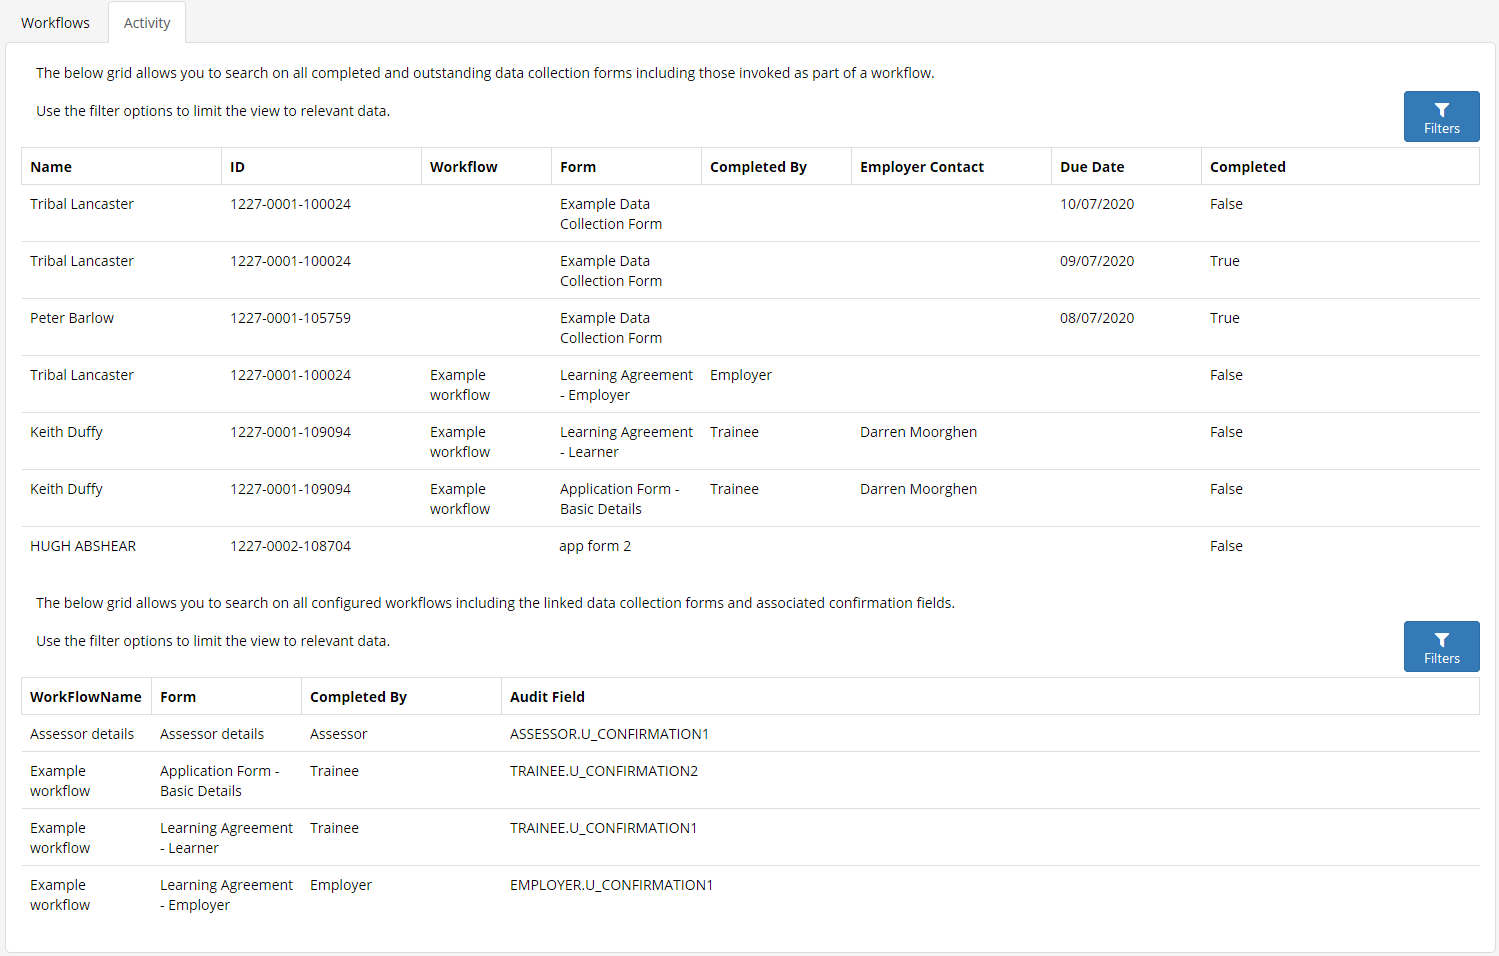
The top section lists all data collection forms assigned to users. The data can be filtered by clicking the Filters button next to the table.
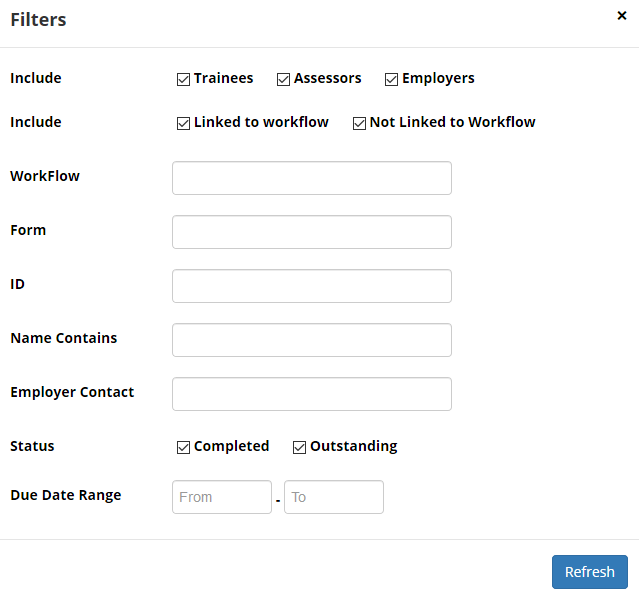
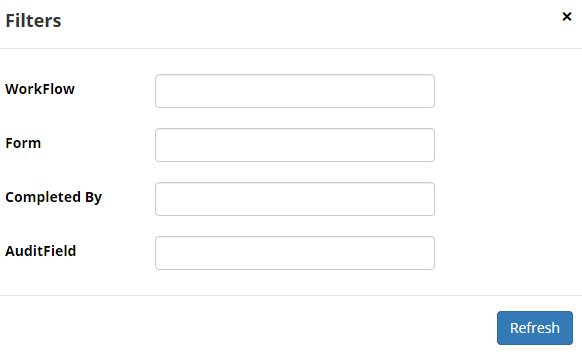
The bottom section lists all configured workflows. The data can be filtered by clicking the Filters button next to the table.
Default Assessors and Employers on Learner Forms
Default assessors and employers can be configured for learner forms being completed by an assessor or employer. When these options are selected, they override the ability to manually select an assessor or employer to assign a form to when invoking a workflow against a learner.
Default to latest assessor/employer
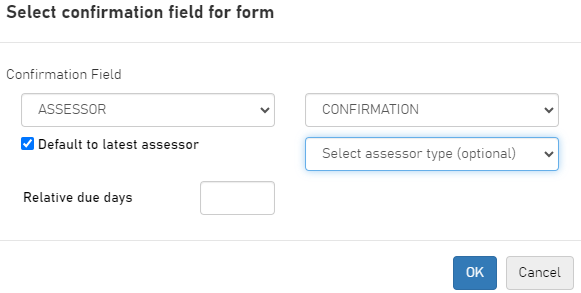
When a learner form is added to a workflow and the Employer or Assessor box is ticked, a new Default to latest assessor/employer checkbox is available:
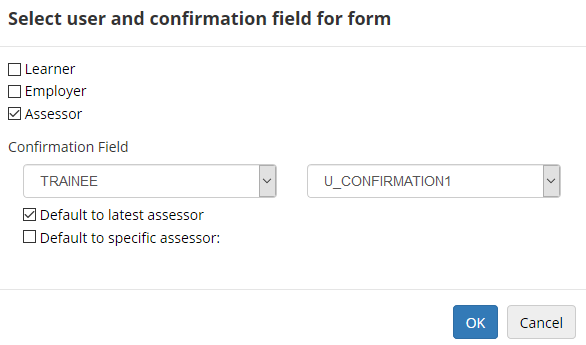
If this is ticked and the workflow is invoked against a learner, the form will be assigned to the latest live assessor/employer record associated with the learner, ordered by start date.
Additionally, you can also choose to specify the assessor or employer type. For example, if a learner has two active assessor records associated with them - an Assessor and a Tutor - selecting the type will tell the workflow whether to use the Assessor record or the Tutor record. If the type is not specified, the record with the most recent start date will be selected.
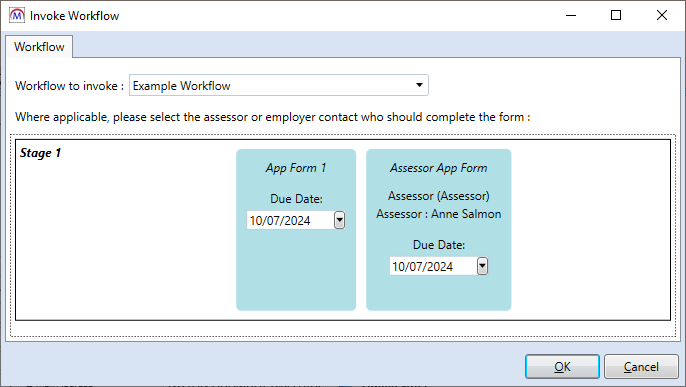
When the workflow is invoked in Maytas 5, the type that has been used is displayed in parentheses next to the assessor or employer.
When all forms in a stage have been completed and the next stage is made available, the workflow will check that the assessor/employer record is still live and will change to the latest live record if not.
Default to specific assessor/employer
This option lets you specify an assessor or employer to be assigned to a form before the workflow is invoked. However, assessors and employers must have a field set for them to appear in the list of available assessors/employers to select from. The fields are:
- Assessors - ASSESSOR.ALLOW_DEFAULT_WORKFLOW_USER
- Employers - EMPLOYER.ALLOW_DEFAULT_WORKFLOW_USER
A value of Y in these fields makes the assessor or employer available to select for this option. The fields can be added to tabs in the Screen Designer.
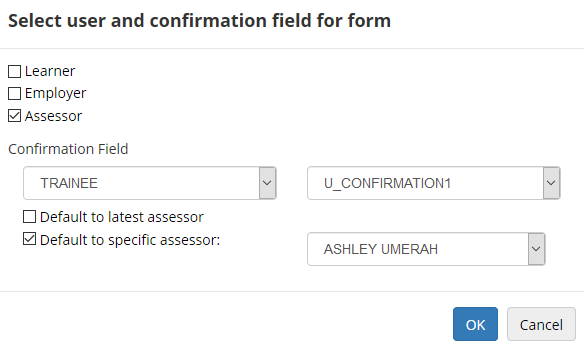
Please be aware that assessors and employers that are not associated with the learner can be selected for this option.
If no assessors or employers have a value in ALLOW_DEFAULT_WORKFLOW_USER, the Default to specific assessor/employer option will not appear.
With both options ticked
If Default to latest assessor/employer and Default to specific assessor/employer are both ticked, the workflow will select the latest assessor/employer record if one is available. If no live record is found, the specific record is selected instead. This may be useful for completing forms where, for instance, learners are unlikely to have had assessors and employers assigned to them yet.
Relative Due Days
The relative due days can be specified for each form, which sets the due date for a form to the specified number of days after a workflow stage is invoked. For example, if a stage 1 form has 3 relative due days entered and the workflow is invoked on 12th February, the due date will be set to 15th February.
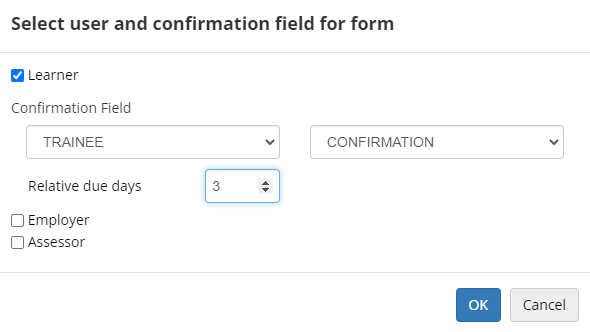
Setting the relative due days is optional, and if left empty then no default due date will be applied to a form. It is also possible to manually change or add a due date when a workflow is invoked.
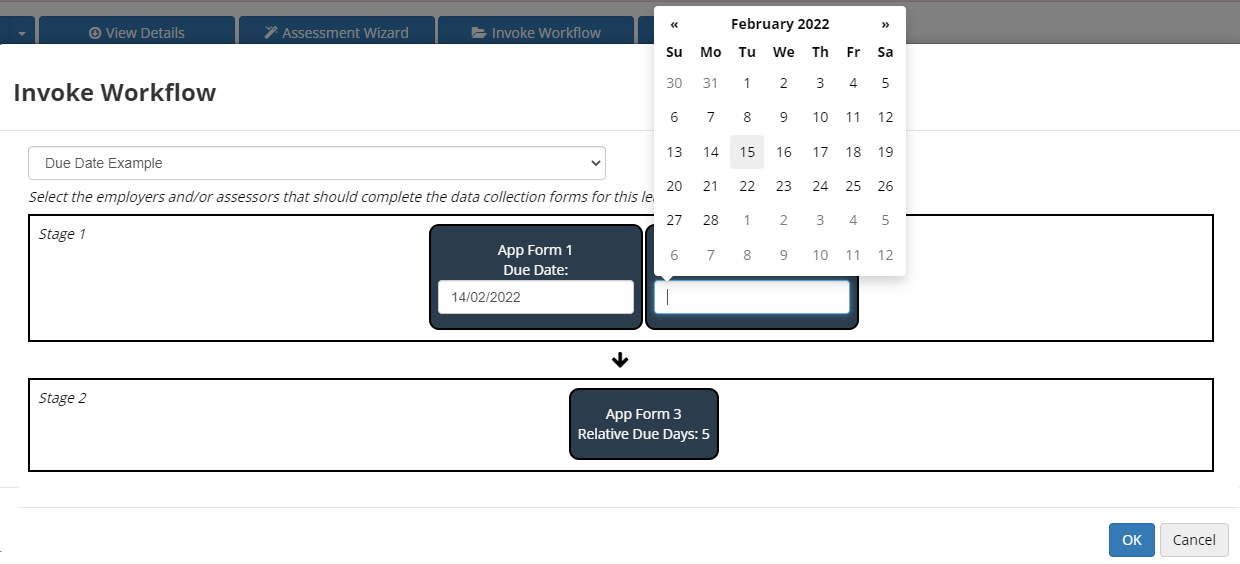
If a due date is set for a form, it will be displayed to the user when they are prompted to complete the form.
If a workflow has more than one stage, only stage 1 will have its relative due dates applied to start with. Once stage 1 has been completed, the relative due date will be applied to the next stage, based on the completion date of the previous stage. For example, if all forms in stage 1 are completed on 14th February and a form in stage 2 has relative due days set to 5, the due date for that form will default to 19th February.
If expiry dates are enabled, these will work relative to any due dates that are set.
It is also possible to include the due date and expiry date in data collection reminder emails sent to users by using the {{duedate}} and {{expirydate}} parameters in the relevant email body config. e.g. Please complete this form by {{duedate}}. The link will expire on {{expirydate}}.
Invoking Workflows as a Maytas User
Maytas Users can invoke workflows for a learner. This requires a user permission to be set:
- Go to Web User Editor on the sidebar.
- Search for and select the Maytas User.
- Click Permissions to expand that section.
- Under the Data Collection header, tick the Can invoke workflows permission.
- Click Workflows to expand that section.
- Tick each workflow that you want to be accessible to the Maytas User.
- Click Save.
The user can then
Active Workflows
Assessor and Maytas users can view a learner's active workflows and at what stage each workflow is at.
This feature is enabled by default via a configuration option, which can be disabled if required as follows:
- In Maytas Hub, go to Settings on the sidebar.
- Click the System configuration button.
- Go to Assessor Login on the left (under the Maytas Hub Online header).
- Locate the Trainee section on the right.
- Locate the Show active workflows on Trainee Summary option and set the toggle button to OFF.
- Click Save.
With the feature enabled, active workflows are displayed at the top of a learner's Summary page. Each stage is shown along with its status.

Clicking a stage will open a pop-up at the top-right of the screen which shows the forms to be completed for that stage, who needs to complete each form and the deadline (if applicable). Click the pop-up to close it.
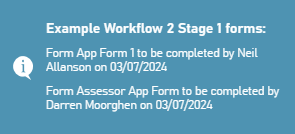
As stages are completed, this will be reflected in the Active Workflows section.

To show completed workflows, click the Show Complete toggle button at the top-right of the panel.

If a workflow has been invoked against a learner more than once, the most recent invocation will be displayed.
Workflow Completion Email
When a workflow is completed, a configurable confirmation email can be sent to all users within the workflow (including the user who invoked it) advising that it is complete, along with the date and time of completion.
To enable and configure the email:
-
Go to Settings on the sidebar.
-
Click the System Configuration button.
-
Go to Admin on the left (under the Maytas Hub Online header).
-
Locate the Data Collection section on the right.
-
Tick the boxes for the two relevant config options:
-
Email body sent to selected Workflow User types upon completion of a Workflow - Enter the body of the email you wish to be sent upon completion of a workflow.
The following parameters can be used in the email body, which will be replaced with the relevant data when the email is sent:
-
{{fname}} - Shows the user's first name.
-
{{lname}} - Shows the user's surname.
-
{{user}} - Shows the user's username.
-
{{workflowname}} = Shows the title of the workflow that was completed. Note that this does not show the names of each form within the workflow, as this is not currently possible.
For example, if the body was set as:
This is to confirm that {{user}} has completed the assigned forms for {{workflowname}}.and an email was sent to user jsmith after completing a workflow called Induction, the resulting email body would be:
This is to confirm that jsmith has completed the assigned forms for Induction.
-
-
List of Workflow User types to email upon completion of a Workflow - Select the user types that should receive the email.
-
-
Select the required columns from the list.
-
Click Save.