5.14 SP2 Maytas Release Notes
Note regarding submissions
We would like to remind providers to create a submission early and check for any errors using reports from the appropriate software (i.e. the FIS or LLWR-Inform). Welsh providers should also remember to download their ULI file. After submission to the ESFA or DfES, providers should check that data has submitted correctly using the available reports. Providers should check that all their expected starts and completions are submitted correctly, and that start and outcome payments correctly match the PFR or ACE funding reports.
Our support desk gets extremely busy in the days prior to the submission deadlines, and although we try and prioritise submission-related queries, we cannot guarantee assistance if queries are sent late. If you do encounter any issues, please ensure that you contact Maytas Support as soon as possible, as we can only rectify issues of which we are aware. We also recommend checking Maytas.net regularly for information on any known issues and solutions. Tribal cannot be held responsible for any issues caused by your failure to comply with this advice.
Technical specification
The latest Maytas and e-track technical specification can be found here.
Once the upgrade has been completed, the version number should be checked to ensure it has been successful.
- Start Maytas and go to Support on the toolbar.
- Click About.
- The version numbers should read 181.20 / 5.14.6600.2. If you have any other version, please ensure you have followed the upgrade instructions correctly. If you require assistance, please contact Maytas Support.
It is the responsibility of customers to ensure that users carry out any required user acceptance testing and sign off on the upgrade.
Complete the Upgrade
Features Added in the Upgrade
These are the main updates in the upgrade:
- Winning PCRs for 5.14
- Funding model 36 plans for Financial Planning
- Quarterly employer invoicing
- Employer terms and costs for the AS
- Fixes to a number of issues
Reports Library 1.0.2.7 is also included in the upgrade but must be installed separately. This is detailed in the Upgrade Guide. If you are a hosted customer, please contact the Service Desk to arrange for the reports library update to be applied.
Re-Import the FIS Data Sets
The FIS data sets must be re-imported for this upgrade, even if they were imported in a previous upgrade.
It is essential that the latest aim information is imported into Maytas for use by the ILR export. This should be done by importing the relevant information directly from the Data Service’s Funding Information System (FIS). To do this, you must have the FIS installed and correctly configured (please refer to the Data Service’s instructions for setting up the FIS).
Please ensure you have the latest version of the FIS with the 2018/19 components installed.
Once the FIS is installed and configured, the information can be imported as follows:
- Perform a sync in Maytas 5, then restart Maytas 5.
-
Go to Exports | Uploads | Upload FIS Data Sets.
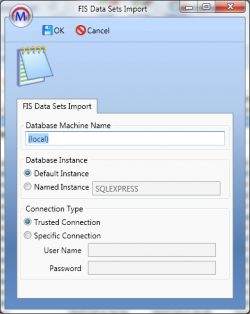
- There are three items to configure:
- Database Machine Name – If the FIS is installed on the same machine that you are using for Maytas 5, this can be left as (local). Otherwise, enter the machine name of the SQL server where the FIS database is held.
Database Instance – If the SQL server holding the FIS database has a named instance (e.g. MACHINENAME\INSTANCENAME), select Named Instance and enter the instance name. Otherwise leave this as Default Instance.
If you have no named instance and Default Instance does not work, you may need to select Named Instance and leave the instance name blank.
- Connection Type – This is the login for the SQL server holding the FIS database. Trusted Connection will use Windows authentication. If you wish to specify the login details, select Specific Connection and enter the credentials.
- Click OK. The FIS data will now be imported.
- If you have an Adult Skills budget contract and a transition factor, this must be entered on the contract:
- Go to Management on the toolbar and click Contracts on the ribbon.
- Select the relevant contractor, then select the Adult Skills contract on the right.
- Click the
 button.
 - Go to the Uplifts tab.
- Enter the ASB Transition Factor and click OK.
- Click Apply to save the change.
Import Latest Postcode Data
The latest postcode file available from the ESFA should be imported into Maytas. The 2017/18 postcode file can be downloaded from here:
https://www.gov.uk/government/publications/uplift-factors-and-postcode-files
Once downloaded, the file can be imported as follows:
- Go to the Exports tab.
-
Click the Uploads button and select Upload Postcodes | Upload Post Code Data (2017/18).

- Browse to and select the downloaded zip file and click Open.
- The file will now be imported. Click OK on the confirmation message which appears.
Note on the Funding Cache
By default, the funding cache will update overnight so that funding information in Maytas uses the newly-imported FIS and postcode information. Please check with your system administrator if you are unsure if or when the funding cache is updated on your system. You can also manually set the funding cache to update by going to Management | Profiles and clicking the Funding Cache button, though please be aware that this may take a long time and may use a large amount of system resources, which could affect performance for other users on the system.
Maytas 5 Version 5.14.6600.2 Release Notes
Maytas Certificate Renewed
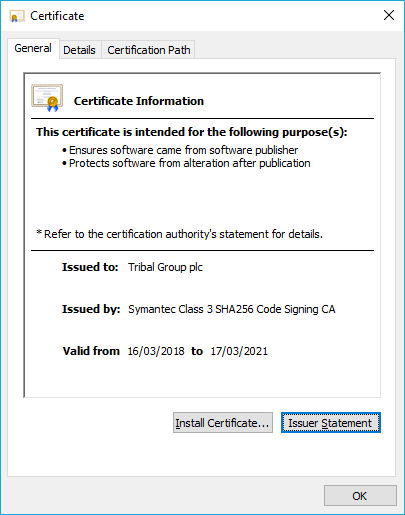
The certificate for Maytas has been renewed. To view this:
- Go to your Maytas client installation folder.
- Right-click Maytas5WPF.exe and select Properties.
- Go to the Digital Signatures tab.
- Select Tribal Group plc from the signature list and click Details.
- Click View Certificate.
Maytas 5 Version 5.14.6600.1 Release Notes
Winning PCRs
Select All Users in Tab Permissions
When editing tab permissions, it is now possible to set a permission for all users for a specific tab (e.g. make a tab read-only for all users). To do this:
- In Maytas, go to Tools | Edit Permissions.
- Click Tabs on the ribbon.
- Select the tab on the left.
-
Right-click the Visibility header on the right and select Set all visible, Set all readonly or Set all hidden.
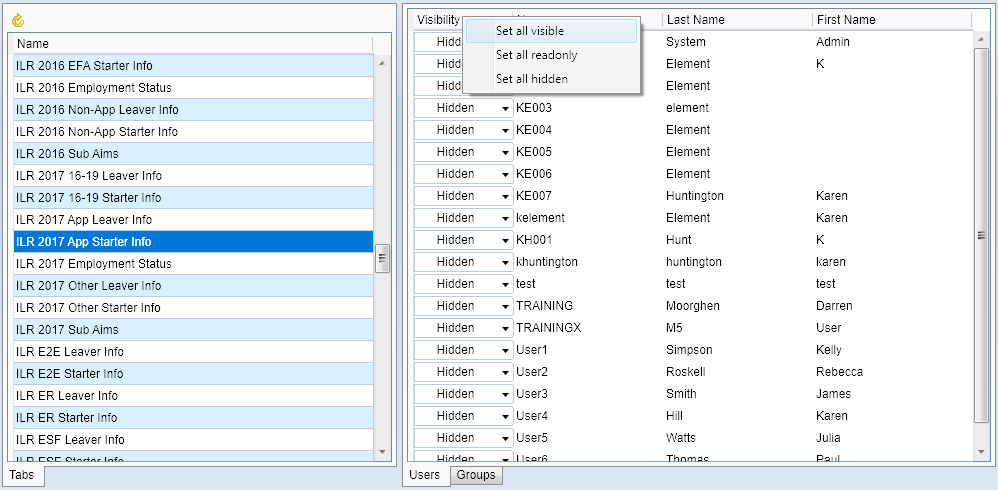
This will set the chosen option for all users.
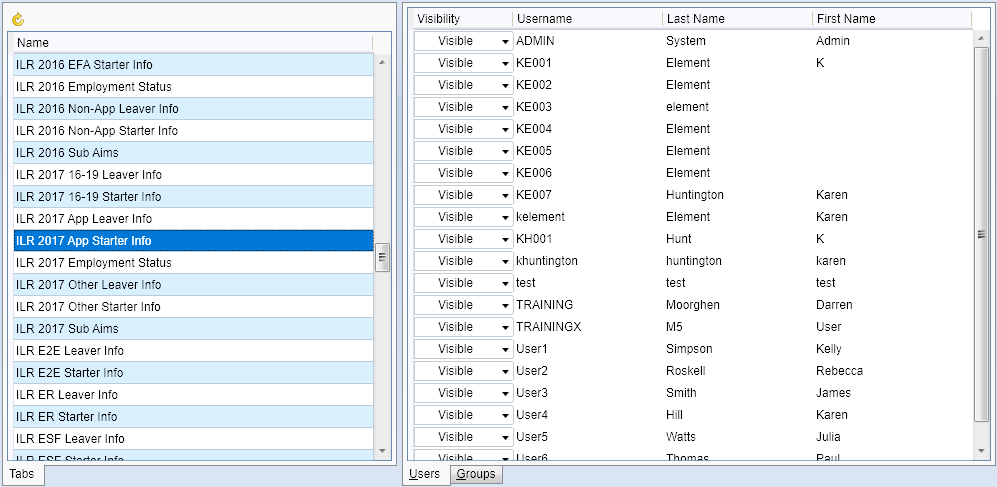
- Click Apply and restart Maytas for the changes to take effect.
Validation Rule Builder – Apply Multiple Conditions Per Rule
The validation rule builder now allows you to apply more than one condition to each rule, which provides more flexibility for bespoke validation. To do this:
- In Maytas, go to Tools | Validation.
-
Choose a rule area on the left and double-click New Basic Validation Rule.
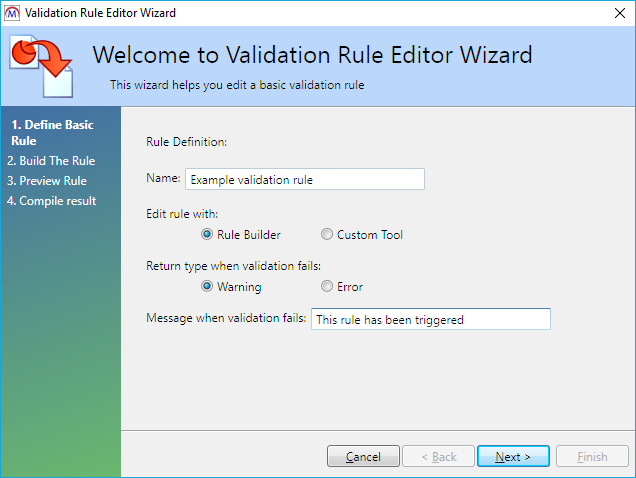
- Enter a name and a message for the rule. Ensure that Rule Builder is selected for this example and choose either warning or error.
-
Click Next.
-
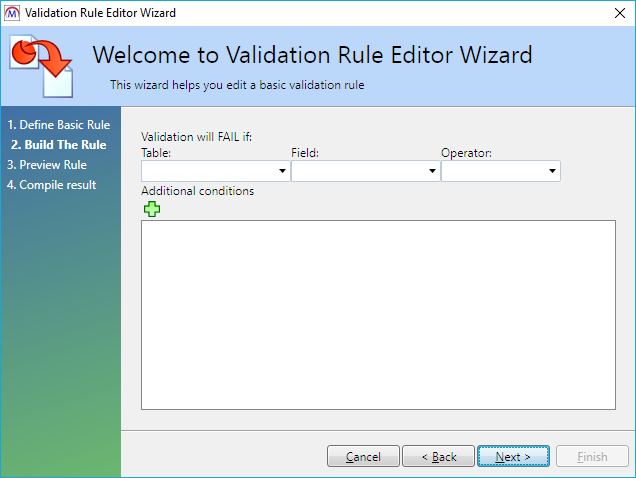
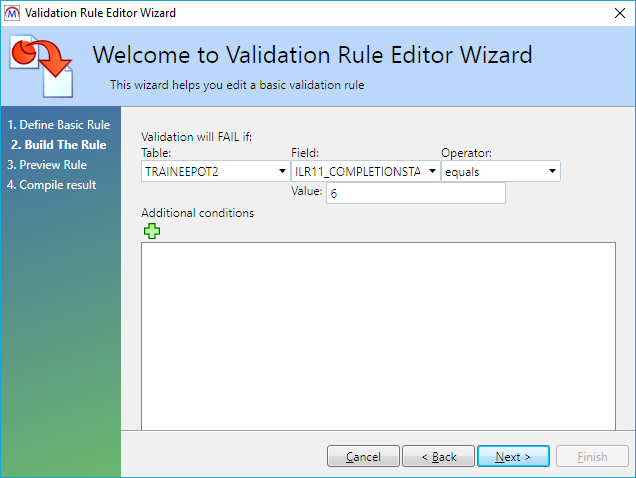
The rule conditions are specified on this screen. Choose the Table, Field and Operator for the first rule and enter a value if relevant (e.g. for equals / not equals).
-
To add additional conditions, click the
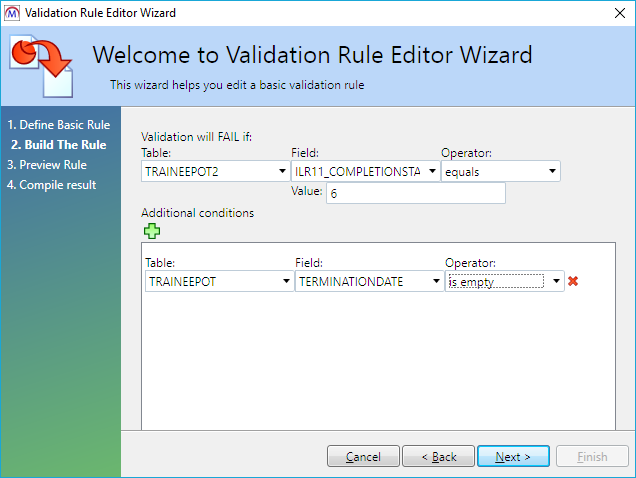
 button, then select the Table, Field and Operator (and value if relevant) as before.
-
Add additional conditions as required. When finished, click Next.
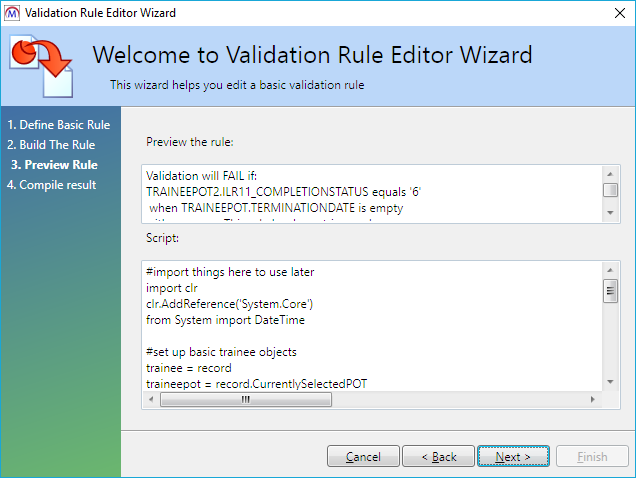
- You will see a summary of the rule. Click Next when ready.
- Click Finish.
- Sync Maytas for the rule to be propagated to all clients.
Financial Planning Updates for Funding Model 36
Financial Planning has been updated so that plans for funding model 36 can now be created.
Create a Funding Model 36 Plan
- Go to Management | Financial Plans.
- Double-click New Financial Plan.
- Choose the contract for the plan (note that for FM36 this MUST be a contract for 2017/18 or later) and click Next.
-
Enter a name for the plan and click Next.
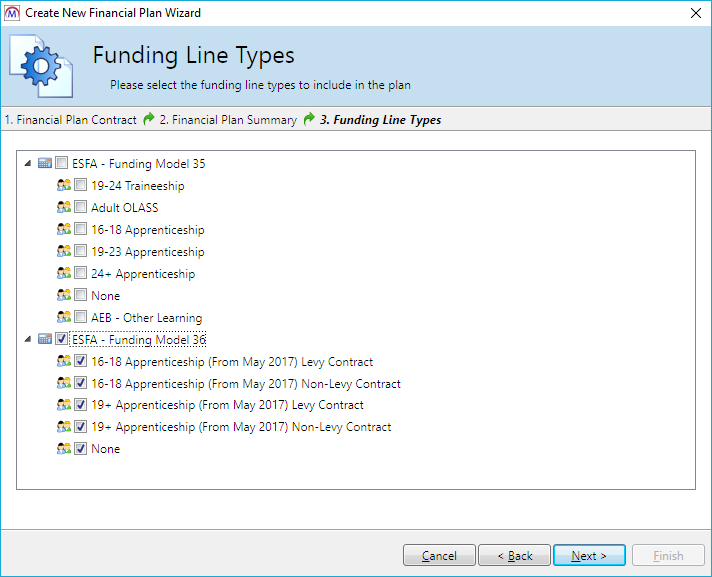
- On this screen you can choose the funding models and funding line types to include in the plan, which can be a combination of FM35 and FM36. For this example, we will choose funding model 36. Click Next.
- Choose the years and periods to include in the plan. For this example, we will choose all available years. Click Next.
- Click Finish to create the plan.
Default Assumptions
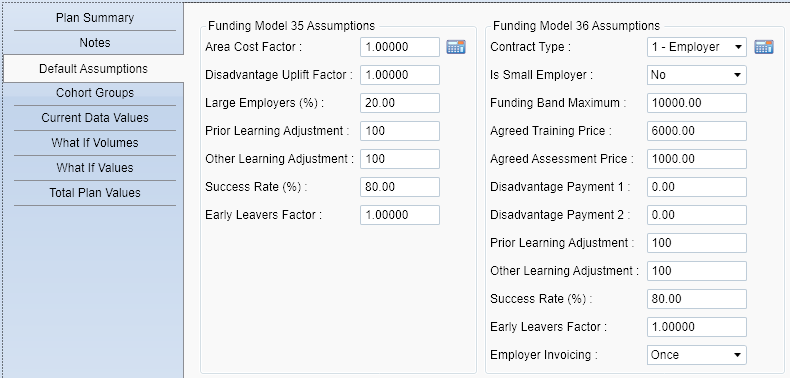
The Default Assumptions tab now separates assumptions for funding models 35 and 36. As before, the calculator buttons can be clicked to automatically calculate average assumptions based on your data. You can also manually change assumptions as required.
For information on funding terms and what they mean in terms of funding calculations, please refer to the ESFA's published funding documentation.
Cohort Groups

The Cohort Groups tab now has a Field View dropdown box at the top right which lets you choose whether to show FM36 assumptions, FM35 assumptions or both.
When editing a cohort group, the Field View box is also available at the top-right of the screen so that you can toggle between the appropriate assumptions for each funding model.
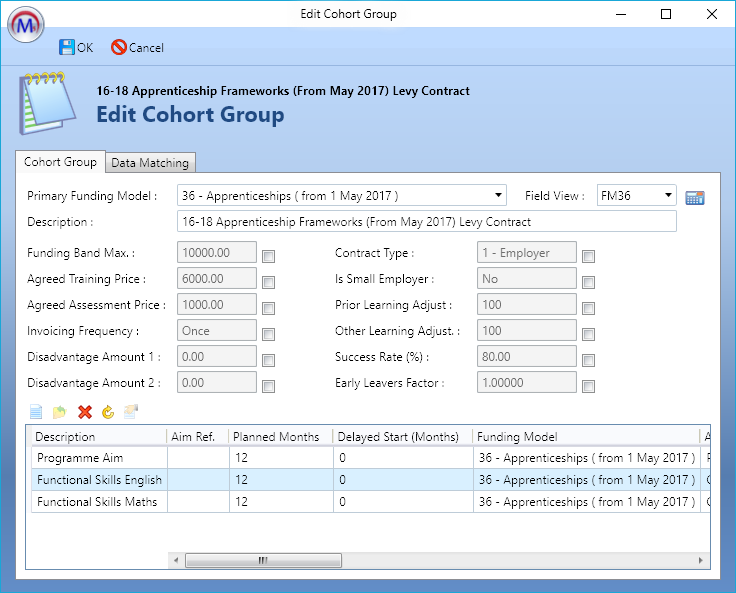
When editing an aim from the grid, the fields available on the Funding Factors, Aim Rates and Type and Specific Aim Details tabs are different depending on which funding model is selected on the Aim Details tab.
Forecast Completion Rate
The forecast completion rate calculation can be found on the Claim Details calculations tab for FM36:
- Open the record for a learner on funding model 36 and go to the Claim Details tab.
-
On the Calculations tab, the forecast completion rate can be found in the framework uplift section.
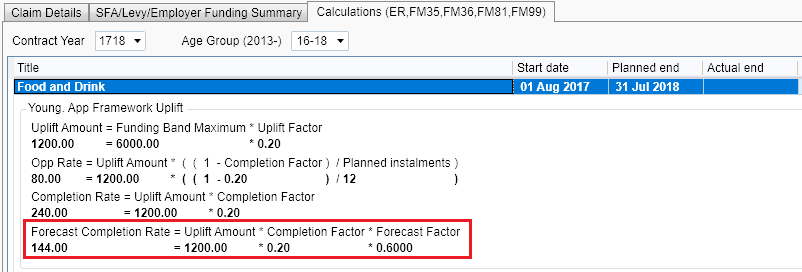
Note that this uses the default forecast factor, which is overridden in financial plans by the success rate assumption value.
Employer Balancing Payments
Employer balancing payments are included in the what-ifs and current values for financial planning for FM36 plans where the funding band maximum is less than the total price (for the what-if values, this is determined in the assumptions where Funding Band Maximum is less than Agreed Training Price + Agreed Assessment Price).
The following assumptions are made for employer balancing payments:
- Invoicing is assumed to be in advance.
- The payments are not invoiced after the actual end date.
- Where there is a residual change in price, the invoicing frequency starts again from the price date.
- Where there is a change in price after the planned payments, a one-off balancing payment may be generated, providing that the actual end date has not been reached.
Quarterly Employer Invoicing
Employer placement invoicing can now be done on a quarterly basis. Note that this requires the Allowances and Payments module.
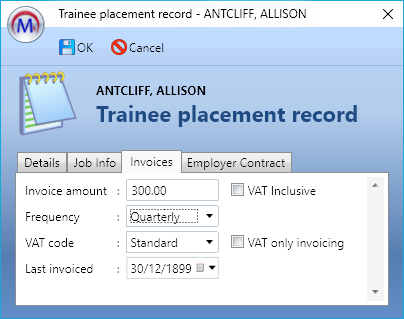
- Open a learner record and go to the Summary tab.
- On the Employer / Personnel grid, select an employer and click Edit.
- Go to the Invoices tab.
- The Frequency box now includes an option for Quarterly.
- Amend other values as required and click OK, then click Apply.
Note that fractional quarters are not calculated – i.e. the full amount per period will be invoiced.
Employer Terms and Costs
To meet new requirements for the Apprenticeship Service (AS) and levy funding, employer contract terms agreed with a training provider can now be recorded against the employer. The terms can then be used for invoicing purposes (note that this requires the Allowances and Payments module).
Add the Contract Terms
- Open the employer record for the employer you wish to add contract terms to.
- Go to the Contracts tab.
-
Click the
 button to add a new row.
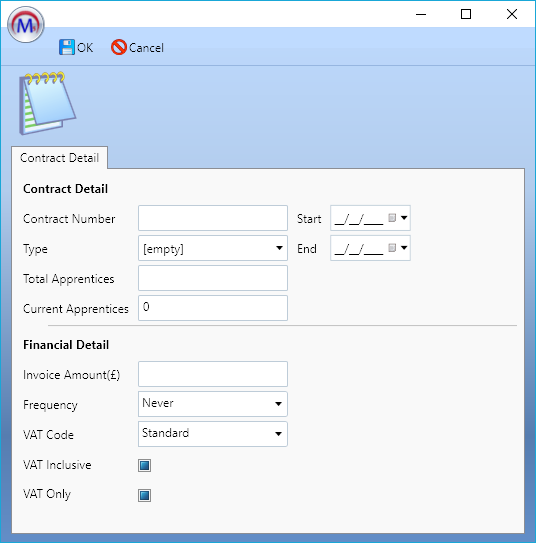
- Complete the contract details:
- Contract Number – This can be any number you want providing it is unique from other used contract numbers. This number is then entered against learners to link them to the contract (detailed later in these instructions).
- Type – This can either be fixed or ongoing. It has no functional purpose other than to describe the type of contract.
- Total Apprentices – Enter the total number of apprentices that the contract should have.
- Current Apprentices – This is not entered, as it is automatically determined by the number of learners attached to the employer who have been assigned the contract number.
- Start / End – These are the start and end dates of the contract terms. Invoices will only run for learners attached to the contract where their learning start/end dates overlap with the contract terms start/end dates. For example, if a learner is in learning from 01/10/2017 to 01/09/2018 and the contract terms are from 01/08/2017 to 31/07/2018, then invoices for this contract will only be generated for the learner from 01/10/2017 until 31/07/2018.
- Invoice Amount(£) – This is the amount in pounds which should be generated for each invoice.
- Frequency – This is the frequency in which invoices should be generated.
- VAT Code – This is the VAT code to use for the invoices.
- VAT Inclusive – Tick this if the invoice amount specified above includes VAT.
VAT Only – Tick this if the invoice amount specified above is ONLY the VAT.
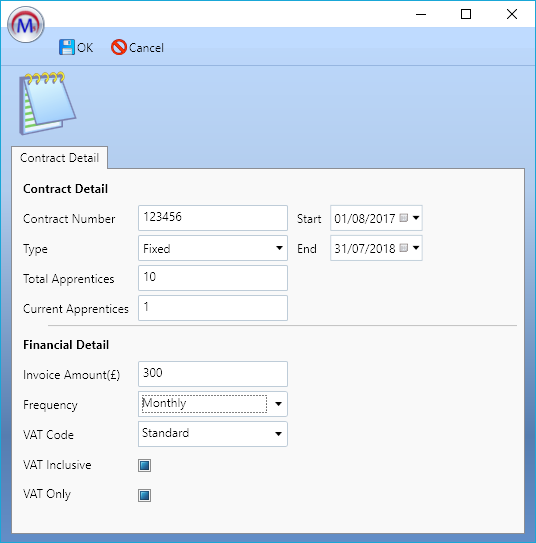
- Click OK when finished, then click Apply.
Assign the Contract to Learners
- Open the relevant employer record and go to the Trainees / Assessors tab.
- Select a learner to assign to the contract and click Edit. Note that you can instead open a learner record and open the employer link from the grid on the Summary tab.
-
Go to the Employer Contract tab.
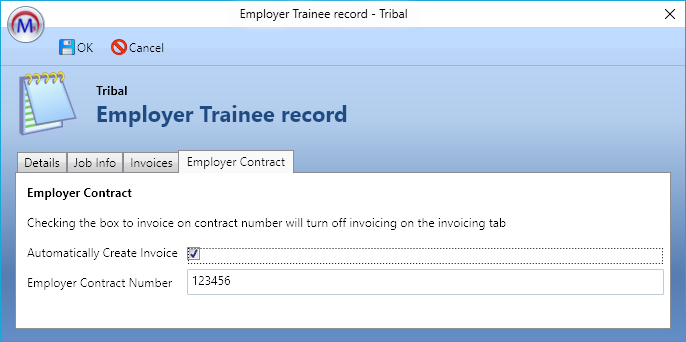
- Enter the Employer Contract Number, which should match the contract number entered on the contract.
-
Tick the Automatically Create Invoice box. Note that this is mutually exclusive to invoicing using the Invoices tab, and once ticked it will change the frequency on the Invoices tab to Never. Similarly, changing the frequency on the Invoices tab will untick the box on the Employer Contract tab.
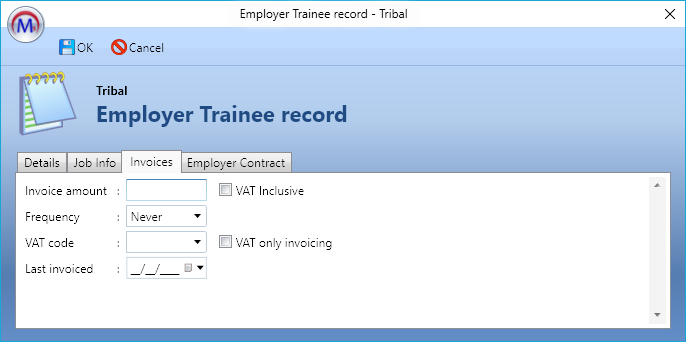
-
Click OK, then click Apply.
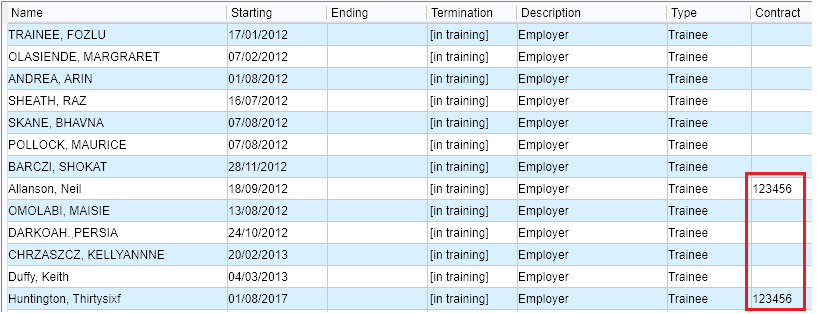
The contract number will be displayed on the Trainee / Assessors grid.
If you wish to use this field in custom reports, the table/column is TREMPLOYER.CONTRACTNUMBER
-
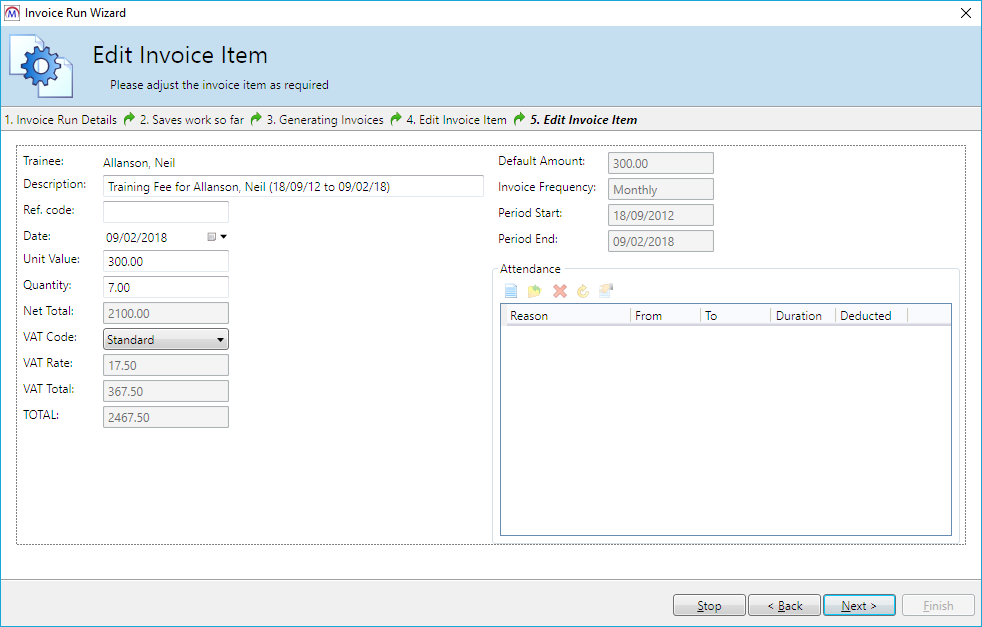
Repeat for additional learners as required. When you perform an invoice run, the invoices for these learners will now be generated.
Reports Library 1.0.2.7 beta
Financial Plan Overview – Funding Model 36 Plans
The Financial Plan Overview report has been updated so that it works for plans that use funding model 36 data.
ILR Exports Comparison – Field Changes for all Fields
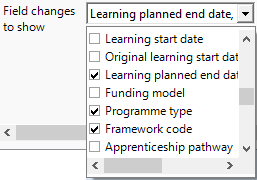
The ILR Exports Comparison report has been updated so that the third table, Field Changes between File 1 and File 2, can show changes for all ILR fields. The fields included on this table are determined by the fields selected in the Field changes to show parameter. By default, a set of fields likely to have an impact on funding or achievement rates is selected.

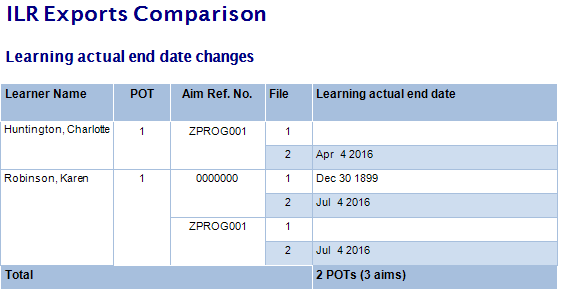
The drilldown for this table has also changed as it now only shows changes for the field you are drilling down on.
LLWR Exports Comparison
The LLWR Exports Comparison report is a new report in the Audit folder which lets you choose two LLWR exports and compare them to identify the differences between them.
The intention behind the report is to help providers account for changes between files, such as starters and leavers, which can help to identify or explain data issues.
Parameters
- Years – This filters the available LLWR exports to select based on the specified contract years.
- File status – This filters the available LLWR exports based on the status of each export file. By default, only files where the status indicates they were output or the file preparation was finished are included. The other statuses option can be selected to show any other files (e.g. files with errors).
- Centre – This filters the available LLWR exports based on whether they contain any of the selected centres. For example, if you select centre 0001 and an export includes data from centres 0001 and 0002, the export will appear in the list. This is to ensure that it is at least possible for the two selected LLWR exports to have some matching data.
- LLWR export file 1 and 2 – These let you choose the LLWR export files to compare.
- Field changes to show – This determines which LLWR fields appear in the Field Changes between File 1 and File 2 table.
Layout
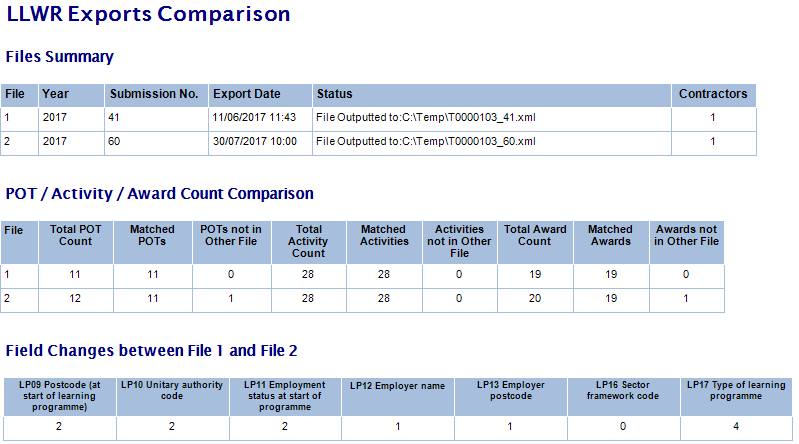
The report is split into three tables – Files Summary, POT / Activity / Award Count Comparison and Field Changes between File 1 and File 2.
Files Summary
This shows basic information about each file, including the contract year, submission number, export date, file status and the number of contractors included in each export.
POT / Activity / Award Count Comparison
This shows a comparison of POT, activity and award counts in each file.
- Total POT Count – The total number of POTs in each file.
- Matched POTs – The number of POTs which appear in both files. POTs are matched on trainee ID and POT.
- POTs not in Other File – The number of POTs in each file where the trainee ID and POT do not appear in the other file.
- Total Activity Count – The total number of activities in each file.
- Matched Activities – The number of activities which appear in both files. Activities are matched on trainee ID, POT and LA05 activity ID.
- Activities not in Other File – The number of activities in each file which do not appear in the other file (based on the criteria for matched activities).
- Total Award Count – The total number of awards in each file.
- Matched Awards – The number of awards which appear in both files. Awards are matched on trainee ID, POT, AW06 award number and AW08 award reference.
- Awards not in Other File – The number of awards in each file which do not appear in the other file (based on the criteria for matched awards).
Each of these figures can be clicked to show a drilldown of the relevant POTs and activities / awards.
Field Changes between File 1 and File 2
This shows POTs, activities and awards which have been matched between files (using the same criteria as the Matched columns detailed above) where field values have been changed. E.g. the LA31 Completion Status column shows the count of activities in both files where the completion status has changed between file 1 and file 2. The columns included in this table are determined by the fields selected in the Field changes to show parameter.
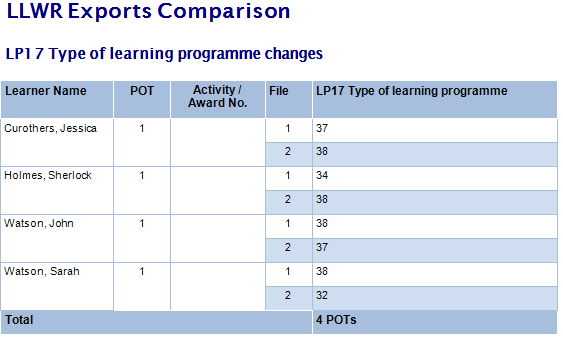
Each of these figures can be clicked to show a drilldown of the relevant rows. Each POT, activity or award in the drilldown shows the values from file 1 and file 2 for easy comparison.
Ofsted Short Inspection Report 2017 Update
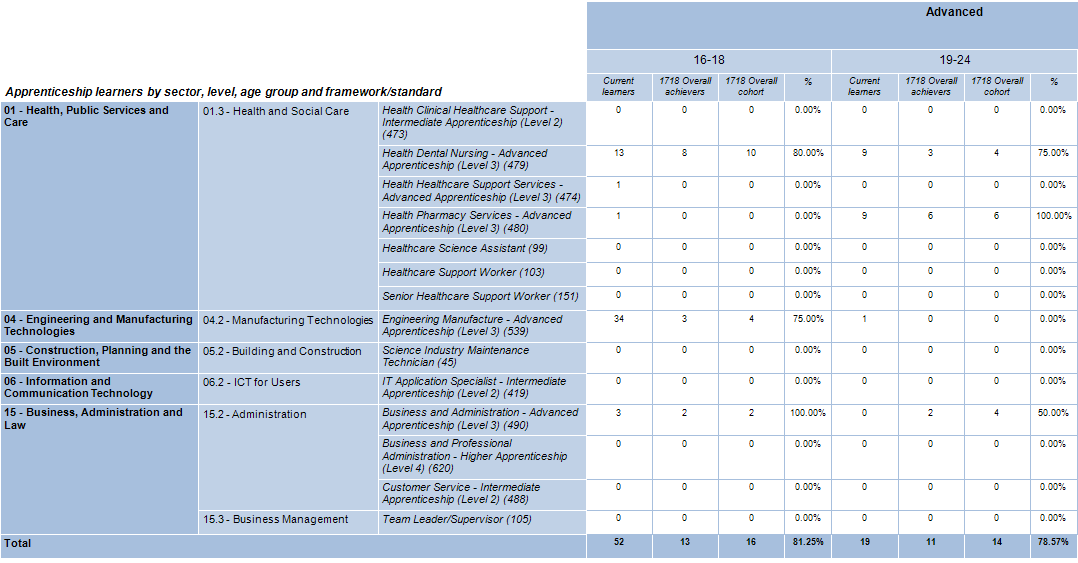
The Ofsted Short Inspection Report 2017 report has been updated so that the table Apprenticeship learners by sector, level, age group and framework/standard now includes achievement rates as well as the number of current learners. These figures can be clicked to show a drilldown of the relevant learners.
Documentation for all reports can be found here.