Browse Modules
The Browse Modules screen is a directory of all modules available in the system. It allows you to view the details of each module and the units and elements which comprise it. For each of these you can also view its associated evidence types and any learners who are enrolled on it (or have previously been enrolled on it).

View and Edit Existing Modules
You can search for a module by entering the search term and clicking Search (if no search term is entered, this will display all modules). You can search by module title, module code or NVQ reference by entering search terms in the appropriate boxes. To filter by an awarding body, select the required awarding body from the dropdown box. You can also include obsolete modules by ticking the Include Obsolete box.
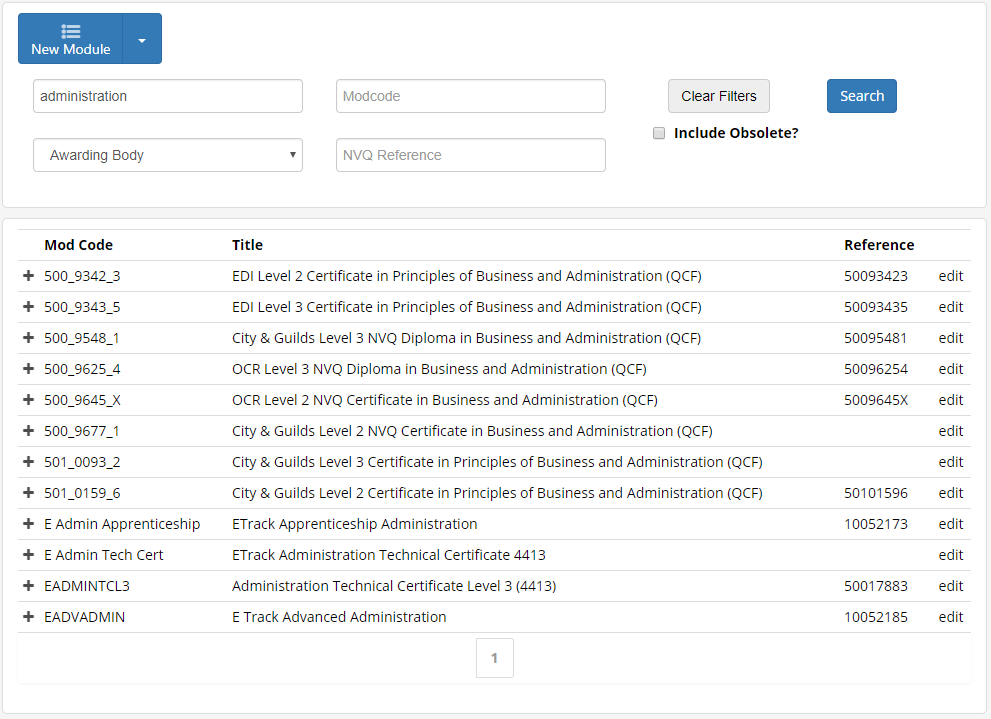
The results show the module code, title and reference code of the module. Please note that only base modules are shown initially.
To view the units within a module, click a module from the results.
To edit a module, click edit at the end of the row.
View Units in a Module
Search for a module and click on the relevant row from the search results. The units within that module will be displayed.
Details
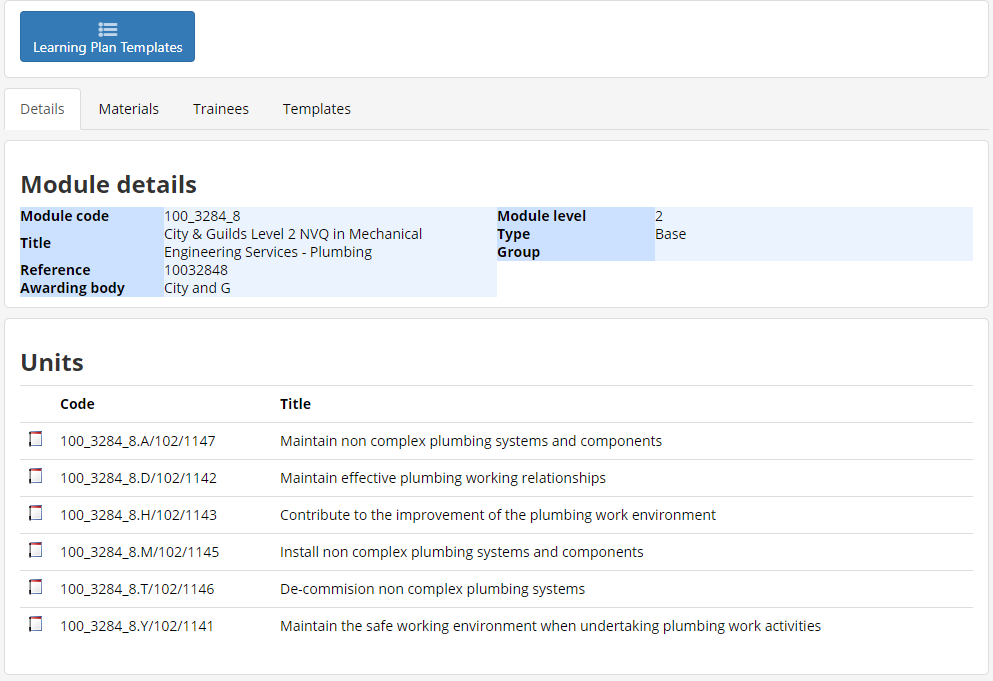
The Details tab shows the selected module details at the top and a list of any units within the module at the bottom. Click a unit to open it. This will then show the unit details and a list of any elements within the unit. Again, clicking an element will open it.
Materials
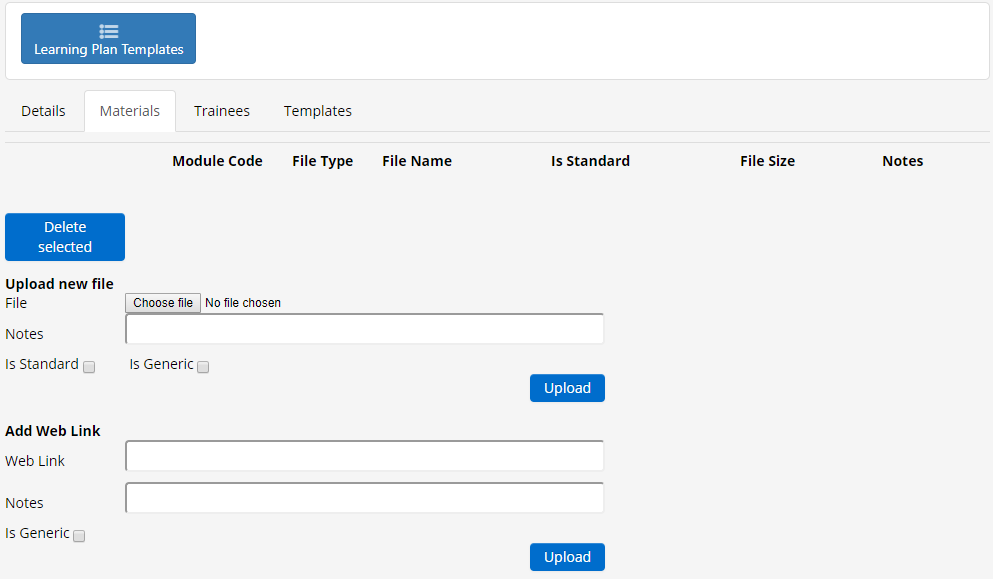
The Materials tab lets you upload and view learning materials for the selected module (this is only possible for top-level modules, not units or elements).
To upload a file, click Choose file in the Upload new file section. Browse to and select the file and click Open. Enter any notes for the material then click Upload. The file will then be listed at the top of the tab. Clicking the filename will open it for viewing.
To delete a file, tick the checkbox to the left of the file and click Delete selected.
You can also add a web link for training materials. To do this, enter the URL into the Web Link box, enter any notes for the link and click Upload. The link will then appear underneath any uploaded files, and clicking the link will open it in a new web browser window.
To delete a link, tick the checkbox to the left of the link and click Delete selected.
Trainees
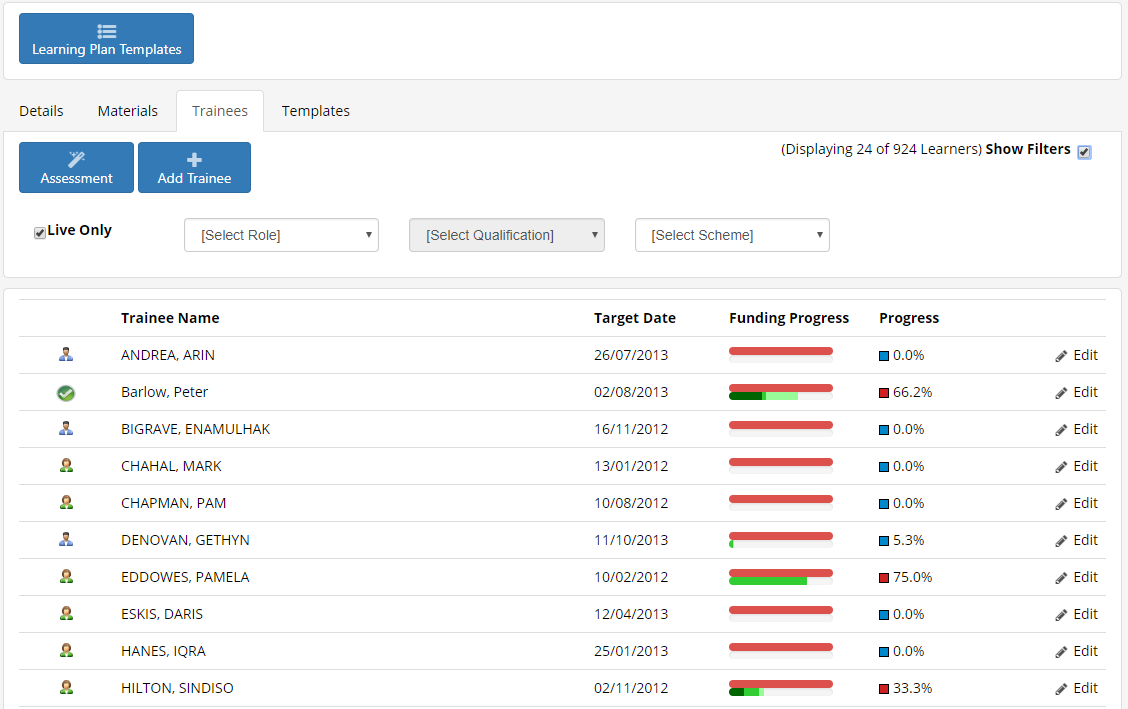
The Trainees tab shows a list of learners enrolled on the selected module, unit or element. By default this will only show live learners – to show leavers, first tick the Show Filters box, then un-tick the Live Only box. Click a learner to open their profile.
Templates
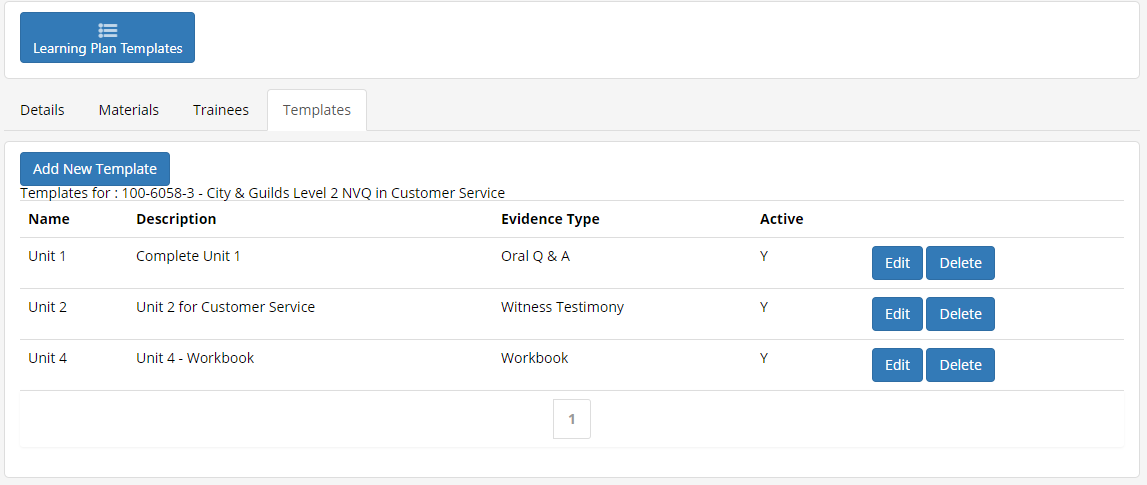
The Templates tab lets you create mapping templates for assessments. To create a new template:
-
Click Add New Template.
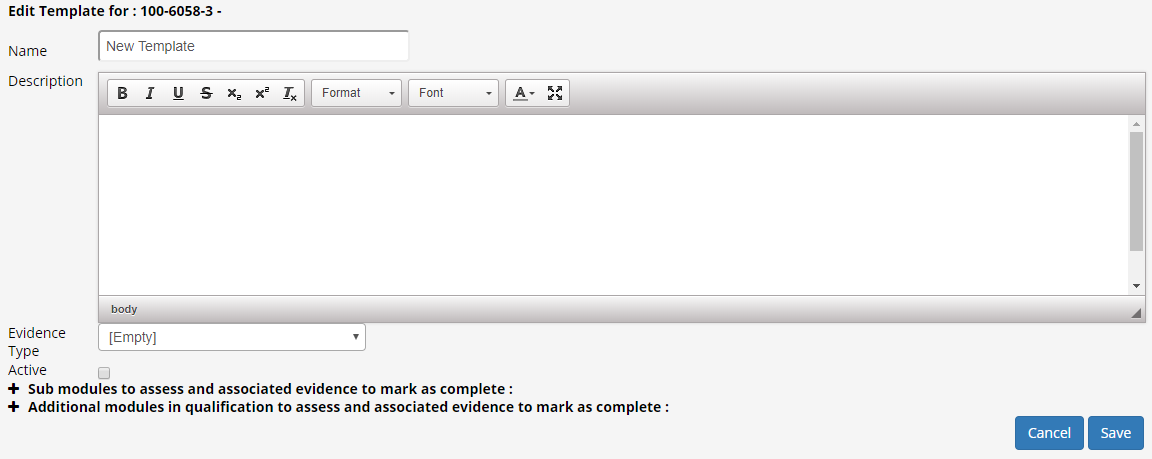
- Enter a name and description for the template.
- Choose the evidence type to be assessed from the dropdown box.
- Tick the Active box to make the template available for use.
- Click the + buttons next to Sub modules and Additional modules to expand the unit lists.
-
Tick the units to be assessed. This will open any evidence requirement criteria for the units. You can also tick the checkbox at the top (next to the header) to select all units.

- Tick the criteria to be assessed.
- When finished, click Save at the bottom of the screen.
The template will now appear in a list at the top of the tab. Click Edit (on the right-hand side) to make any changes or click Delete to delete the template.
Create and Edit a New Module
Create a New Module
To add a new module:
- Select Browse Modules from the toolbar.
-
There are three ways of creating a new module:
- Click New Module. This will create a new module from scratch.
- Click the arrow next to New Module and select Create from. This will create a new module based on an existing one.
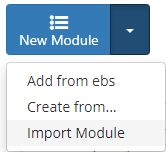
- Click the arrow next to New Module and select Import Module. This allows you to import a module that has been exported.
For this example we will create a new module from scratch.
- Enter the module title and modcode and click Save.
The module will be created.
Edit a Module
- Select Browse Modules from the toolbar.
- Search for the module you wish to edit.
-
Click the edit button at the end of the module you wish to edit.

-
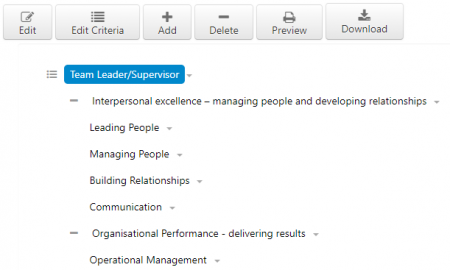
You will now see the hierarchy of the module and its units and elements.
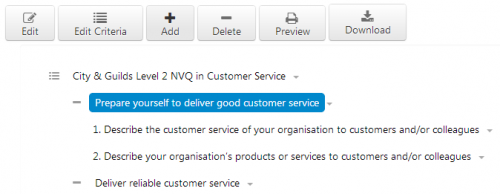
Select an item and click the Edit button to view its details.
- Complete the fields as required and click Save when finished.
- The Edit Criteria button allows you to add the evidence criteria for the module.
- The Add button lets you add units under a module, or elements under a unit. Select the parent item in the objectives tree (i.e. a module or unit) and click Add. You can then enter the details for the objective.
- The Delete button deletes the selected objective.
- The Preview button shows a preview of what the module will look like to users in Maytas Hub, complete with evidence criteria.
- The Download button lets you download the module to a file. It can then be imported when creating new modules.
Clone an Existing Module
To create a new module based on an existing module:
- Select Browse Modules from the toolbar.
-
Click the arrow next to the New Module button and select Create from…
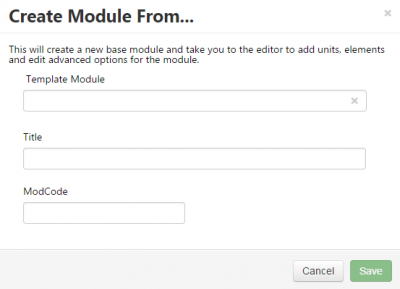
- Start typing the existing module title in the Template Module box and select the module from the list which appears.
- Enter a new title and modcode for the module and click Save.
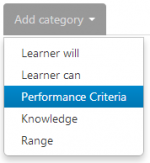 Evidence Criteria
The Edit Criteria button allows you to add the evidence criteria for the module. On the Edit Criteria screen, click Add category and select the type of criteria. A tab will be created for that criteria.

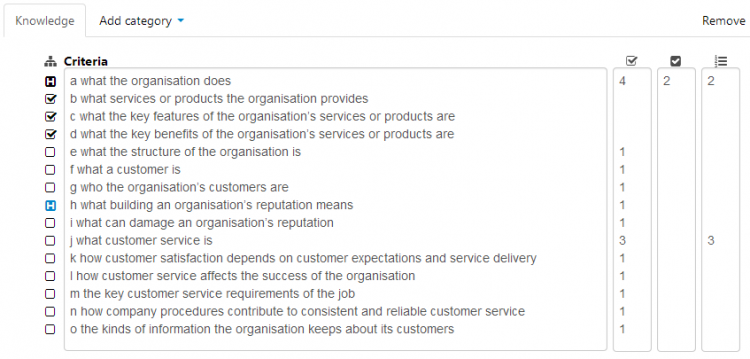
Enter the criteria in the Criteria box, and press enter to add a new row. The three columns at the end are for the amount of required evidence, the type of evidence and the max score:
- Required evidence – Enter the number of times the criteria must be evidenced.
- Type of evidence – Enter the amount of required evidence of a specific type or types. The types are determined by a system config (in the config editor, select Objectives under Maytas Hub Offline and locate the config called List of required evidence types for TYPEREQUIRED).
- Max score – This can be used to allow more than one piece of evidence to be counted in a single visit. When a number is entered in this column, it signifies the maximum number of pieces of evidence that can be addressed in a single visit. When completing an assessment in Maytas Hub and entering the evidence to be included, you will see a dropdown list rather than a checkbox so that you can select the amount of evidence to be counted. For example, if a piece of criteria has a max score of 3, you will be able to choose 0, 1, 2 or 3 in the assessment.
The column on the far left can be used to create criteria groups, so that multiple pieces of criteria can be checked under one header. To add a header, click the checkbox for the first piece of criteria you wish to add to the group and select Create Group Header from the pop-up list. Then click the last piece of criteria you wish to add. This will select all the criteria between those two. In the following example, a to d have been selected, with a as the group header:

For criteria groups, the required evidence only needs to be entered against the group header. Evidence is then assessed against the group rather than individual pieces of criteria.
You can also create a standalone group by clicking the checkbox for a piece of criteria and selecting Create Standalone Header.
Additional types of criteria can be added as required by clicking Add category and choosing the type. This will create another tab for that type.
A completed set of criteria would look similar to this:
Required Evidence Types
As of the 5.14 release, when editing evidence criteria for a qualification, the required evidence types can be specified from a dropdown box rather than from a system config. Previously, if the type of evidence  box was completed then the required evidence types had to be specified in the config option List of required evidence types for TYPEREQUIRED (Maytas Hub Offline section / Objectives).
- Select Browse Modules from the toolbar.
- Search for the qualification you wish to set a grading scheme for.
-
Click edit at the end of the row for the qualification.

-
Select the relevant row and click Edit Criteria.
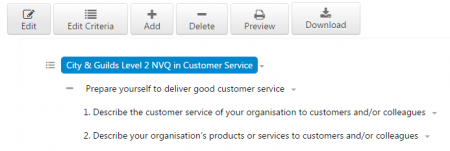
-
Any existing criteria will be displayed. Otherwise, add a category from the dropdown box.

-
The new option on the right allows you to choose the required evidence types.


- The selected evidence types will be used instead of the types in the system config. If nothing is selected in the new option, the types in the system config will be used.
- Click Save.
Required QCF Points
The number of QCF points a base module requires can now be specified. When managing objectives, the total QCF points from selected units is then compared to the required QCF points of the module, and the user is notified if not enough points are selected.
First, the required QCF points should be entered against the base module:
- Select Browse Modules from the toolbar.
-
Search for the module and click edit at the end of the relevant row from the results.

-
On the Edit Module screen, select the base module (the top row) and click Edit.
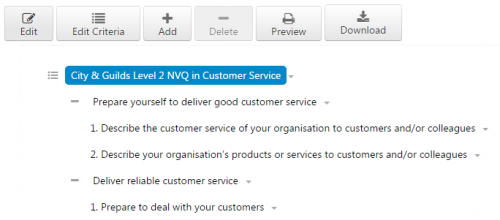
- Enter the number of Required QCF Points for the module (at the bottom-right).
- Click Save at the top of the screen.
Next, add the module to a trainee:
- Select Browse Trainees from the toolbar and select a trainee.
- Click Manage Objectives.
- Click Add Objectives.
- Search for and select the module.
-
At the top-right you will see the total QCF points currently selected and the required number of QCF points for the module. If the selected number is less than the required number, the text “This module requires x QCF Points” will be red.
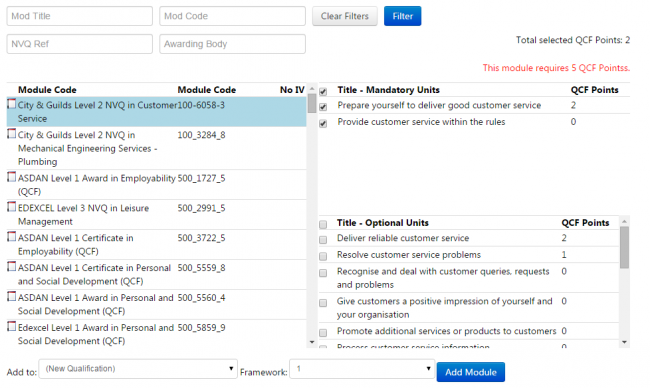
- Select additional units with QCF points to meet the required number for the module.
Qualification Terminology
With the introduction of Apprenticeship Standards, the terminology around qualifications (e.g. modules, units and elements) is changing in some cases. While there are already options in Maytas Hub to change terminology for qualifications across the system, there is now also the option to change terminology for specific qualifications. These new options take precedence over the system-wide terminology options if both are entered.
To set terminology for a specific qualification:
- Select Browse Modules from the toolbar.
- Search for the qualification you wish to set terminology for.
-
Click edit at the end of the row for the qualification.

-
Select the top row and click Edit.
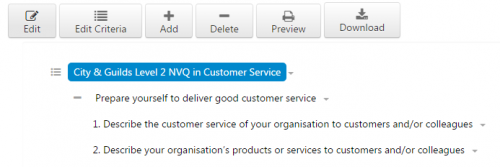
- The qualification details will appear on the right. Go to the Standards tab.
- Enter the new terms for qualification, unit and element in the Terminology Override section.
- Click Save.
Grading Schemes
Grading schemes can be created and applied to qualifications. To create a grading scheme, a user must first be given permission:
- Select Web User Editor from the toolbar.
- Search for and select the user to be given permission.
- Click Permissions.
-
Tick Manage Grading Schemes.
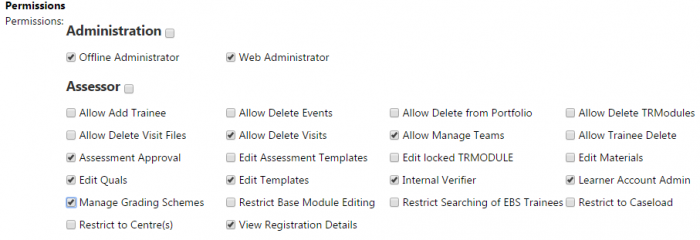
- Click Save.
Once the permission has been set, a grading scheme can be set up as follows:
- Select Browse Modules from the toolbar.
- Search for the qualification you wish to set a grading scheme for.
-
Click edit at the end of the row for the qualification.

-
Select the top row and click Edit.
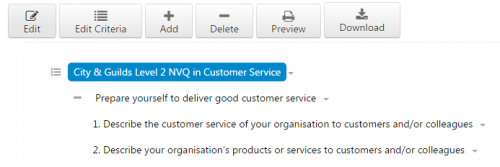
- The qualification details will appear on the right. Go to the Standards tab.
-
Click Manage in the Grading section.

-
You will now see the Grading Schemes screen. Click New to create a new scheme.

- Enter a name for the scheme, then click Add Grade.
-
Enter the first grade in the field which appears. Click Add Grade to add and enter additional grades as required.
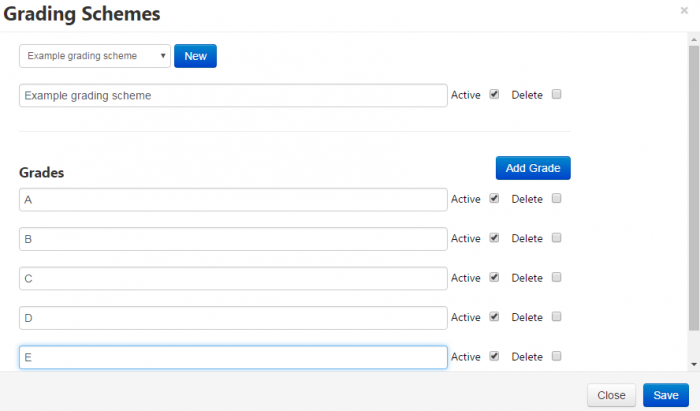
- You can delete grades by ticking the Delete box, or you can make a grade inactive by unticking the Active box next to a grade. The same logic applies to the Active and Delete boxes next to the scheme itself.
- Click Save when finished.
-
To apply the scheme on the Standards tab, select Grading Scheme from the Mode box then select your scheme from the Scheme box.

- Click Save.
Apprenticeship Standards Tab
When editing a module for Apprenticeship Standards, a number of details specifically for Standards should be completed on a separate tab:
- Select Browse Modules from the toolbar.
- Search for the qualification you wish to set terminology for.
-
Click edit at the end of the row for the qualification.

-
Select the top row and click Edit.
-
The qualification details will appear on the right. Go to the Standards tab.
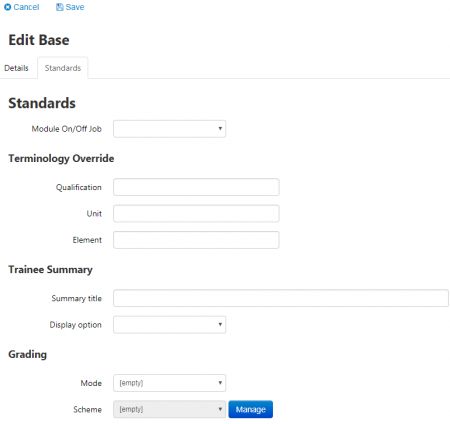
- Module On/Off Job lets you specify whether the qualification is on or off the job. Note that this can be set at any qualification level.
- Enter the new terms for qualification, unit and element in the Terminology Override section.
-
The Trainee Summary section lets you configure the qualification so that when it is displayed on the learner summary page and learner home page, it can show the qualification code, the qualification title or a custom title.
Choose the Display option (i.e. the modcode, the modtitle or the summary title). If nothing is selected, the modcode will be used. If you choose summary title, enter the title in the Summary title field.
- For details on grading, see the grading schemes section.
- Click Save.
Objectives Ordering
The module editor allows you to enter a display index against units and elements within a module so that the order in which they appear can be manually specified. If no display index is entered, the module code is used to order instead.
To order units and elements:
- Go to Browse Modules on the taskbar.
- Search for the module you wish to order and click edit at the end of the row.
-
The units and elements will be displayed.
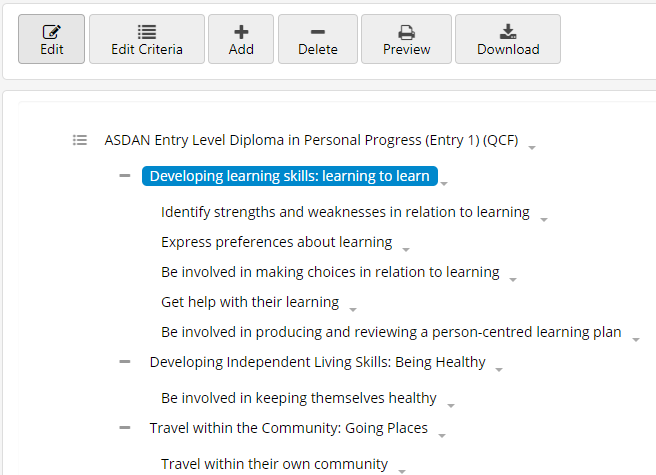
Select the first unit or element you wish to order and click Edit.
-
Scroll to the bottom of the editing pane and enter a value in the Display Index field.

- Scroll back up and click Save.
- Repeat steps 3 to 5 to enter additional index values as required.
The specified ordering will take effect on the following screens:
- The learner summary screen on assessor and learner logins
- The objective summary on the learner home page
- The objective summary on the IQA view
Please note that the ordering is not applied to the module editor.
Import Evidence Category Lookups
When importing a module into the Module Editor, there is the option to import any evidence category lookups from the import file which are not already in the database. This will only work with modules that have been exported as of the 5.22 SP1 release, as the export now includes the lookup longstrings for evidence categories. Additionally, only lookups where the shortstring is not present in the database will be imported - i.e. the import will not overwrite existing lookups where the shortstring is the same but the longstring is different in the database and the import file.
How to export a module
- Go to Browse Modules on the sidebar.
- Search for the module you wish to export.
-
Click the edit button at the end of the module you wish to export.

-
You will now see the hierarchy of the module and its units and elements.

- Click the Download button. This will export the module to an .etobj file which is saved in your default browser downloads folder.
How to import a module and include evidence category lookups
- Go to Browse Modules on the sidebar.
-
Click the arrow next to the New Module button and select Import Module.
-
Click Choose File, browse to and select the .etobj file you wish to import and click Open.

-
Click Add.

- By default, the option to import evidence category lookups will be selected. Untick this box if you do not wish to import the lookups.
- Click Upload. Once the upload has finished, you will be returned to the Module Importer screen.
Evidence Criteria Applied via Tasks Across Multiple Modules
When a task associated with multiple modules (each with evidence criteria) is completed for a learner, the criteria from each of the modules will be applied to the learner.
See the Tasks page for details.