Communities
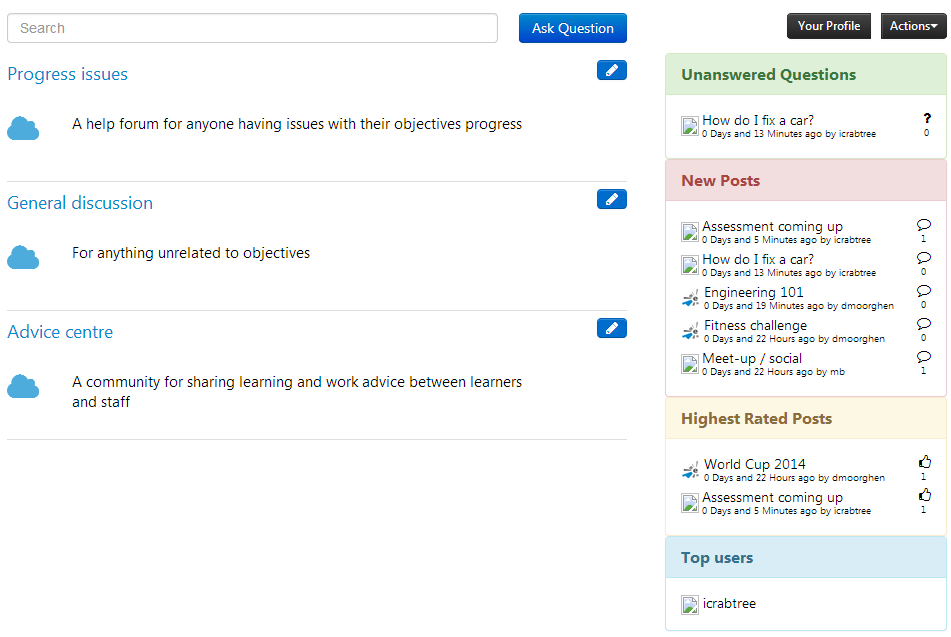
The Community module is a platform for discussion, interaction and sharing resources between all types of Maytas Hub users. Discussion forums can be created and moderated, which provides an area for learners to share information and progress with each other and their assessors / employers. Resources such as relevant and helpful websites or learning materials can be assigned to communities to make them readily available to community members.
Setting up a Community
To set up a community, a user must first be given permission to create communities:
- Log into Maytas Hub as an admin user.
- Go to Web User Editor on the toolbar.
- Search for and select the user you wish to give permissions.
- Click Permissions.
- Tick the Admin Communities box.
- Click Save.
The user will now have admin privileges in the Community module. To create a community:
- Log in as a user with Community admin privileges.
- Go to Community on the toolbar.
- Select Actions | Add new on the right-hand side of the screen.
- Enter a title and description for the community.
- Choose whether to tick the following boxes:
- Allow forum – This will allow the creation of forums in the community.
- Forum Moderation – When ticked, all discussion topics and posts must be approved by a moderator before being published.
- Published – This must be ticked for the community to be visible to other users.
- Click Save when finished.
The community will now be visible on the main community screen. Click a community to enter it.

Each community is only visible to users who are given access to it. To add users to a community:
- Go to Actions | Edit community.
- Click the Users tab.
- Click Add Users.
- Search for individual users and click them to add them. Note that you can add multiple users in one go. Click Save when finished.
You can also tick the Admin and Mod boxes against users here to designate them as administrators or moderators for the community.
Adding Content to a Community
To add a forum to a community:
- Go to a community and click Forum.
- Click New thread.
- Enter the thread title and body.
- If the thread is a question you wish an answer to, tick the Question box. This will allow you to designate a reply as the answer to your question, so that others who have the same question in the future will be able to immediately see the answer.
- If you wish the thread to remain at the top of the list of threads (e.g. for an important announcement), tick the Sticky box.
- Click Save.
To post in a forum thread:
- Click on the forum thread.
- Enter your post in the Post Reply section and click Reply.
The Subscribe to this topic box can be ticked on this screen if you wish to receive notifications when other users reply to the thread. You can also click the Like button if you like a post.
To add a resource to a community:
- As a community admin, go to a community and select Actions | Edit community.
- Go to the Resources tab.
- Click Add Root.
- Enter a title for the resource and choose the resource type (e.g. URL).
- The third option on the page depends on the type of resource:
- External URL – Enter the URL.
- Child page – Enter the text for the page.
- eLearning - Click Choose file, browse to and select the eLearning file and click Open. Click Upload File, then click OK on the message which appears.
- File download – Click Choose file, browse to and select the eLearning file and click Open. Click Upload File, then click OK on the message which appears.
- Video – see here for more information.
- Tick Published to make the resource available to other users.
- Click Save.
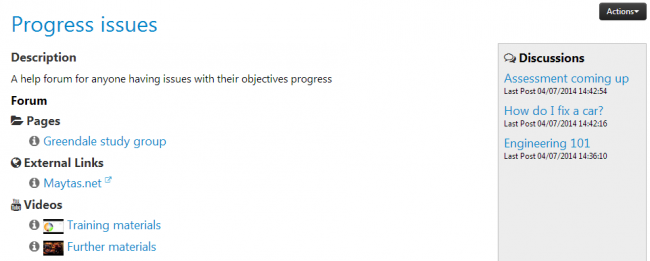
Once forum threads and resources have been added to a community, the community page provides a summary of activity:
User Profiles
Each user has a community profile which allows them to upload an avatar (i.e. a picture). To do this:
- Go to the main Community page.
- Click Your Profile.
- Click Choose File.
- Browse to and select the picture and click Open. Please note that pictures do not have to be a specific size, as Maytas Hub will automatically resize them.
- Click Upload.
Forum Moderation
If you have created a community which requires forum moderation, each new forum and post requires approval from a moderator before it is published. To moderate a forum:
- As a moderator user, go to a community requiring forum moderation.
- Click Forum.
-
If any new threads have been created, you will see the option to approve or reject it:
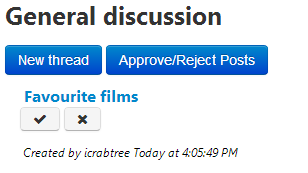
- Click the tick to approve or the cross to reject.
- To view a list of pending posts, click Approve/Reject Posts.
-
Again, you will see the approve / reject options next to each new post:
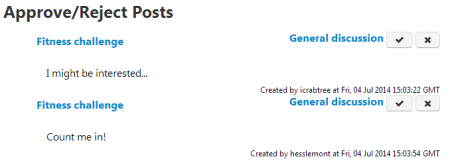
- Approve or reject each post as appropriate.
- Click Close when finished.
Close Community Forum
Community forums can be closed so that they no longer appear in the list of forums. To do this:
- Go to Community on the toolbar.
- Select the relevant community.
- Click the
 button next to Discussions on the right and choose the relevant forum.
 - Click Edit Topic.
-
Tick the Close this topic checkbox and click Save Changes.
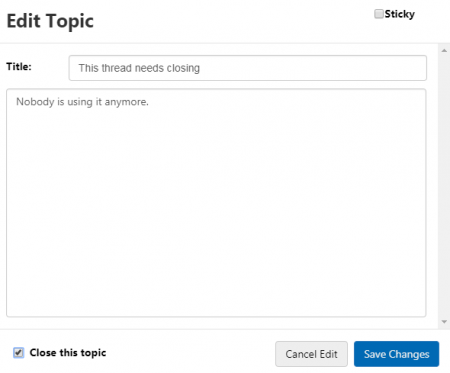
Closed forums can be shown in the forum topic list by ticking the Show Closed Topics button (to get there, open the community, click Discussions and select the relevant forum).
Tasks
A community can be assigned tasks:
Adding and Using Tasks
- As a community admin, click Community on the toolbar.
- Select the community on the left.
- Click Actions on the right and select Edit community.
-
Click the Tasks tab.

- Click Add to add a new task.
- Enter a description.
- Select an associated resource (the list is populated from the list of resources in your community).
- Enter the number of days in which the task must be completed by community members (days due).
- Select the action/verb. Attempted and Passed should only be used for quiz resources, where Attempted means the task is set to complete if the quiz is attempted and Passed means the quiz must be passed before the task is set to complete. Tasks using other types of resources should select Experienced.
- The Groupid allows you to group tasks together (i.e. all tasks with the same groupid will be grouped). Change this if required.
- The Optional checkbox can be ticked if tasks are not mandatory.
- Click Save when finished.
- Click Save at the bottom-right to save the changes to the community.
Back on your community home page you will now see the tasks on the right:
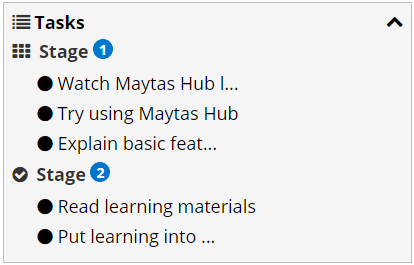
In this example, there are three tasks grouped under Stage 1 and two tasks grouped under Stage 2. The tasks in Stage 1 must be completed before the tasks in Stage 2 can be started.
The icon next to Stage 1 indicates that it is still in progress.
The  icon next to Stage 2 indicates the stage is completed. In this case the tasks within Stage 2 are not completed, but both tasks are optional so the stage is considered as completed.
The blue circles for Stage 1 and 2 mean that there are incomplete tasks within each stage. When all tasks within a stage are completed, the circle changes to green.
Hovering the mouse over the circle next to a task will show when it is due.

Click a task to start it. The resulting action is dependent on the resource type – e.g. a Youtube resource will open the video to play, a file resource will be downloaded, etc. For all resources except quizzes, this will result in the task being set to complete. For quizzes, the quiz must either be attempted or passed to be completed, depending on the action/verb specified for the task.
User Tracking
As a community admin, you can track which community members have completed each task:
- Go to the community home page and select Actions | View user tracking at the top-right.
- This shows each member's progress with each task group. Click the + button next to a group to view the full set of tasks.
![]()
Community Resources and Tasks
Community resources can be assigned to community tasks and the tasks can be assigned to objectives, so that when a learner completes the resource, their assessor receives a notification and a file to assess for the task. The assessor and the learner must both be part of the relevant community for this feature to work, and the learner must be assigned to the relevant objective.
- Go to Community on the toolbar.
- Select the community to add the resource to.
- Go to Actions | Edit community.
- Go to the Resources tab.
- Select the resource you wish to use and click Assessment Task link.
-
Search for the objective you wish to link to the resource. Double click the objective from the list of results to select it.
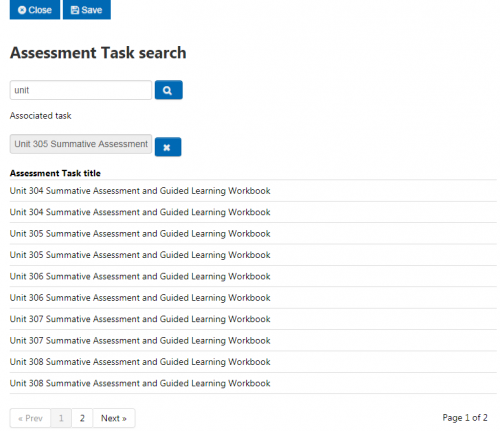
- Click Save.
- Go to the Tasks tab.
-
Add a new task or edit an existing task.
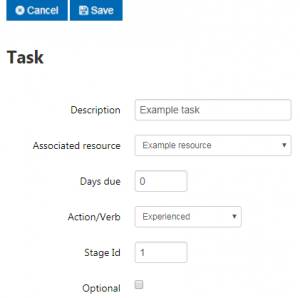
- Complete the task details as required. From the Associated resource dropdown box, choose the resource you wish to associate with the task.
- Click Save.
When a learner in the community with the relevant objective assigned to them completes the task, their assessor (who must also be in the community) will receive a notification:

Clicking the notification will take you to a list of files ready to be assessed.

Click the Assess button to assess the file.

Text Alignment in Child Pages
When creating a child page resource for a Community, the text, web links and images on it can be aligned to the left, right or centre.
- Go to Communities on the toolbar.
- Select a community and go to Actions | Edit community (at the top-right).
- Go to the Resources tab and add or edit a resource. Note that the resource type should be a Child page.
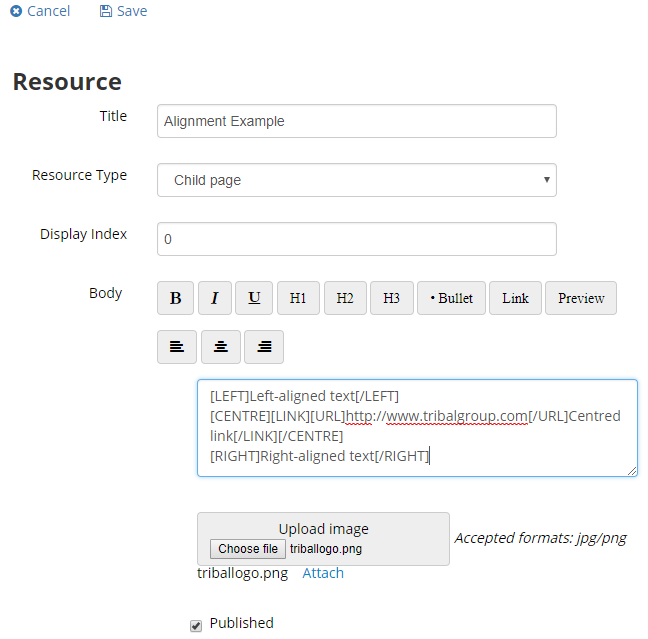
- The three
 buttons allow you to align text, links and images in the Body box. You can either:
Click one of the buttons first which will add LEFT, RIGHT or CENTRE tags in the body, and then you can enter your content between those tags;
or
Enter your content in the body first, then highlight the part you want to align and click the relevant button.
-
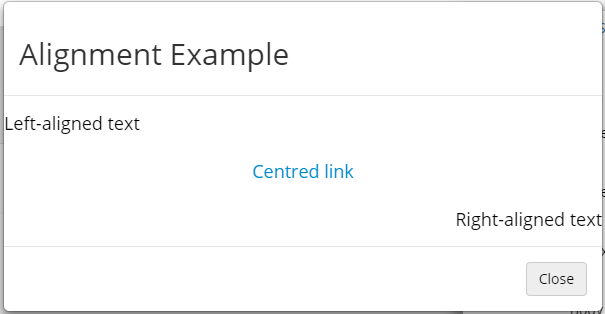
You can click the Preview button to see what the resource will look like.
- Click Save to save the resource.
- Click Save to save the community.
Employer community groups
Community groups can be created so that they are only accessible by employer users and community admins. To create an employer group:
- Go to Communities on the sidebar and open a community.
- Go to Actions | Edit community.
- Go to the Groups tab.
- Click Add Group.
- Enter a name for the group and set the forum and moderation options as required.
- Select Employer from the Membership Type dropdown box.
- In the Add Users section, search for and add employer users as required.
- Click Save.
There is a second new membership type: Employers and Trainees. This option lets you choose an employer, and then all employer and trainee user accounts associated with that employer and its branches will be automatically included in the group. The Employers and Trainees membership type is only available on a group if it is the only group in a community.
To create an Employers and Trainees group:
- Go to Communities on the sidebar and open a community.
- Go to Actions | Edit community.
- Go to the Groups tab.
- Click Add Group.
- Enter a name for the group and set the forum and moderation options as required.
- Select Employers and Trainees from the Membership Type dropdown box.
-
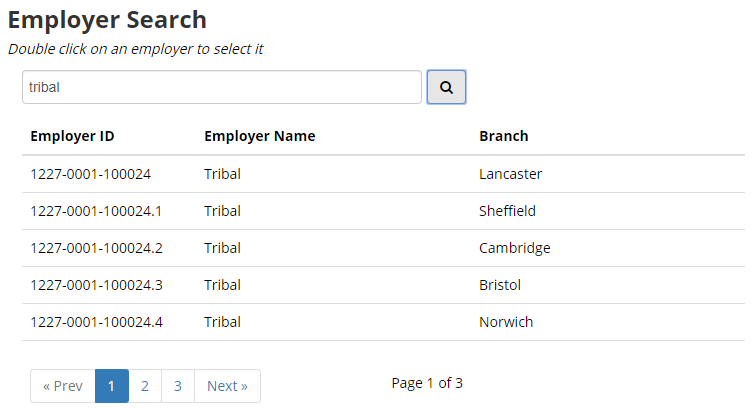
Search for the employer to base the group on. Double-click an employer from the results to select them.
-
The selected employer will appear above the search area. Click the red cross button to remove the employer and choose a different one if required.

- Click Save.
Copying Communities
New communities can be created based on an existing community, which copies across the community structure, including groups, resources, modules, courses, tasks and forums (minus the actual forum posts). Users can also optionally be copied across. Please note that tasks which have been completed by a user in a community will also show as completed for that user in a copy of that community.
To copy a community:
- As a community admin user, select Communities on the sidebar.
- Open the community you wish to copy.
-
Select Actions | Copy this community.

- A pop-up window will appear. Enter a title for the new community and choose whether you wish to copy the community with or without its associated users.
- The new community will now be created. Note that copied communities are unpublished and must be manually published to be visible to other users.
Community Notices
Communities can be given a notification which appears for all users of that community. Only a user who is an admin of a community can create a notice for it. To do this:
- Select Communities on the sidebar and open the community you wish to set a notice for.
-
Click the Add community notice button (only admins of that community will see the button).

-
A pop-up window will appear. Complete the title and body of the notice.
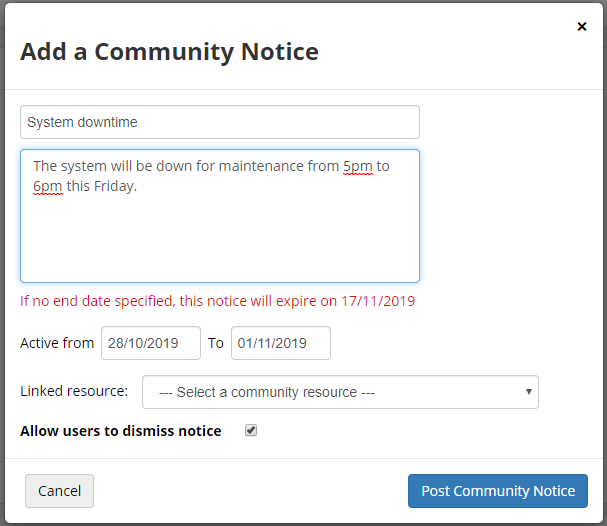
- If you want the notice to only appear between certain dates, enter the dates as required. If the dates are left empty, the notice will take immediate effect and expire after one month.
- If you wish to link the notice to a particular resource, select the resource from the list. This will allow users to navigate directly to the resource from the notice, and Maytas Hub will flag when a user has viewed the resource.
- By default, users will be able to dismiss the notice. If you wish the notice to display each time users login until the expiry date, untick the Allow users to dismiss notice checkbox.
- When finished, click Post Community Notice.
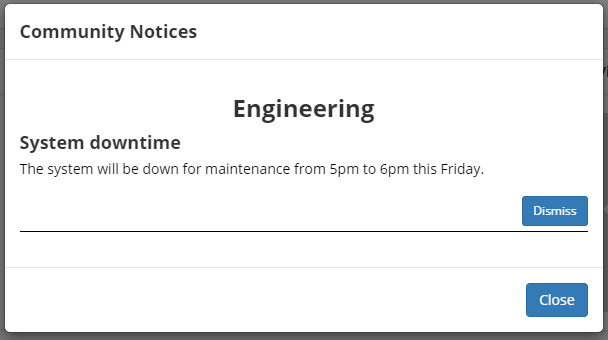
The message will be displayed to users in the community the next time they login to Maytas Hub. The Dismiss button (if enabled) will prevent the message from displaying to the user again, whereas the Close button will hide this instance of the message, and the user will be displayed the message each time they login until either the expiry date or until they dismiss it.
