My Learners Widget - Jump To Screens Menu for Learners
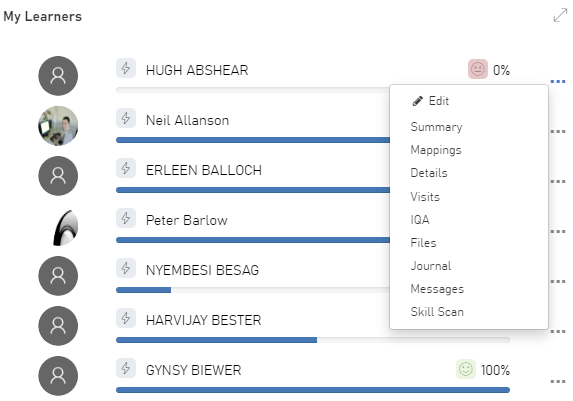
The My Learners widget on the assessor dashboard includes a jump-to menu to quickly access a learner's screens. The menu can be accessed by clicking the three dots at the end of a learner's row:

Most of the options jump to the relevant screen on the learner's record, whereas the Edit option lets you edit a learner's personal, contact and programme details.
Configuring the menu
The standard screens which appear on the menu can be configured. The menu can also be removed entirely:
- In Maytas Hub, go to Settings on the sidebar.
- Click the System configuration button.
- Go to Admin on the left (under the Maytas Hub Online header).
- Locate the General section on the right.
- Locate the permission Standard trainee tabs available on the Jump To menu.
- To remove the menu, untick the checkbox for the permission.
- To configure the screens available on the menu, ensure the checkbox for the permission is ticked, then select the required screens from the list.
- Click Save.
Custom screens on menu
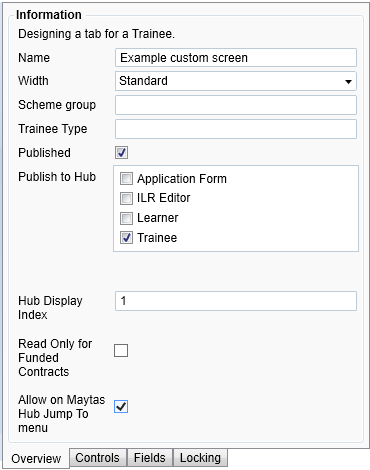
Custom screens can also be included on the menu by enabling an option in the Screen Designer:
-
In Maytas 5, go to Tools on the toolbar and click New / Load on the Screens panel of the ribbon.
-
Open the screen that you wish to enable on the menu (this guide will assume that the screen is already configured to appear in Hub).
-
On the left side, tick the Allow on Maytas Hub Jump To menu checkbox.

-
Click Apply.
-
Go to Home on the toolbar and click the Sync button.
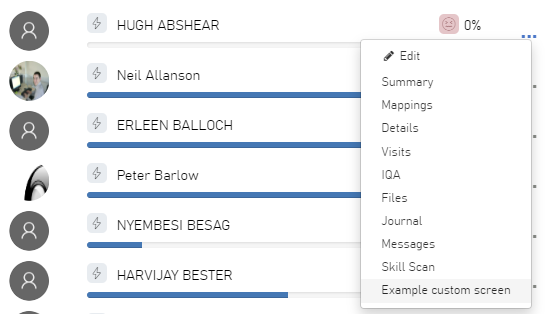
The custom screen will now appear as an option on the menu in Hub:
