How to create a control
The following example describes how to create a simple control for use on a Trainee tab. To create a new control:
-
Go to the Tools tab on the toolbar and click New/Load on the Screens panel.

- The window that appears lists different tab/control types on the left. These are the various areas of the system where tabs can be displayed. For example, a Personnel tab would only appear when viewing a Personnel account. For this example, select Trainee.
- Any existing trainee tabs and controls will be displayed in the lower-right section of the window. The
 icon indicates tabs and the
  icon indicates controls. The upper-right section allows you to create a new tab or control. Double-click *(New User Control).
 -
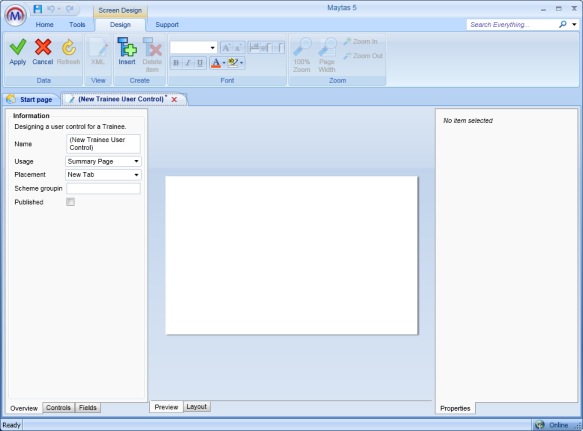
The screen designer will be displayed.

The main parts of the designer are as follows:
- The Design ribbon at the top. This allows you to save, format and control the view of screens.
- The left panel. This has three sections (at the bottom): Overview, which lets you set a variety of miscellaneous screen features; Controls, which lets you add controls to the screen; and Fields, which lets you add fields to the screen.
- The right panel. This displays and lets you edit the properties of the selected control.
- The design area. This is the centre of the designer, where the screen is constructed. There are two views for this: Preview, which gives a visual representation of the screen, and Layout, which shows a hierarchical structure of the screen.
- First, enter a name for the control on the Overview section of the left panel. In this example we will call it Example Learner Details.
- Click Save on the ribbon.
- Go to the Fields section on the left panel and expand the Trainee field list.
- Drag the LASTNAME field onto the design area, near the top. The top of the area should turn grey when the field is held over it, and the field will snap into position when you let go of the mouse button.
-
Drag the FIRSTNAME field underneath the Last Name field. Again, this will snap into position.

- Next we will add a second column to the control. To do this, go to the Layout view by clicking the Layout button at the bottom of the design area.
- Click the arrow next to Screen, then click the arrows next to *(New Section) and *(New Sub-section) to expand the structure. This is a hierarchical structure of the screen, with sections at the top, then sub-sections, then columns, and finally controls.
-
Add a second column by selecting *(New Sub-section), right-clicking it, then left-clicking Column.
The
 icon indicates that you can add an item, and the
  icon indicates that you can remove an item.
 - Return to the Preview view. The two fields added earlier should now only take up half the width of the design area, as they are part of the first column.
- On the Fields section, drag the DOB and TELEPHONE fields onto the second column.
- Click the Date of birth field on the design area to select it. The field’s properties will be shown on the right panel. Try changing the width property (if it is set to Fill, select Custom instead) by altering the Min width and Max width values. Note how the width of the field changes dynamically as the values are altered. The Fill option will simply use the full column width.
-
On the Overview tab (choose this from the bottom left of the screen), tick the Published checkbox. This will make the control available.
At this point we will save and close the control. Remember to save changes regularly.
-
Once saved, click the red X next to the title on the tab to close it.

Next we will create a second control:
- Create a new Trainee control as before and call it Example Learner Address.
- Drag the ADDRESS1, ADDRESS2, ADDRESS3, POSTTOWN and POSTCODE fields onto the design area and save the control.
The How to Create a Tab tutorial follows on from this tutorial.