Module Editor
 The Module Editor allows you to add, remove and edit objectives. To open the Module Editor, click Tools on the toolbar and click Module editor on the General panel of the ribbon.
Overview
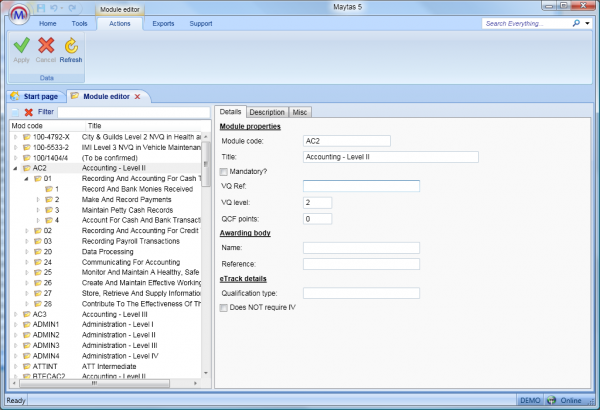
The editor lists modules on the left. These can be expanded to show the unit and element levels by clicking the arrows to the left of each module name. The displayed modules can be filtered by entering either the module code or title in the Filter box above the list.
Select a module/unit/element to display its details on the right of the screen. Each objective has three standard tabs (custom tabs can also be added with the screen designer):
- Details – This shows the basic objective details.
- Description – This allows you to enter a description and an overview of the structure for the objective.
- Misc – This allows you to set date offsets for objectives:
- Relative start offset – This is the number of days after a learner’s start date that the objective will start. For example, if a learner starts on 01/08/2011 and the offset is 7 days, the objective will start on 08/08/2011.
- Relative target offset – This is the estimated number of days to complete the objective. For example, if the start date of the objective is 01/08/2011 and the target offset is 28 days, the target date will be 29/08/2011.
- Relative Percentage % – This is the percentage proportion that the objective counts towards the overall qualification.
Add a New Objective
To add a new base module:
-
Click the
 button above the list of objectives.
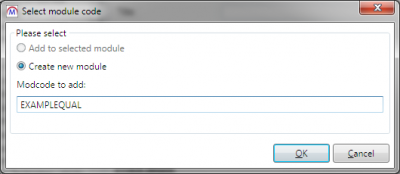
- Choose Create new module.
- Enter the base module code.
- Click OK.
The module will now be added to the list of objectives.
To add a unit to a module:
- Select the module in the list.
- Click the
 button above the list of objectives.
 - Choose Add to selected module (this is selected by default).
- Enter the unit code. Please note that unit codes take the format of MODCODE.UNITCODE (e.g. mymodule.unit1), but only the second part of the code needs to be entered (e.g. unit1).
- Click OK.
To add an element to a unit:
- Select the unit in the list.
- Click the
 button above the list of objectives.
 - Choose Add to selected module (this is selected by default).
- Enter the element code. Please note that element codes take the format of MODCODE.UNITCODE.ELEMENTCODE (e.g. mymodule.unit1.element1), but only the last part of the code needs to be entered (e.g. element1).
- Click OK.
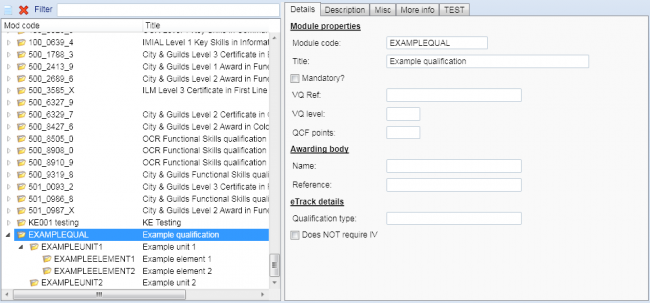
Details can then be added to the module, unit or element by selecting it in the list and completing the details on the right-hand side.
When finished, click Apply to save changes, then sync and restart Maytas for the changes to take effect.
To delete an objective, select it in the list and click the  button above the list of objectives. Click Yes to confirm the deletion.
Import Qualifications
To import a qualification file (of type .m5qual):
- Go to Tools | Module editor.
- Click Import Qualifications.
- Click Browse.
-
Browse for and select the import file and click Open.
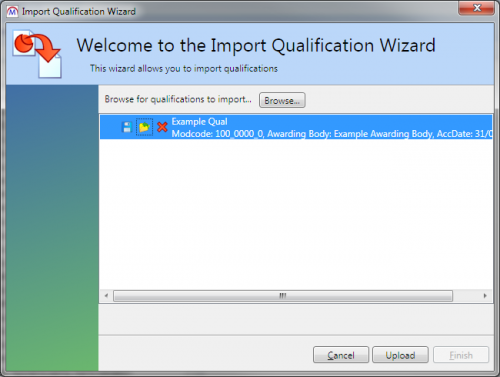
- If you wish to edit the qualification before importing:
Click the
 button.
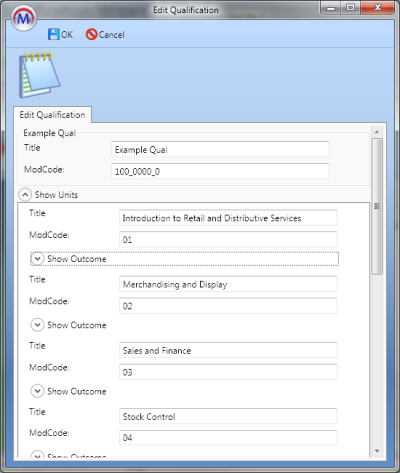
- Edit the title and modcode for the qualification and units as required.
- Click OK.
- Click Upload, then click Finish.
- Sync and restart Maytas for the changes to take effect.
Export Qualifications
To export qualifications to a file which can then be imported into another Maytas database (e.g. a test system):
- Go to Tools | Module editor (on the General panel).
- Select a qualification from the list on the left (this must be a base level module, not a unit or element).
- Click Export Qualification.
- You will be prompted to confirm – click Yes to continue.
- Browse to where you want to export the file and click Save.
- The .m5qual file will be created and a confirmation message will appear. If you wish to open the file location, click OK, otherwise click Cancel.
Module Registers Wizard
A wizard is available to generate registers on a module in the module editor, based on a date range, days of the week and start/end times for each register.
This feature requires a licence for Module Registers. Please contact your account manager for more information.
There are several prerequisites before registers can be added to a base module:
- The Enable Register box must be ticked on the module. This can be found on the Details tab when you select a module in the module editor.
- At least one learner must be enrolled on the module with an occurrence code specified. To do this, go to the Objectives tab on a learner record and add or edit the required module. The Occurrence Code can be found on the Details tab.
To use the wizard:
- Go to Tools | Module editor.
-
Click Add Registers.
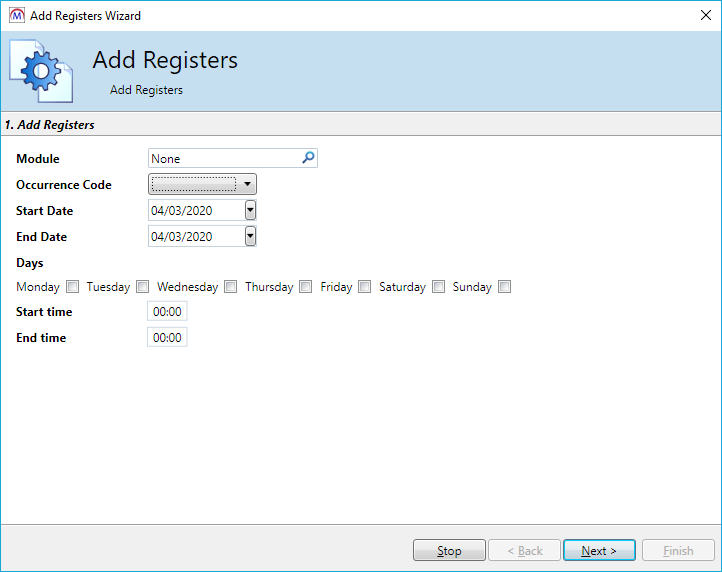
- Click the
 button at the end of the Module field.
 - Search for and select the module to add registers to and click OK (note that only modules that meet the prerequisites above will appear).
- Select the Occurrence Code. The available values are determined by the various occurrence codes entered against learners on the selected module.
- Select the Start Date and End Date which registers should be generated between.
- Select the days of the week when registers should be included.
- Enter the default start and end times for each register (if required). Times for specific registers can be modified on the next screen.
-
Click Next.
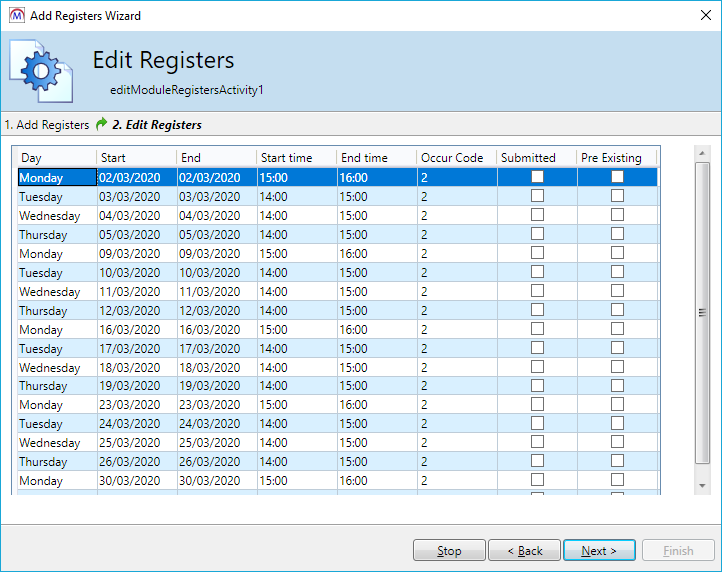
- You will see a list of the registers to be generated, based on the specified date range, days of the week and start/end times. The dates and times for specific registers can be edited by double-clicking them and entering the changes.
- Click Next.
- The registers will now be created. Click Finish.
-
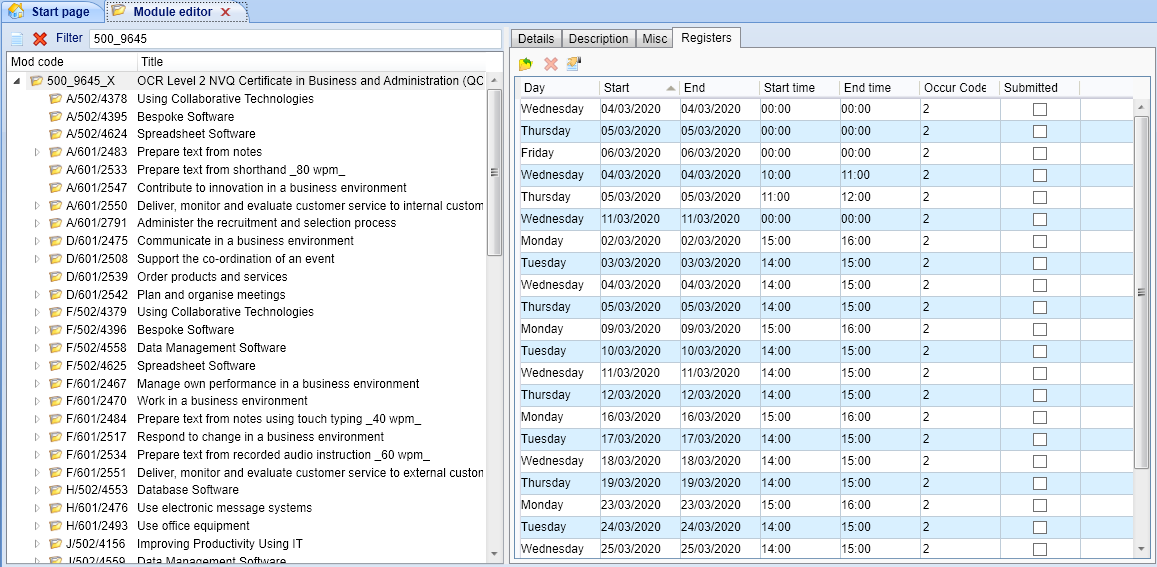
Select a different module and return to the previous one to refresh the registers, then go to the Registers tab. The newly-created registers will be listed here, and they can also be edited by double-clicking the cells and entering the changes.
