e-track Assess
Introduction
Welcome to the wiki guide for e-track Assess. Here you will find all the information you need to download, configure and use the e-track Assess app, as well as hints, tips and FAQs compiled through feedback and experience of past implementations.
Please read the guide carefully and ensure that you have run through the test cases prior to rolling out to live users to ensure your e-track system is setup correctly for e-track Assess.
We looking forward to receiving your feedback.
Setup
The setup process is slightly different for iOS and Android devices.
iOS Setup
Once you have received notification from Tribal that your e-track Assess account is active, several details must be entered in the app:
- Start the Assess app.
- On the login screen, enter your Organisation ID. This can be found in the field ORG.ORGANISATIONID. Enter your e-track username and password in the bottom two boxes.
You should now be able to use e-track Assess.
The login details and a number of other settings can be changed in the following way:
-
Go to your iOS's Settings screen.
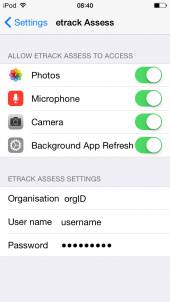
- Scroll down to the list of apps at the bottom and choose e-track Assess.
- The login details can be changed at the bottom of the screen. At the top there are buttons which can allow or prevent e-track Assess from accessing your device's photos, microphone and camera and from refreshing the app in the background.
Android Setup
Once you have received notification from Tribal that your e-track Assess account is active, several details must be entered in the app:
- Start the Assess app.
-
Press the three dots at the top-right of the screen and select Settings.

- Enter your Organisation ID. This can be found in the field ORG.ORGANISATIONID.
- Enter your e-track login details in the Username and Password boxes.
You should now be able to use e-track Assess.
The settings screen has a number of additional options:
- Allow upload over mobile network - By default, e-track Assess only allows files to be uploaded over a Wi-Fi connection, which helps prevent file upload failures. Ticking this option will allow uploads using mobile data. It is highly recommended to leave this option unticked unless Wi-Fi is not available and a file upload cannot wait for a better connection.
- Clear files - This button will clear ALL media files from the device and should NOT be used unless advised to.
Basic Operation
A demonstration of e-track Assess can be viewed below.
Test Case
Once e-track Assess has been set up, we recommend running a test case with a test / dummy learner to check that everything is working correctly.
Stats Service Notifications
The e-track stats service can be configured to send an assessor a nightly email listing any evidence or visit files that have not been uploaded (listed by learner). Please note this requires the latest version of the stats service included with 5.12 and later versions of e-track.
To enable this option, first the e-track stats service config must be updated:
- On the server where e-track runs, go to C:\Program Files (x86)\Tribal Group\e-track Stats Service.
- Open EtrackStatsService.exe.config for editing.
-
Locate the section that looks like the following (except with your connection details):
<add name="DBNAME">
	<sqlConnectionString value="User ID=maytas3;Initial Catalog=DBNAME;Data Source=SERVERNAME;password=PASSWORD"/>
	<onDemandRefresh enabled="True" interval="30"/>
	<scheduledRefresh enabled="True" frequency="Daily" time="01:00" type="InTraining"/>
</add>
-
Add two lines to the bottom (fileBase and fileArchive):
<add name="DBNAME">
	<sqlConnectionString value="User ID=maytas3;Initial Catalog=DBNAME;Data Source=SERVERNAME;password=PASSWORD"/>
	<onDemandRefresh enabled="True" interval="30"/>
	<scheduledRefresh enabled="True" frequency="Daily" time="01:00" type="InTraining"/>
	<fileBase value="c:\files\"/>
	<fileArchive value="C:\m3files\;c:\example\"/>
</add>
- The folder path for fileBase should point to the folder where your e-track visit and evidence files are stored. If you archive these files, the fileArchive path can be entered (if multiple archive locations are used, these can be separated with a semi-colon).
- Save and close the config file.
Next, a number of system config options must be set:
- In Maytas 5, click the M5 button at the top-left and select Options.
-
Under e-track Online, select Stats Settings.
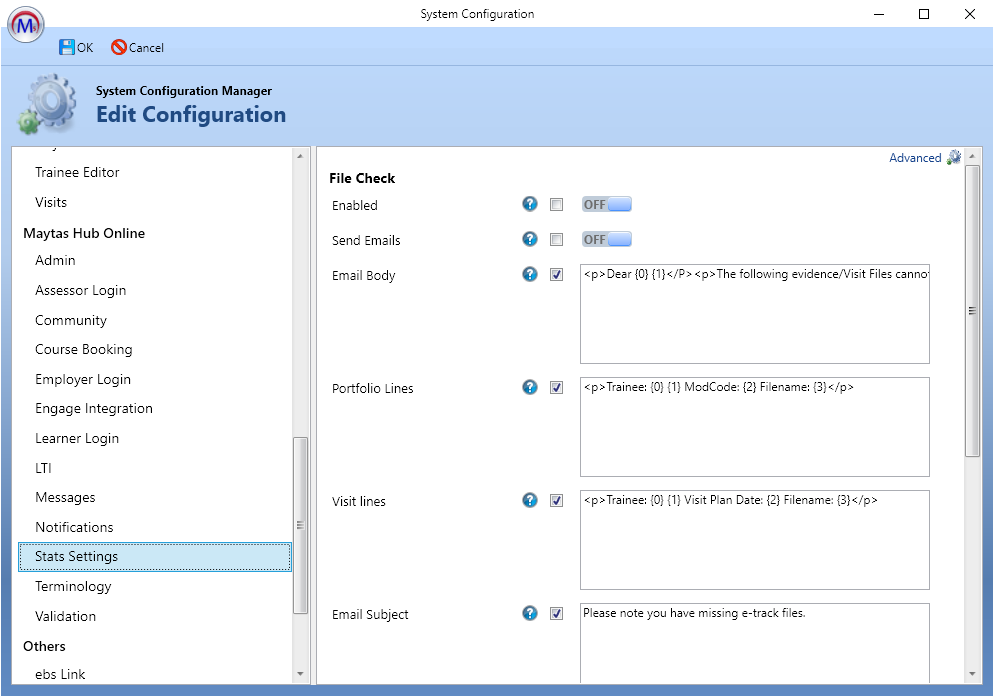
- The format of the email can be defined in the Email Body, Portfolio Lines, Email Subject and Visit lines configs, using HTML formatting. Each of these can also be ticked or un-ticked as required. To enable the sending of emails, tick the Enabled and Send Emails configs and set the toggle buttons to ON.
- Click OK.
Missing Files / Pending Uploads
If e-track Online is missing files uploaded from e-track Assess (e.g. from a failed upload), this can be corrected as follows:
- First, ensure your device has a strong Wi-Fi connection. Currently e-track Assess will only sync files successfully over Wi-Fi, not on mobile data.
-
Fully close the Assess app (note that simply returning to your device's desktop will not close the app, as it will still be running in the background). The method for doing this is different depending on your device OS:
- For iOS devices - http://www.wikihow.com/Close-iPhone,-iPad,-and-iPod-Touch-Apps
- For Android devices - http://www.wikihow.com/Close-Apps-on-Android
- For Windows devices - http://ccm.net/faq/33425-windows-phone-8-how-to-close-apps-running-in-the-background
Please note that the details may vary slightly depending on the version of your OS.
DO NOT uninstall e-track Assess while there are still files that require uploading, as this will remove the pending uploads.
- Open the Assess app.
-
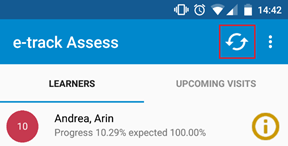
Perform a sync and ensure that your device does not go to sleep.
-
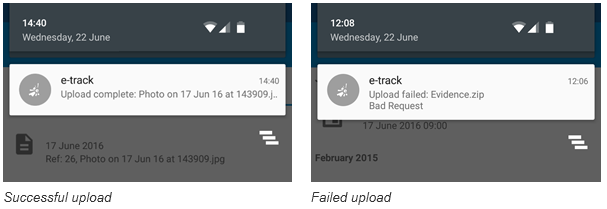
You should start to see notifications on screen. Check to ensure that all files have been sent successfully.
-
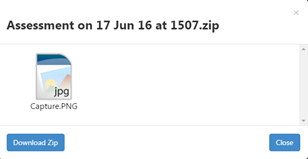
After you have created or sent files, log into e-track and check the file is on the server. The best way to do this is to try and download the file, which will confirm it is present on the server. If the file is not on the server then you will receive a message saying the file could not be found.
- Clear the notification and then repeat the above steps until all are pending files are either successfully uploaded or will not upload after several attempts.
FAQs / Best Practice
In addition to the instructions above, a number of guidelines must be followed when uploading files in e-track Assess:
-
When sending files on Android devices, you should check your device notifications to ensure that all files have been sent successfully.

-
Periodically press the sync button to check if there are any files that still need sending.

- Check that files being attached / transferred are of a sensible size.
-
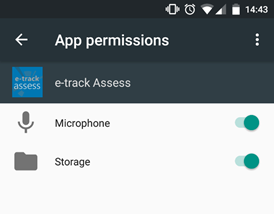
On Android devices, if you receive an error message about not being able to access storage, this is likely due to recent Android changes to app permissions. To fix this, go to your device settings, go to Apps and select e-track Assess. Next, go to Permissions and enable the Storage option. Please note that this may vary slightly depending on specific devices or Android versions – please contact Maytas Support if you require assistance.
