Maytas Hub Release Notes
Technical specification
The latest Maytas and Maytas Hub technical specification can be found here.
Maytas Hub Release Notes – Version 5.23.8000.4
Maytas Support and Self Service
Maytas Support will soon be changing so that the available ways of contacting our support team are by telephone and by the Self Service portal, which allows you to raise tickets and track existing requests. Emailing the service desk directly will not be supported as a method for raising Maytas Incidents or Service requests from March 2022.
Incidents and Service Requests can be raised on the Self Service portal, which can accessed at:
The central Service Desk can be called on +44 1143080080. This is only recommended for P1 incidents or if you are unable to access the Self Service portal.
A guide to these changes can be found here.
Workflow Updates
Improvements to Workflow Due Dates
The way in which workflow due dates are managed has been overhauled. The Workflow Editor now allows you to specify the relative due days for each form, which sets the due date for a form to the specified number of days after a workflow stage is invoked. For example, if a stage 1 form has 3 relative due days entered and the workflow is invoked on 12th February, the due date will be set to 15th February.
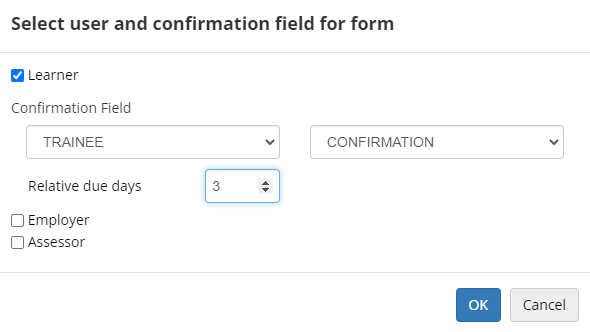
Setting the relative due days is optional, and if left empty then no default due date will be applied to a form. It is also possible to manually change or add a due date when a workflow is invoked.
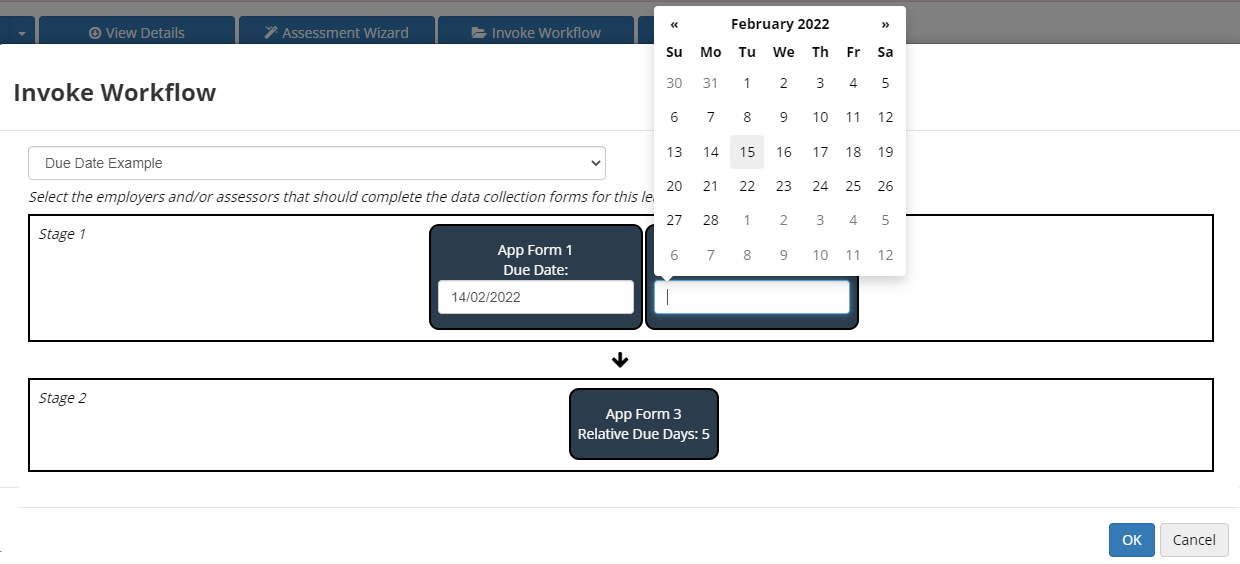
If a due date is set for a form, it will be displayed to the user when they are prompted to complete the form.
If a workflow has more than one stage, only stage 1 will have its relative due dates applied to start with. Once stage 1 has been completed, the relative due date will be applied to the next stage, based on the completion date of the previous stage. For example, if all forms in stage 1 are completed on 14th February and a form in stage 2 has relative due days set to 5, the due date for that form will default to 19th February.
If expiry dates are enabled, these will work relative to any due dates that are set.
It is also possible to include the due date and expiry date in data collection reminder emails sent to users by using the {{duedate}} and {{expirydate}} parameters in the relevant email body config. e.g. Please complete this form by {{duedate}}. The link will expire on {{expirydate}}.
Invoking Workflows as a Maytas User
Maytas Users can now invoke workflows for a learner. This requires a user permission to be set:
- Go to Web User Editor on the sidebar.
- Search for and select the Maytas User.
- Click Permissions to expand that section.
- Under the Data Collection header, tick the Can invoke workflows permission.
- Click Workflows to expand that section.
- Tick each workflow that you want to be accessible to the Maytas User.
- Click Save.
The user can then
Preventing Deletion of Workflows in Use
Workflows that are in progress are now prevented from being deleted, and a message is displayed to the user attempting to delete it with an explanation.
Employer Skill Scan Updates
Employer Skill Scan View
Employer users can now view Skill Scans for their employees by opening a learner record and going to the Skill Scan tab. The tab is read-only for employer users and new Skill Scans cannot be created from it.
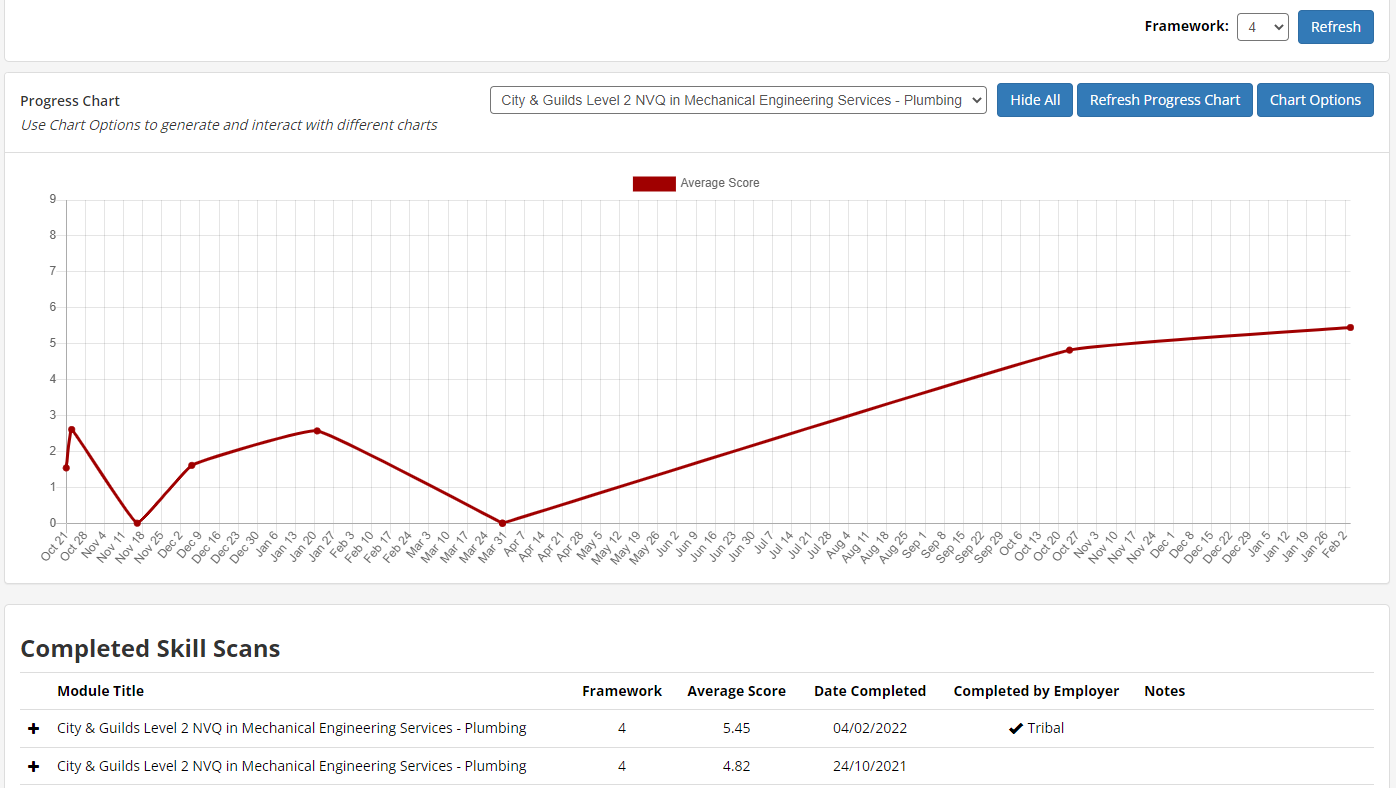
The tab is controlled by user permissions and is enabled by default. To remove access to the Skill Scan tab for an employer user:
- Go to Web User Editor on the sidebar.
- Search for and select the employer user.
- Click Custom Tabs to expand that section.
- Under the Learner Editor header, untick the Skill Scan permission.
- Click Save.
Improvements to Assigning a Skill Scan to an Employer
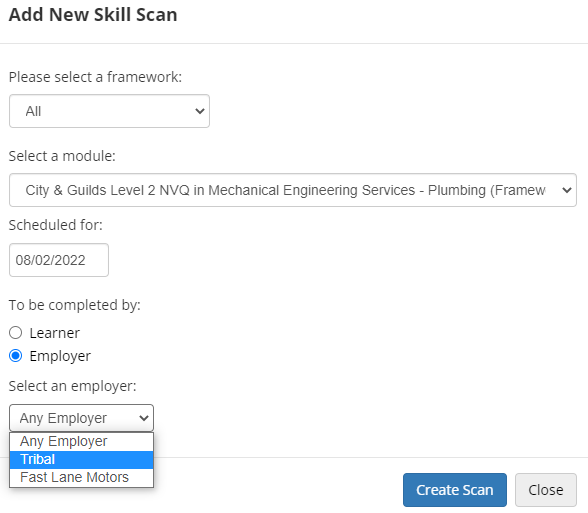
When a Skill Scan is created for an employer to complete for a learner, if the learner has previous employer records that are now closed, the Skill Scan will only be sent to employers they are currently active with.
It is also possible when setting up a Skill Scan to manually select a specific employer from the Select an employer dropdown box.
Viewing Skill Scans from Other Employers
A config option is available which allows employer users to view Skill Scans for their learners that are not specifically associated with that employer (e.g. Skill Scans completed at a previous employer). To enable this:
- In Maytas Hub, go to Settings on the sidebar.
- Click the System configuration button.
- Go to Employer Login on the left (under the Maytas Hub Online header).
- In the General section, tick the box for the See Skill Scan data from other employers setting on the right and ensure the toggle button is set to ON.
- Click Save.
When an employer views a learner's Skill Scan tab, they will now see a Completed by Employer column which will show if a Skill Scan was completed by a specific employer. If the column is empty, that means the Skill Scan has not been associated with a specific employer.

Assessor users also have a column showing which employer completed a Skill Scan, although this only applies to Skill Scans created as of this upgrade as it is not possible for Maytas Hub to determine which employers completed historical Skill Scans.
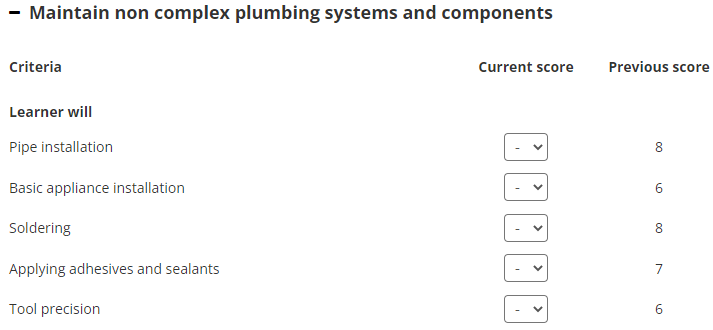
View Previous Scores when Completing Skill Scan
Previous scores can now be viewed when completing a Skill Scan. To enable this feature:
- In Maytas Hub, go to Settings on the sidebar.
- Click the System configuration button.
- Go to Learner Login on the left (under the Maytas Hub Online header).
- In the Skill Scan section, tick the box for the Show previous Skill Scan scores setting on the right and ensure the toggle button is set to ON.
- Click Save.
The previous scores will now be displayed when completing a Skill Scan.
Custom Visit Tabs for Employers
Employer users can now view custom tabs for visits created in the Screen Designer. These tabs are read-only in the employer editor.
To enable a visit tab for an employer user:
- Go to Web User Editor on the sidebar.
- Search for and select the employer user.
- Click Custom Tabs to expand that section.
- Under the Visits Editor header, tick the box for each tab you wish to be visible.
- Click Save.
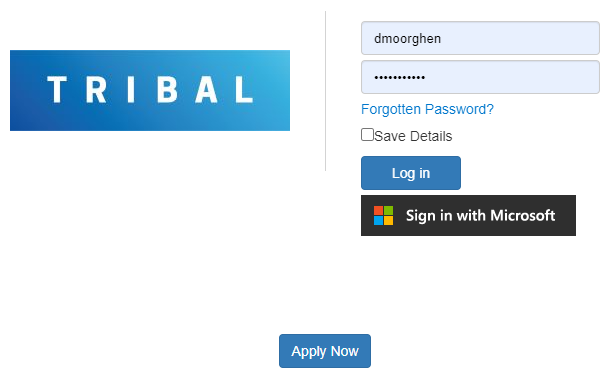
Configurable 'Apply Now' Button on Login Page
An Apply Now button can be added to the login page which goes to a specified URL (e.g. an application form). To enable and configure this button:
- In Maytas Hub, go to Settings on the sidebar.
- Click the System configuration button.
- Go to Admin on the left (under the Maytas Hub Online header).
- In the Online Applications section, tick the box for the Apply Now button URL setting on the right and enter the URL you wish to use.
- Click Save.
The login page will now display the Apply Now button, which will go to the URL entered in the config.
Manage POTs in Maytas Hub
Custom tabs in Maytas Hub now have a POT selection dropdown box for learners with multiple POTs that determines which POT the data on the tab relates to.
Additionally, it is possible to add or delete POTs in Maytas Hub (controlled by user permissions). Adding a POT requires that the Custom Add Trainee form(s) configuration option is enabled and set to a valid form, which will be used as the process for adding POTs (see here for details).
To give permission to manage POTs:
- Go to Web User Editor on the sidebar.
- Search for and select the relevant user.
- Click Permissions to expand that section.
- Under the Assessor header, tick the box for the Manage Trainee POTs permission.
- Click Save.
The buttons for adding and deleting POTs can be found at the top of a learner's Summary page.

Clicking the Add New POT button will prompt you to select a contractor, scheme and start date for the POT, before proceeding to the form specified in the configuration option.
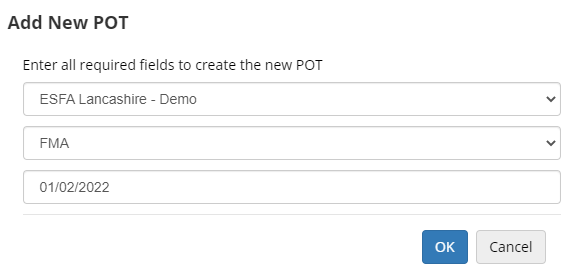
The current POT for a learner must be ended with a POT termination date before a new POT can be created. You will be notified and prevented if you attempt to add a POT while the current one is still open.
The Delete POT button prompts you to select the POT to delete.

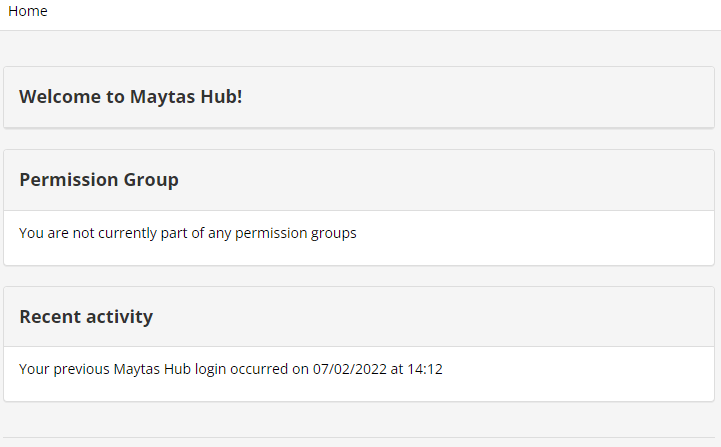
Limited Homepage Permission
A new Limited Homepage permission is available which restricts a user's login to a basic homepage which only displays the permission groups they belong to and their last login data. Learners with this permission can still complete data collection forms and Skill Scans assigned to them.
Maytas users have the limited homepage by default.
To enable the limited homepage for a learner:
- Go to Web User Editor on the sidebar.
- Search for and select the learner user.
- Click Permissions to expand that section.
- Under the Trainees header, tick the box for the Limited Homepage permission.
- Click Save.
The learner will see the limited homepage when they next log in.
File Store on Custom Tabs
The learner file store now works on custom tabs in Maytas Hub and can display files uploaded to the file store via Maytas.

This requires the Trainee Files custom control to be added to a tab in the Screen Designer.
The file store will be read-only in Maytas Hub, though permission can be given to allow files to be downloaded:
- Go to Web User Editor on the sidebar.
- Search for and select the learner user.
- Click Permissions to expand that section.
- Under the Files header, tick the box for the Download From Learner File Store permission.
- Click Save.
If you download a file from the file store, it is important to remember that it may contain sensitive or protected data under the GDPR or other laws. It is your responsibility to ensure that any downloaded files are stored and handled appropriately.