Create a Process
- Under the Tools ribbon, click Process Browser.
- The window that appears lists different process types on the left. These are the various areas of the system where processes can be displayed. For example, a Personnel process would only appear when viewing a Personnel account. For this example, select Trainee.
-
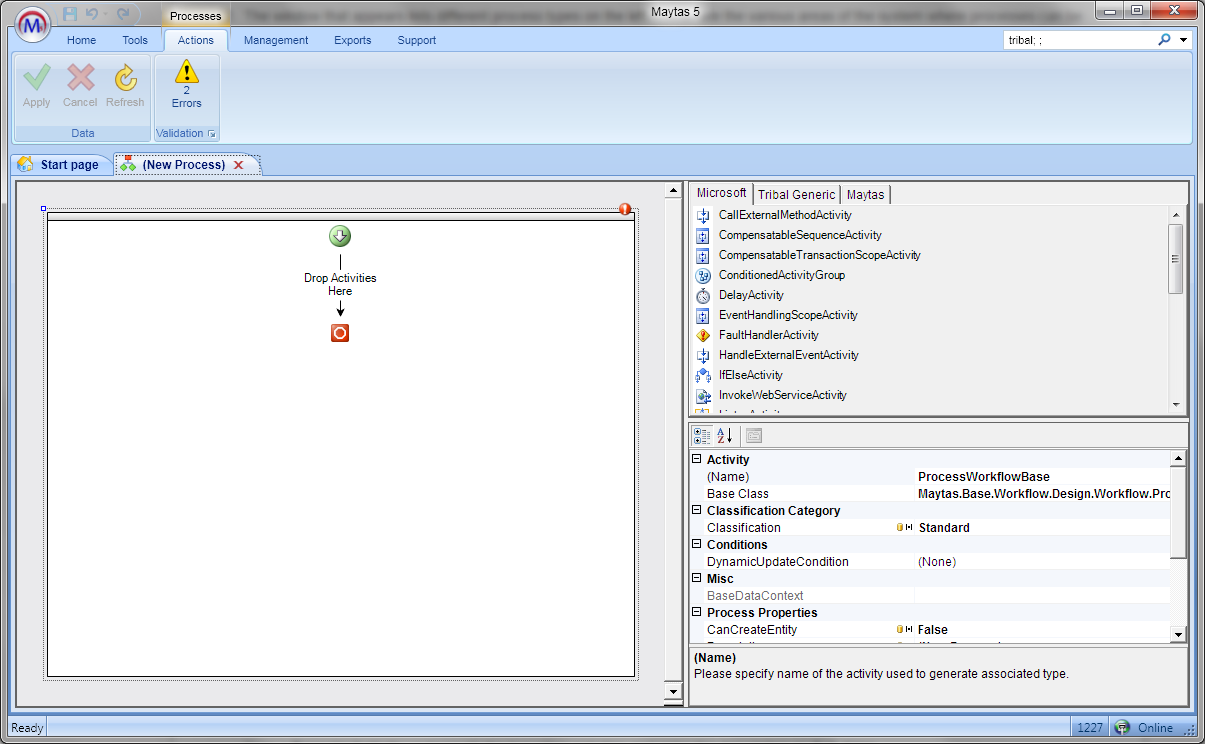
Double click New Process. You will now see the process designer. For this example we will create a simple process for setting up a newly created learner using existing controls.

-
Before continuing, we will resolve the validation error which is being reported. Click the yellow warning triangle and you will see that a property description has not been set. In this case, it is referring to the name of the process, as it is currently set to the default (New Process).
Note that at the top-right of the flowchart area there is a red exclamation mark. If a section of the flowchart has this symbol, it indicates that the section has an error.
-
 In the properties panel, locate the Description field in the Process Properties group and enter a name for the process. Click Apply at the top-left of the screen and the error will disappear.
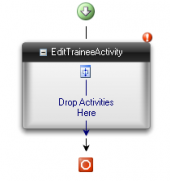
 - Drag EditTraineeActivity from the activity list to the flowchart area (in between the
 and
and icons, which represent the start and the end of the process).
 - Another error will appear. This is because the newly-added activity is not linked to a control. Click the activity header (the dark grey area) if it is not already selected and locate the ControlName field in the Configuration group.
- Click ControlName and click the drop-down arrow to display a list of available controls. Select ContactDetails.
- By default, each step of the process uses the activity name as a header. However, if a description is entered, this will be used instead. Enter Contact Details in the Description field in the Activity group.
- Drag a second EditTraineeActivity underneath the first.
- Set the ControlName to POT Info.
- Enter the Description as POT Info.
-
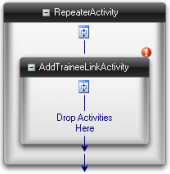
For the next step we will add one or more subsidiary aims. To do this we will first need to add a RepeaterActivity. A RepeaterActivity is used for activities which you may want to perform more than once, such as adding a number of sub aims or diary events. The repeater loops round on a screen, and after each loop asks whether or not you want to perform the activity again.
 Drag a RepeaterActivity underneath the two other activities and enter the description as Sub Aims.
 -
We now need to add an activity for the repeater to repeat on. Drag an AddTraineeLinkActivity into the repeater.
TraineeLinkActivities link trainee activities to the auxiliary trainee tables (e.g. the sub aims table).
- Select AddTraineeLinkActivity and set the ControlDataContextType in the Misc group to TRAINEE_ILR_AIMS, which is the sub aims table.
- Set the ControlName to ILR Subaims.
-
Select the RepeaterActivity. Enter the NoQuestion as Finish wizard, and enter the YesQuestion as Add another subsidiary aim.
The YesQuestion repeats the loop and the NoQuestion moves onto the next step.
- Click Apply to save the changes.
- Go to Home on the toolbar and click the Sync button.
Now that we have a process, it needs to be made accessible in the system by creating a new ribbon button. To do this, please follow the Create a New Button tutorial, which follows on from the above tutorial.