Assessment Wizard
The assessment wizard allows an assessor to plan an assessment for a learner (or learners).
-
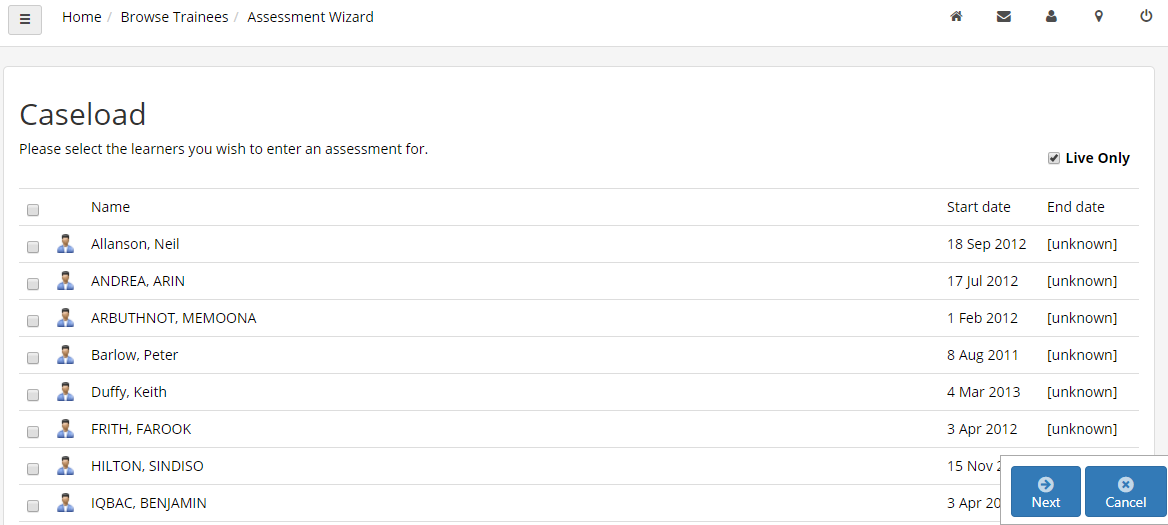
To create an assessment for a single learner, open the learner's record and click the Assessment Wizard button on the Summary screen. To create an assessment for a group of learner's, go to Trainees on the toolbar and click the Assessment Wizard button. You will then see a list of learners - tick the boxes next to the learners you wish to add to the assessment and click Next.
-
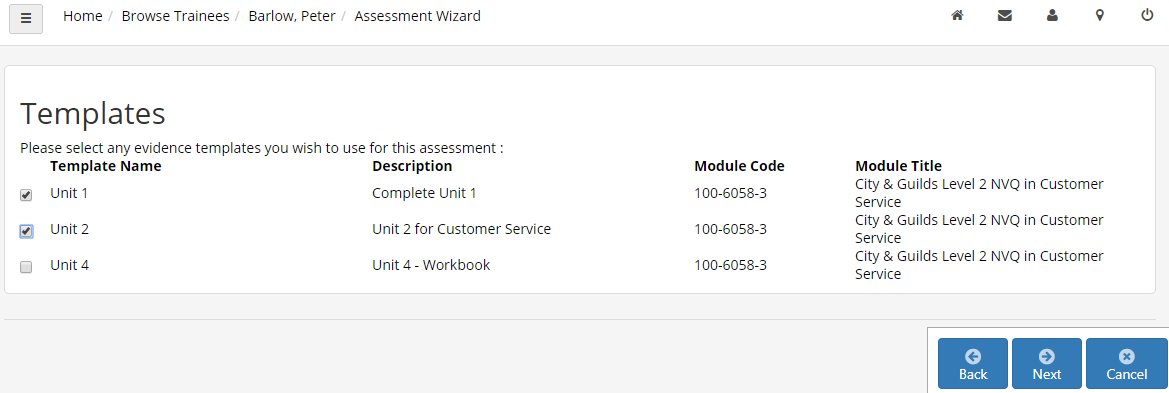
If assessment templates have been set up, you will have the option to select them here for the assessment (please see the Templates page for more information on setting up templates). Tick the boxes next to the templates you wish to use (if any) and click Next.
-
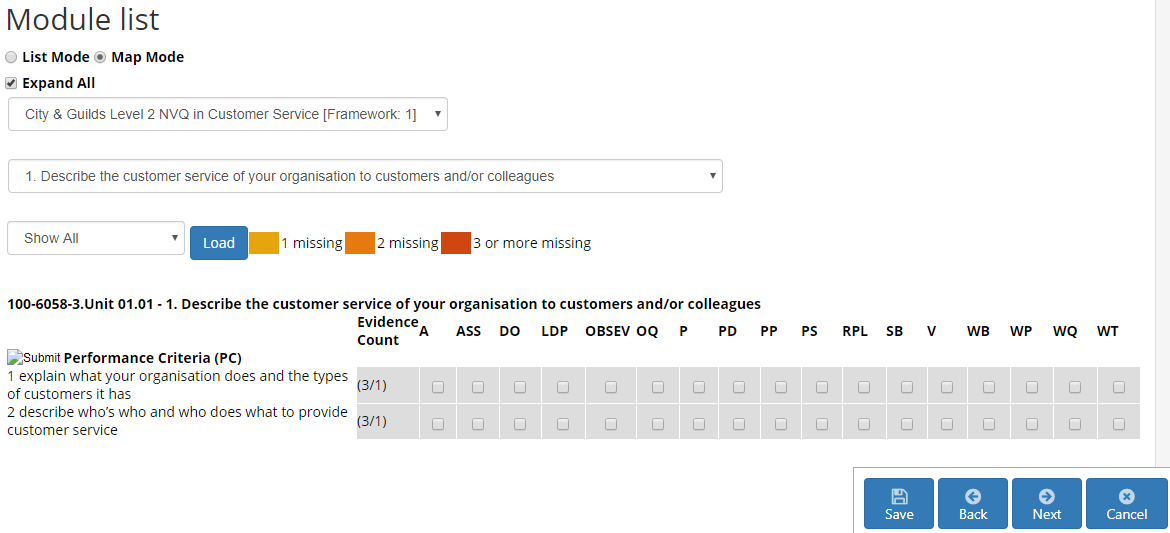
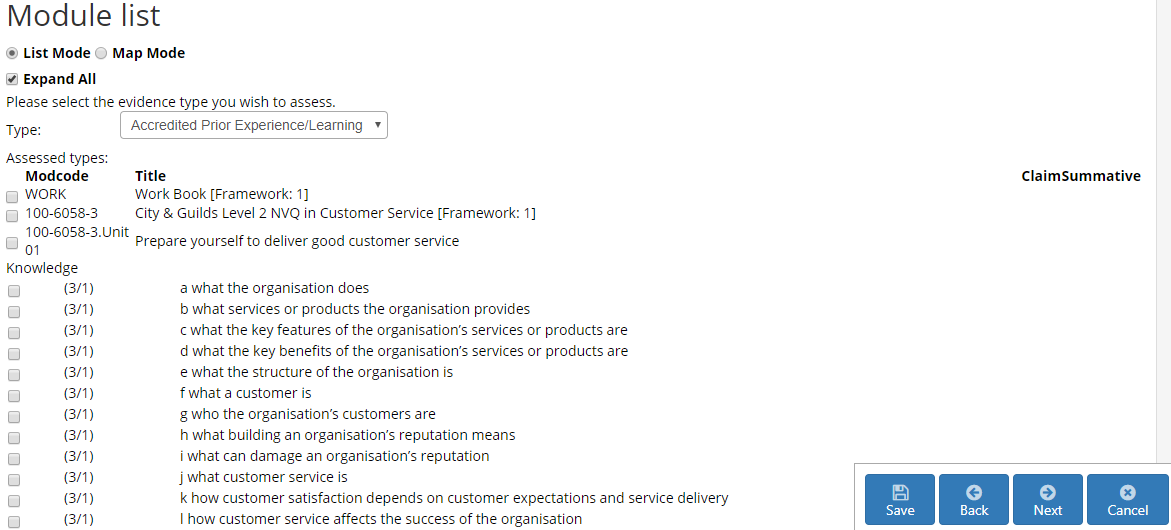
The module screen of the wizard allows you to choose which modules will be assessed (if none are to be assessed, simply click Next). There are two views:
-
Map Mode - This is the default view, which lets you plan evidence mappings per unit by evidence type.
-
List Mode - This view lists all applicable units and lets you plan the evidence to be assessed by evidence criteria.
For information on how to set evidence plans for an assessment with either mode, please see the Evidence Plans page.
-
-
The next screen lets you enter the basic details of the assessment, including the type of assessment, planned date, start and end times and any notes you wish to enter.
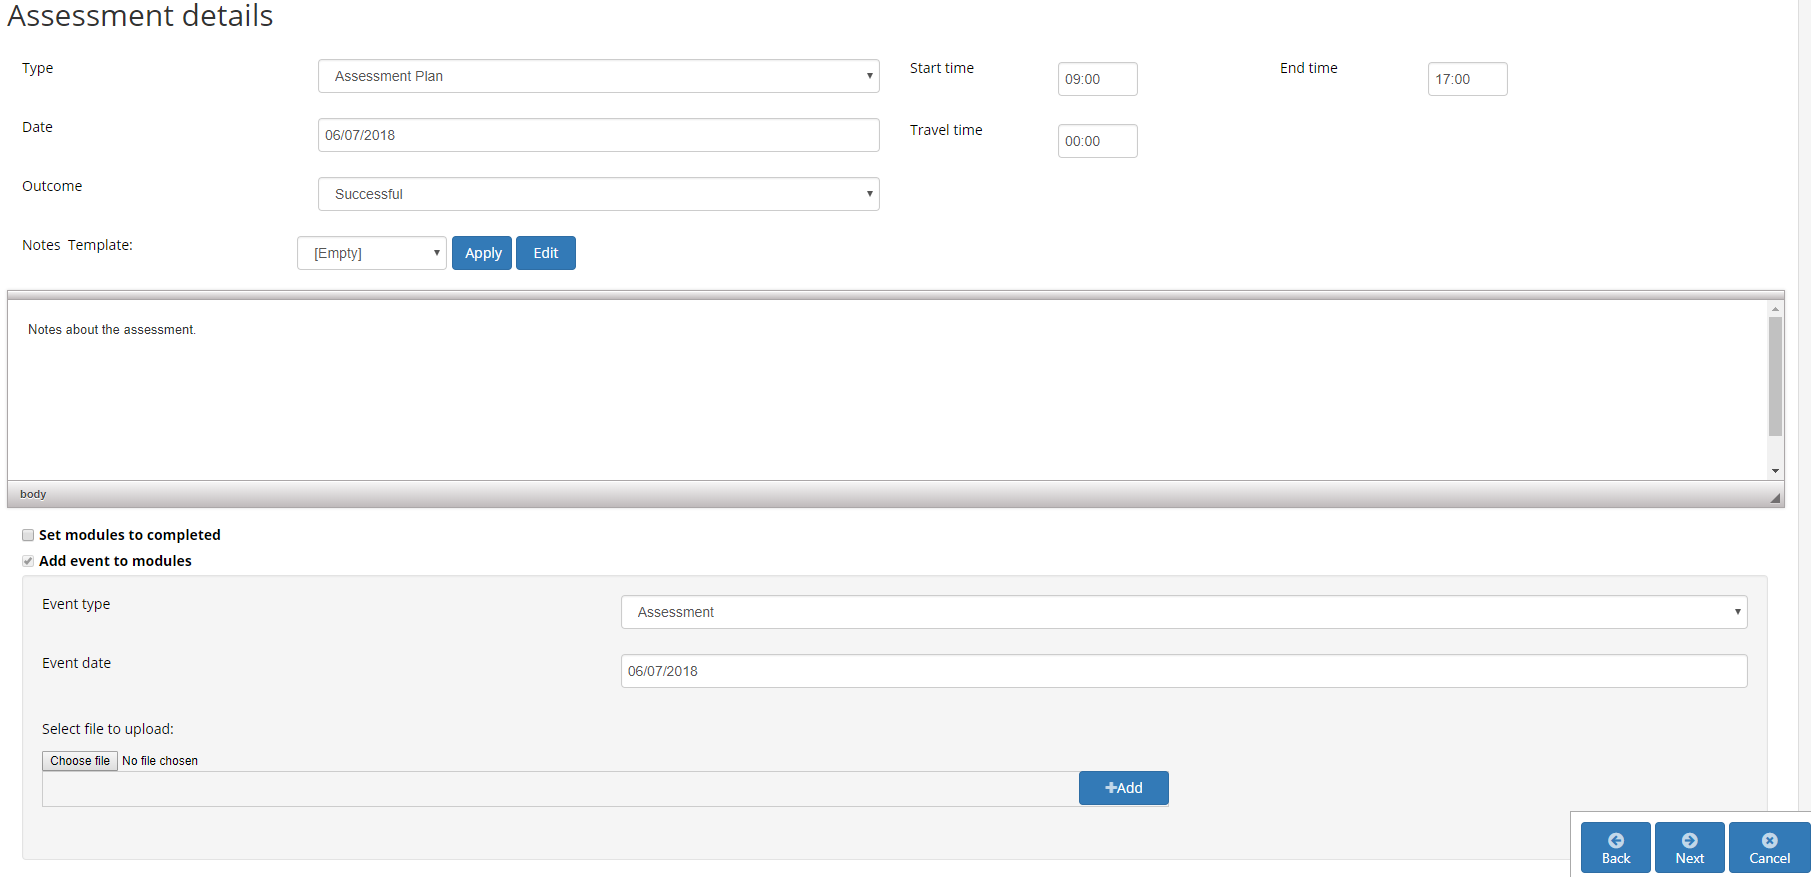
The Outcome field would not necessarily be entered while planning the event – this can be entered by editing the assessment at a later date.
Similarly, the Set modules to completed checkbox should only be ticked once they have been assessed, as this will enter completion dates for the units being assessed (as determined on the previous screen).
At the bottom of the screen you can choose the event type and date and upload files relevant to the assessment (e.g. evidence files). To do this:
- Click Browse.
- Browse to and select the file and click Open.
- Click +Add.
- To remove a file, select it from the list and click -Remove.
- Click Next when finished.
-
On the final screen, feedback can be left for the learner and any relevant files uploaded by clicking the Browse button. Again, feedback would usually not be entered while planning the assessment – this would be done after it has actually taken place by editing the assessment.
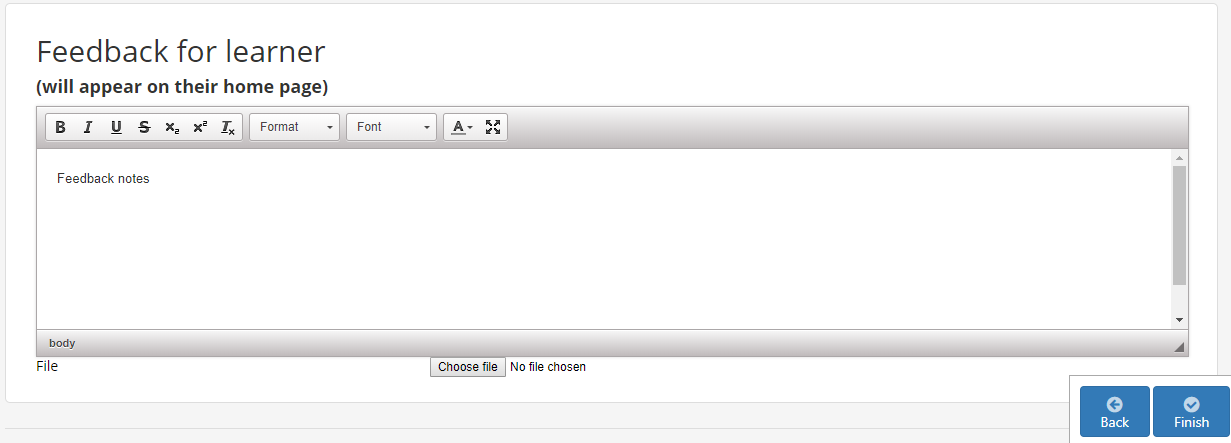
Click Finish to add the assessment.
To edit an assessment (e.g. to complete the outcome, actual date, feedback, etc, once it has taken place), select the Visits tab in the learner’s profile and click the assessment to open it (see Visits for more information).