Maytas Hub Release Notes
Technical specification
The latest Maytas and Maytas Hub technical specification can be found here.
Maytas Hub Release Notes – Version 5.22.7950.4
PCR - Hyperlinks in Messages and Learning Plan Templates
Message Hyperlinks
The relevant section of the video runs from 35s to 2m22s.
The Maytas Hub
- Go to Messages on the sidebar and click New Message.
-
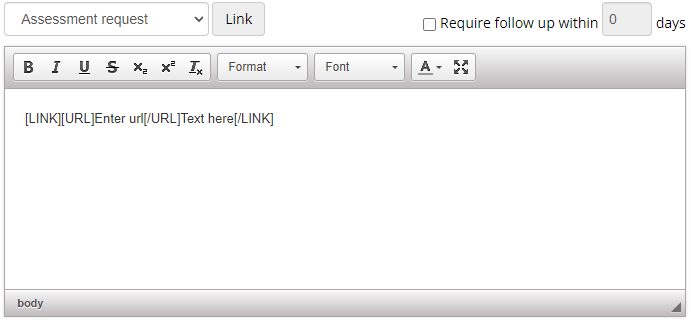
Click the Link button to add a hyperlink template to the body.
-
The URL for the link should go between the [URL][/URL] tags and the text you want to display for the link should go where it says Text here. e.g. If you entered:
Here's the [LINK][URL]http://www.tribalgroup.com[/URL]Tribal website[/LINK].
The end result would be:
Here's the Tribal website.
-
Complete and send the message as usual. The recipient will receive the message with the link.

Learning Plan Template Hyperlinks
- Go to Settings on the sidebar and click the Learning Plan Templates button.
-
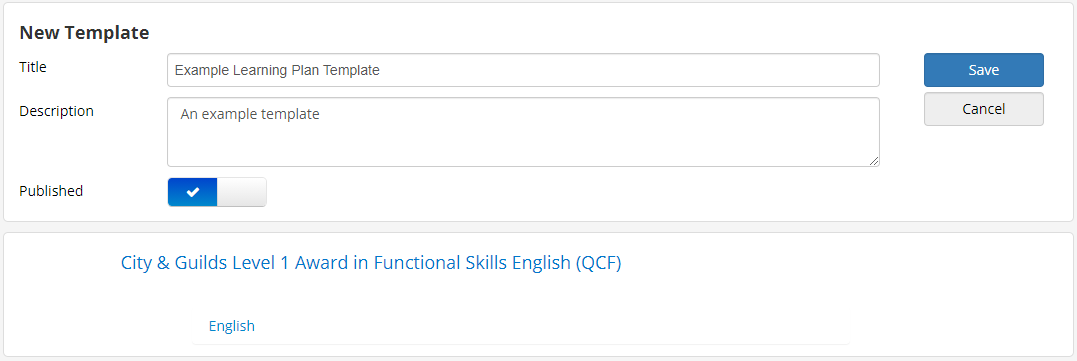
Add or edit a template.
-
Select the unit you want to edit the notes for and click the Add button.
-
Click the Link button to add a hyperlink template to the notes.

-
The URL for the link should go between the [URL][/URL] tags and the text you want to display for the link should go where it says Text here. e.g. If you entered:
Here's the [LINK][URL]http://www.tribalgroup.com[/URL]Tribal website[/LINK].
The end result would be:
Here's the Tribal website.
New formatting options are also available (e.g. bold, italics, bullet points, etc).
- Complete the template as required and click the Save button.
PCR - ILP Improvements for Learner Login
The relevant section of the video runs from 2m23s to 5m13s.
The way in which a learner's ILP is accessed in the learner login is now consistent with the assessor login. To access a learning plan in the learner login:
- Go to Visits on the sidebar and open the relevant visit.
-
Go to the Plan tab.
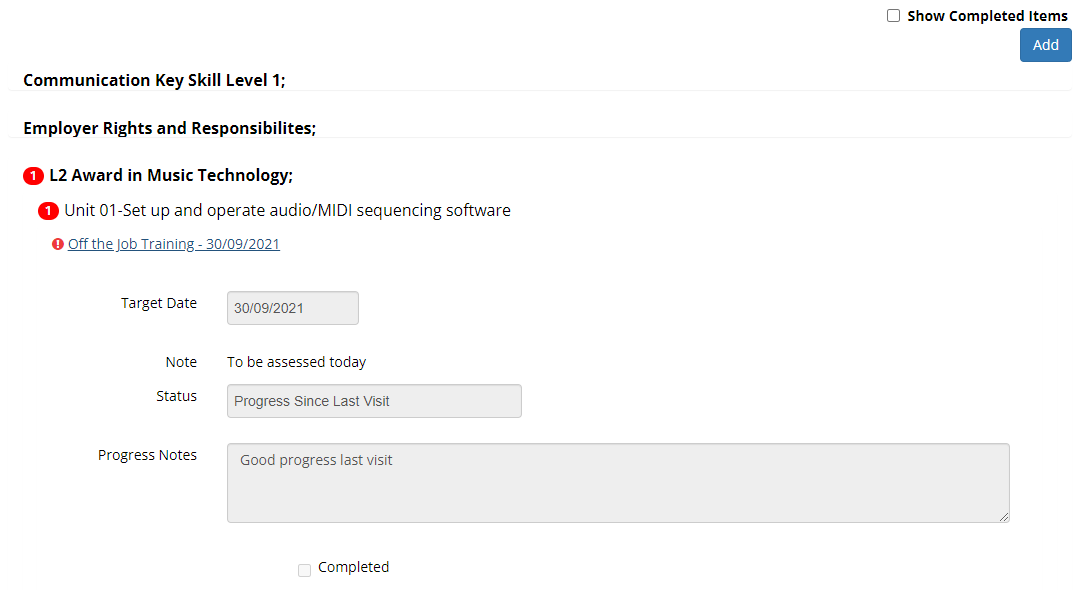
- The plan can now be viewed. By default, only open plan items are shown. To include completed items, tick the Show Completed Items box at the top-right.
An ILP button can also optionally be included on the learner login home screen with a config option:
- In Maytas Hub, go to Settings on the sidebar.
- Click the System configuration button.
- Go to Learner Login on the left (under the Maytas Hub Online header).
- Tick the box for the Show ILP button on home screen setting on the right (in the Learning Plan section) and ensure the toggle button is set to ON.
- Click Save.
If a learner has an upcoming visit, the ILP button will now appear on their home page, and clicking it will open the learning plan for that visit. If there are multiple upcoming visits, the earliest one will be opened
 .
.
PCR - Data Collection Form Reminders
Reminder emails for data collection forms can now be sent out to ensure users complete assigned forms by their due date.
This can be configured in a variety of ways:
- In Maytas Hub, go to Settings on the sidebar.
- Click the System configuration button.
- Go to Stats Settings on the left (under the Maytas Hub Online header).
- The relevant config options can be found in the Data Collection section on the right. Tick each required option and set them as follows:
- Body of the reminder email sent to existing users with a data collection form to fill out soon - Enter the email body you want to send to users who have an outstanding form approaching their due date.
- Send reminder email when form is due soon - This toggle button enables the sending of reminder emails to users who have an outstanding form approaching their due date.
- Days after due date that form expires - This can optionally be set to cause forms to expire a specified number of days after their due date. An expired form can no longer be completed.
- Body of the reminder email sent to existing users with an overdue data collection form - Enter the email body you want to send to users who have an outstanding form that has gone past its due date.
- Send reminder email after due date - This toggle button enables the sending of reminder emails to users who have an outstanding form that has gone past its due date.
- Days before due date to send reminder email - This determines how many days before a due date the reminder email is sent.
- Click Save.
The email body config options can use the following parameter tags to automatically insert data such as names into the email (similar to mail merge):
| Parameter | Description |
|---|---|
| {{fname}} | User first name |
| {{lname}} | User surname |
| {{user}} | Username |
| {{employername}} | Employer name |
| {{etrackurl}} | URL for Maytas Hub |
| {{duedate}} | Form due date |
If the email body config options are not entered, default email bodies are used.
Permission Group Updates
Access to Browse Modules and Data Authentication
The Maytas User
- In Maytas Hub, go to Web User Editor on the sidebar.
- Go to the Groups tab.
- From the User Type dropdown box, select Maytas User.
- Click Maytas User in the list of groups.
-
Click Pages Allowed to View to expand that section.
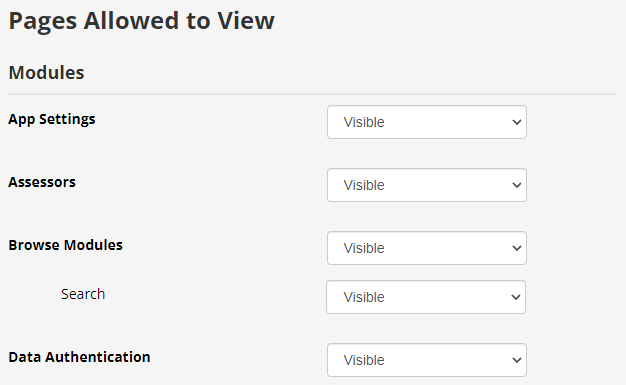
- The permissions for Browse Modules and Data Authentication can be set for the group here.
Maytas User Configuration Section
On the System Configuration screen, there is now a Maytas User Login section which contains configuration options specifically relevant to the Maytas User
- In Maytas Hub, go to Settings on the sidebar.
- Click the System configuration button.
- Go to Maytas User Login on the left (under the Maytas Hub Online header).
- Tick the config options required and set them as follows:
- Custom Add Trainee form(s) - Enter the short string values for each form you wish to include in the New Trainee process (details on form short strings can be found here). Each form should be separated with a semi-colon, e.g. A1;A2;A3.
- Set the number of days after which a Maytas user's password expires - Enter the required number of days.
- Set the password policy - This takes the form of a six-digit number, where each number represents a particular policy:
- The first two digits are the length the password needs to be
- The third digit is the minimum number of uppercase letters
- The fourth digit is the minimum number of lowercase letters
- The fifth digit is the minimum number of numeric characters
- The sixth digit is the minimum number of symbols, from the following list: ! @ # $ ? * ( ) _ + | ~ - = \ / ’ { } [ ] :
- Click Save.
Clone Web User Groups
Web user groups can now be cloned and saved under a different name, so that variations on groups with similar permissions can be set up without having to create each group from scratch. This requires the Web Administrator permission.
- Go to Web User Editor on the sidebar.
-
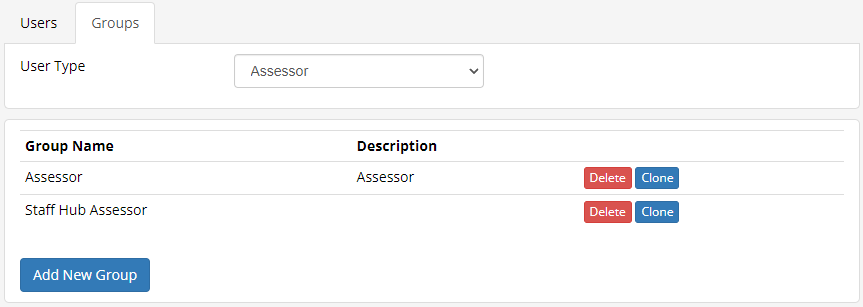
Go to the Groups tab.
-
Click the Clone button next to the group you wish to clone.
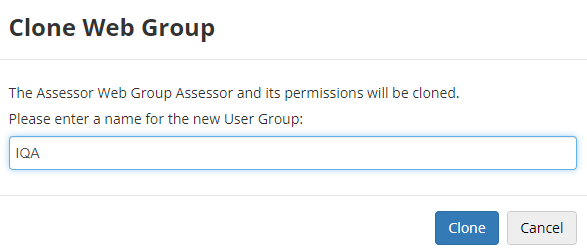
- Enter a name for the new group and click Clone.
- The new group will now be created.
Configurable GUID Expiry for Data Collection and Password Resets
It is now possible to configure when a GUID will expire for data collection and password reset links:
- In Maytas Hub, go to Settings on the sidebar.
- Click the System configuration button.
- Go to Admin on the left (under the Maytas Hub Online header).
- Tick the box for the Days before GUID expiry setting on the right (in the General section).
- Enter the number of days after which the GUID should expire.
- Click Save.
If the config is not set, a GUID will expire after 2 days by default.
Module Editor - Import Evidence Category Lookups
When importing a module into the Module Editor, there is now the option to import any evidence category lookups from the import file which are not already in the database. This will only work with modules that have been exported as of the 5.22 SP1 release, as the export now includes the lookup longstrings for evidence categories. Additionally, only lookups where the shortstring is not present in the database will be imported - i.e. the import will not overwrite existing lookups where the shortstring is the same but the longstring is different in the database and the import file.
How to export a module
- Go to Browse Modules on the sidebar.
- Search for the module you wish to export.
-
Click the edit button at the end of the module you wish to export.

-
You will now see the hierarchy of the module and its units and elements.
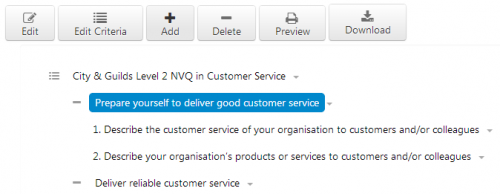
- Click the Download button. This will export the module to an .etobj file which is saved in your default browser downloads folder.
How to import a module and include evidence category lookups
- Go to Browse Modules on the sidebar.
-
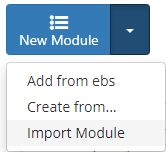
Click the arrow next to the New Module button and select Import Module.
-
Click Choose File, browse to and select the .etobj file you wish to import and click Open.

-
Click Add.

- By default, the option to import evidence category lookups will be selected. Untick this box if you do not wish to import the lookups.
- Click Upload. Once the upload has finished, you will be returned to the Module Importer screen.
Web User Editor - Locked User Administration Enhancements
A new standalone permission, Restricted Web User Editor, is available in the web user editor which gives a user the ability to lock and unlock accounts, but no other admin functionality.
This first requires a config option to be set:
- In Maytas Hub, go to Settings on the sidebar.
- Click the System configuration button.
- Go to Admin on the left (under the Maytas Hub Online header).
- Tick the box for the Number of failed logins before account is locked setting on the right (in the General section).
- Enter the number of permitted failed logins before accounts are locked.
- Click Save.
To set the permission:
- Go to Web User Editor on the sidebar.
- Search for and select the user who requires permission.
- Click Permissions to expand that section.
- Under the Administration header, tick the Restricted Web User Editor permission.
- Click Save.
The user can then lock and unlock accounts as follows:
- Go to Web User Editor on the sidebar.
-
Search for the user account you wish to lock or unlock. Note that there is a dropdown box in the search options which defaults to Show all accounts, but this can be changed to show only locked or only unlocked accounts.

- Click the Lock or Unlock button as required at the end of the user's row.
- You will be asked to confirm your choice. Click OK to confirm.
- The user account will now be locked or unlocked, as selected.