Maytas Hub Release Notes
Technical specification
The latest Maytas and Maytas Hub technical specification can be found here.
Maytas Hub Release Notes – Version 5.25.8511.2
Login Page Improvements
The Maytas Hub login page has been improved with a modernised interface and more configurable options.
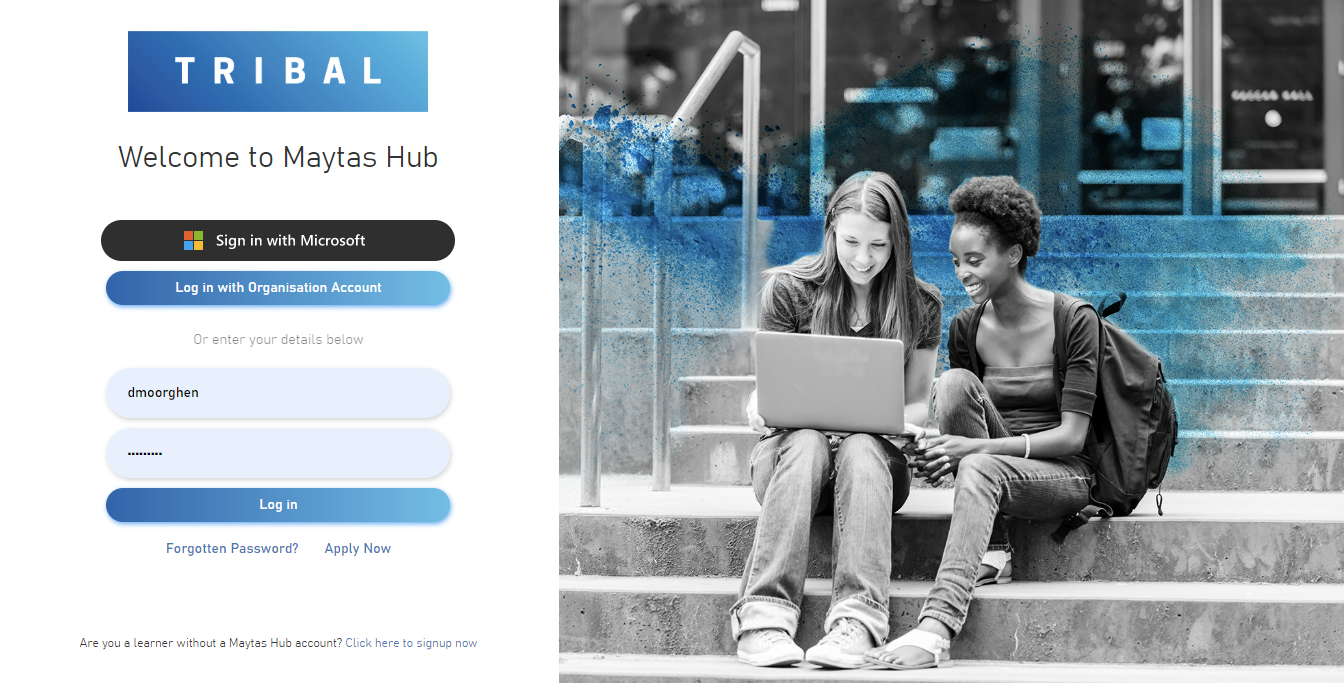
The available login options are as follows:
| Login Option | Notes |
|---|---|
| Standard / native login using Maytas web user credentials | Appears for all users |
| Sign in with Microsoft | Appears if EITHER (but not both) Azure AD or Azure B2C single sign-on is configured |
| Log in with Organisation Account | Appears if BOTH Azure AD and Azure B2C single sign-on are configured, in which case Sign in with Microsoft uses Azure AD and Log in with Organisation Account uses Azure B2C |
The image on the right of the login screen is randomly picked from a selection of available images each time the page is refreshed. You can upload a custom image to use instead:
-
In Maytas Hub, go to Settings on the sidebar.
-
In the Theme section, click the Choose file button next to the Custom Login Splash Image option.
-
Browse to and select the image you wish to use and click Open. The minimum image size is 900x600 pixels.
-
Click Save.
-
If you wish to remove the custom image from use, click the Reset button.
Sidebar Expand / Collapse / Pin
The sidebar is now collapsed by default and will automatically expand when the mouse moves over it. When expanded, the sidebar also now has a pin  button which will keep the sidebar expanded until it is unpinned or you move to another screen.
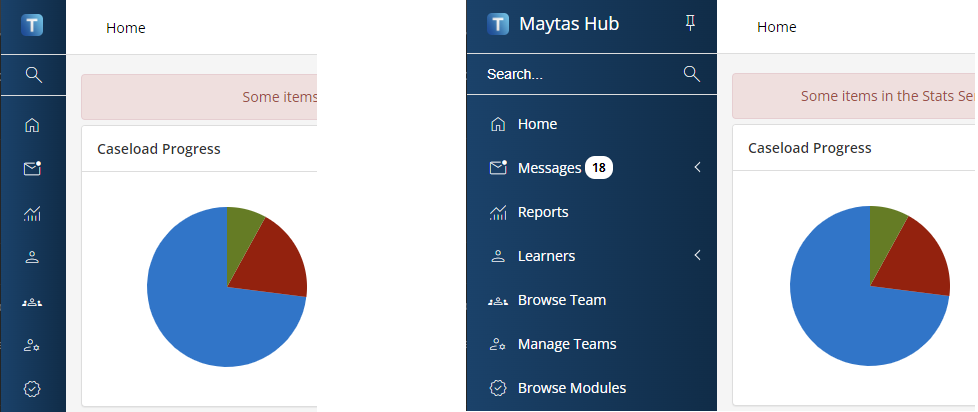
The collapsed and expanded sidebar.
Learner Journey - Risk Level
Learners can now be graded as high, medium or low risk in the Learner Journey.
The Risk Level column must first be enabled with a configuration option:
- In Maytas Hub, go to Settings on the sidebar.
- Click the System configuration button.
- Go to Assessor Login on the left (under the Maytas Hub Online header).
- Scroll down on the right to the General section.
- Locate the List of extra columns to show on the caseload screen option and tick the Risk Level box.
- Click Save.
The Risk Level column will now appear on the Caseload screen.

Clicking on the risk level will show a breakdown of the risk factors used to determine the overall risk level.
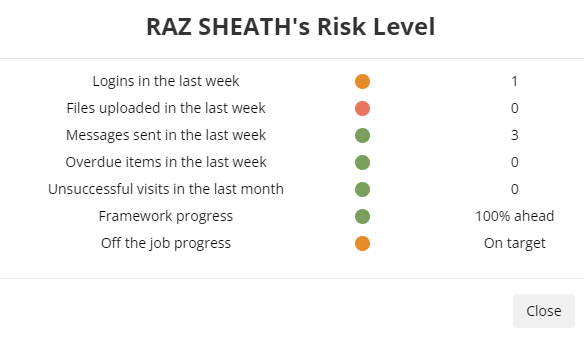
Risk Level Calculation
A risk level is assigned to each risk factor, all of which are amalgamated into an overall risk level for a learner. The risk factors for each learner are as follows:
| Risk Factor | High Risk | Medium Risk | Low Risk |
|---|---|---|---|
| Logins in the last week | 0 | 1-2 | 3+ |
| Files uploaded in the last week | 0 | 1-2 | 3+ |
| Messages sent in the last week | 0 | 1-2 | 3+ |
| Overdue learner journey items in the last week | 3+ | 1-2 | 0 |
| Unsuccessful visits in the last month | 3+ | 1-2 | 0 |
| Framework progress | Below expected progress | On target | Above expected progress |
| Off the job progress | Actual hours below expected hours | On target | Actual hours above expected hours |
Each factor is then given a risk score:
-
High risk = 1
-
Medium risk = 3
-
Low risk = 5
When the risk scores are totalled, the overall risk level for the learner is determined as follows:
| Total risk score | Overall risk level |
|---|---|
| 15 or less | High |
| 16-25 | Medium |
| 26+ | Low |
Traffic Light Icon Update
The icons used for traffic light statuses throughout Maytas Hub have been updated.
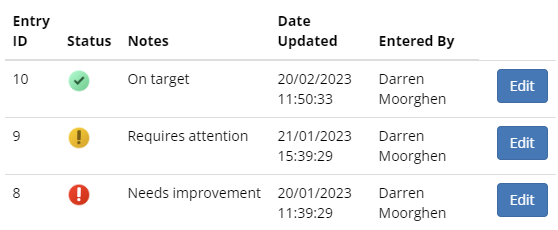
Hide Admin Buttons on Learner Summary
The admin buttons at the top of the learner Summary screen can now be hidden or displayed with the arrow button to the left of them.

Single Sign On with Azure B2C
Maytas Hub users can now link their Hub user account to an Azure B2C user, so that the Azure B2C credentials can be used to login to Maytas Hub.
This can work alongside the existing Azure AD single sign-on system in Maytas Hub, so that if both systems are configured then it will be possible to login to Maytas Hub using either an Azure AD or an Azure B2C account.
First this needs to be configured, which requires your Azure B2C client ID, client secret and tenant (your Azure B2C system administrator should be able to provide these values):
- In Maytas Hub, go to Settings on the sidebar.
- Click the System configuration button.
- Go to Admin on the left (under the Maytas Hub Online header).
- Scroll down on the right to the Single Sign On section.
- Tick the boxes for the four Azure B2C settings and enter their values:
- Azure B2C Authority - This should be set to https://login.microsoftonline.com/{0}/oauth2/v2.0
- Azure B2C ClientId - Value provided by administrator
- Azure B2C Client Secret Value - Value provided by administrator
- Azure B2C Tenant - Value provided by administrator
- You can additionally set the Hide Native Login option to ON to prevent the native Maytas Hub login option to appear so that only the Microsoft login option appears.
- Click Save.
Next, each user who needs to login using this feature must have the email address associated with their Azure B2C account entered against their Maytas Hub web user account:
- Go to Web User Editor on the sidebar.
- Search for and open the required user.
-
Under Basic Details, enter the Azure B2C email address in the Single Sign On Email box.

- Click Save.
The login screen will now include a Sign in with Microsoft option, which can be used by configured users to login to Maytas Hub using their Azure B2C credentials.
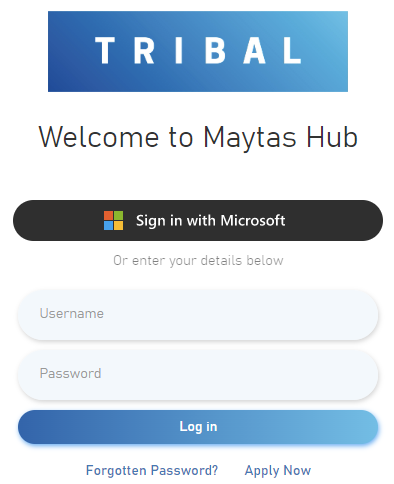
If you have configured single sign-on for both Azure AD and Azure B2C, there will be two separate login buttons: Sign in with Microsoft will use Azure AD and Log in with Organisation Account will use Azure B2C. If you have only configured one of the options, only the Sign in with Microsoft button will appear.
Finally, the return URL and platform type in Azure must be set. The return URL must be set to your Maytas Hub URL with /account/azurelogincallback added at the end. For example, if your Maytas Hub URL is https://myserver/MaytasHub then the return URL would be:
https://myserver/MaytasHub/account/azurelogincallback
The platform type must be set to Web.
For further details on configuring Azure, see here.
Force Evidence Files and Message Subjects to be Renamed
An option is now available to force learners to rename evidence files and the message subject before the files are uploaded. This requires a configuration option to be set:
- In Maytas Hub, go to Settings on the sidebar.
- Click the System configuration button.
- Go to Learner Login on the left (under the Maytas Hub Online header).
- Scroll down on the right to the Evidence Wizard section.
- Tick the box for the Force evidence wizard message subject and filename to be changed option and ensure the toggle button is set to ON.
- Click Save.
Once enabled, when a learner submits evidence, the Message Subject and Attachment filename will be blank so that they have to be entered before the evidence can be submitted (10 characters minimum for each).

Data Collection Form and Skill Scan Completion Improvements
Grid View of Outstanding Forms
When a user has multiple data collection forms to complete, the pop-up window which appears upon login now includes a Grid View button which shows a list of all the user's outstanding forms.

When the Grid View button is clicked, the list of forms is displayed:

Clicking a row will open the form for completion. Clicking the List View button will go back to the standard view with the dropdown box to select a form.
Data Collection and Skill Scans Prompt
When learner and employer users have data collection forms and skill scans to complete, options for both will now appear on the prompt.
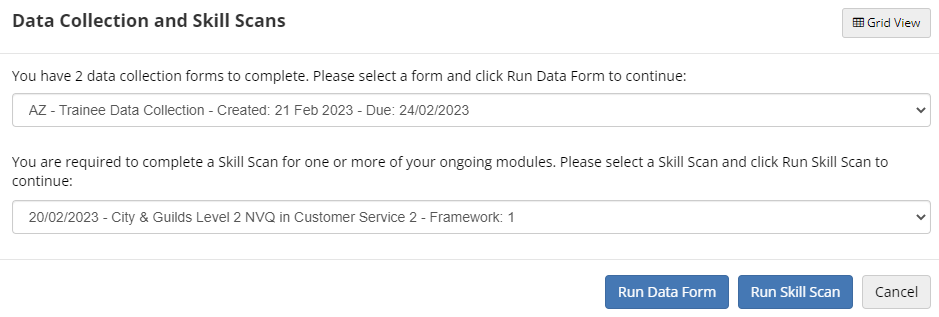
This allows you to select either the form or the skill scan to complete and then click either Run Data Form or Run Skill Scan to begin.
Preferred Gender Pronouns
A learner's preferred gender pronouns can now be specified on the learner Summary screen.
-
Open the learner's record and go to the Summary screen.
-
Click the View Details button.
-
Click the edit button next to Learner Details.
-
In the Personal Details section, select a value from the Gender Pronouns dropdown box.
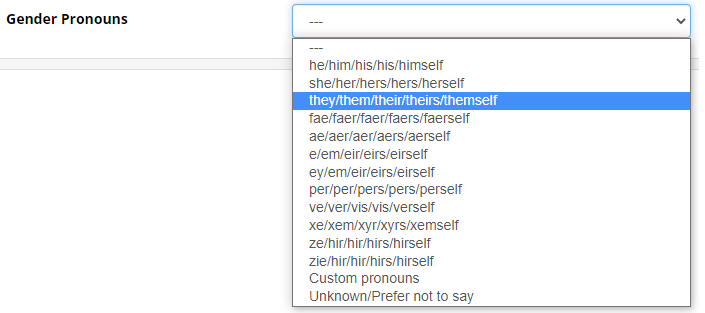
-
If the learner's preferred pronouns are not in the available lookups, you can enter them manually by selecting the Custom pronouns value. This will display the Gender Pronouns section.
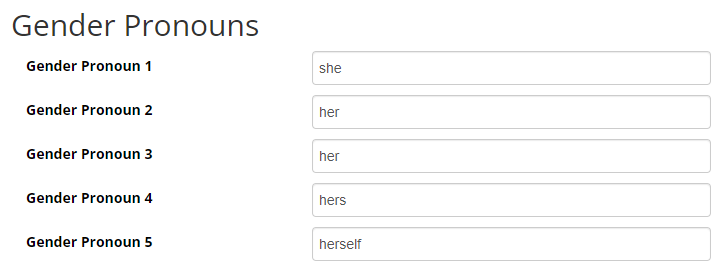
Enter the pronouns as required. If the gender is set as male or female, the pronouns will be pre-populated with he/him or she/her pronouns respectively. These can be changed as required.
-
Click Save.
Web User Accounts for Employer Contacts
Employer contacts can now be given a web user account so that employers can effectively have more than one Maytas Hub user.
-
Go to Web User Editor on the sidebar.
-
Click Add New Web User.
-
Complete the Account Details and Basic Details as required.
-
Click Associated Record.
-
Click the Associate Record button.
-
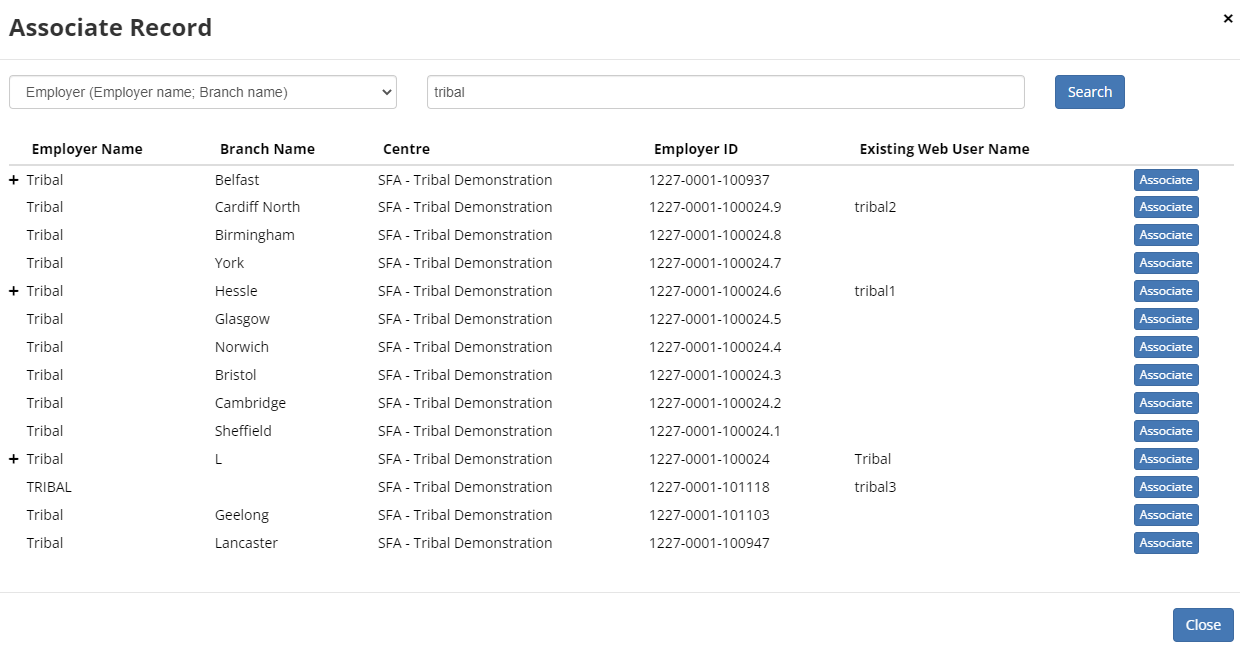
Select Employer from the dropdown box and search for the contact's employer.
-
Employers that have contacts will show a + button to the left. Click the + to show the contacts.

-
Click the Associate button for the contact you wish to associate with the web user.
-
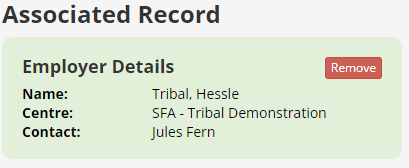
Click Save. The employer contact will now be associated with the web user. You can remove this association by clicking the Remove button.
Restrict to Key Contacts
Web user accounts associated with an employer contact can be restricted to only viewing learners that have the user as their key contact:
-
Go to Web User Editor on the sidebar.
-
Search for and open the user or group that requires permission.
-
Click Permissions to expand that section.
-
Under the Employer Contact header, tick the Restrict to Key Contacts permission.
-
Click Save.
Visits Data Collection Forms - Employer Contacts
Data collection forms for visits that are to be completed by an employer on behalf of a learner will now be sent to the learner's employer key contact if one exists. If not, the form is sent to the email address on the employer account instead.
This matches how learner forms to be completed by an employer on behalf of a learner work.
Report Viewer Update
The report viewer used by the Maytas Hub Reports module has been updated to address several issues and add support for future development. The main noticeable change is that the parameters area is visually different, as it now uses the built-in Microsoft report viewer tools.

Custom Validation Message
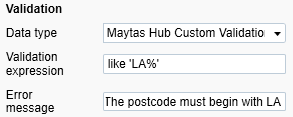
When custom validation is used on a screen created in the Screen Designer, a custom validation message can now be defined. If no custom validation is specified, a default error message will appear when invalid data is entered.
To define a custom validation message for a field that has custom validation configured for it:
- In Maytas 5, go to Tools on the toolbar and select New / Load on the Screens panel of the ribbon.
- Open the relevant screen.
- In the design area, select the field that you wish to set a custom validation for.
-
In the Validation section on the right, enter the validation message you wish to display in the Error message box.
- Click Apply.
- Go to Home on the toolbar and click the Sync button.
When invalid data is entered in the field in Maytas Hub, the custom validation message will now appear.

Learner Login - Mappings Coverage Progress Chart
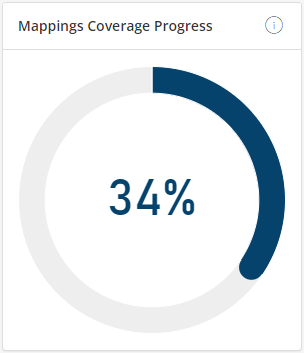
The Learner Login homepage can now include a chart which shows a learner's overall progress in terms of the criteria they have submitted evidence for (regardless of whether it has been assessed) as a percentage of their total criteria.
Hovering the mouse over or tapping the different sections of the ring will show the amount of submitted and outstanding criteria.
This is a different measure to the Expected v Actual Progress chart, which has a much more complex derivation (see here for details).
To enable the chart:
- In Maytas Hub, go to Settings on the sidebar.
- Click the System configuration button.
- Go to Learner Login on the left (under the Maytas Hub Online header).
- Scroll down on the right to the Evidence Wizard section.
- Tick the box for the Show Learner Mappings Coverage Progress chart option and ensure the toggle button is set to ON.
- Click Save.
How progress is calculated
The progress is the percentage of covered mappings out of total mappings.
Covered mappings is the number of distinct criteria from objectives the learner is enrolled on that have at least one piece of evidence submitted against them via the evidence wizard. This shows as Submitted on the chart (i.e. the dark area of the ring).
Total mappings is the number of criteria against objectives that the learner is enrolled on that are able to have evidence submitted against them via the evidence wizard.
Note that evidence does not need to have been assessed for it to count, and so the percentage should be treated as an indicative measure of progress.
OTJ Summary - Planned Hours Override
The configurable OTJ Summary column on the Browse Trainees screen will now use the Planned Hours Override on the Off the Job Training screen if entered, otherwise it will use the derived value in the Off the job calculator field, as in previous versions.