Employer Editor
Add an Employer to the System
To add an employer to the system:
- Click the M5 logo in the top-left corner of the screen.
- Click or hover over New and click Employer.
- Enter the employer’s details on the first screen and click Next.
- Enter the employer’s address details on the second screen and click Next.
- Click Finish to complete the process, or click Back to return and alter details.
- You will now see the Employer’s details screen. Click Apply on the ribbon to save the account.
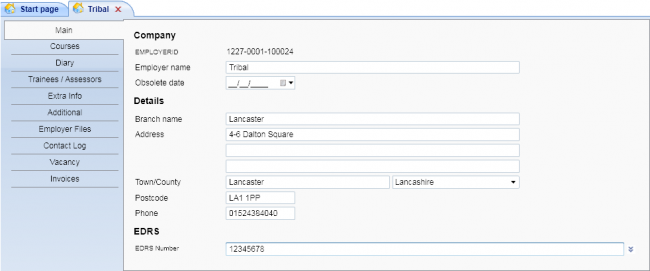
Employer Tabs
Main
This allows you to enter and edit employer contact and address details.
Diary
The diary allows a variety of events to be planned and recorded for an employer.
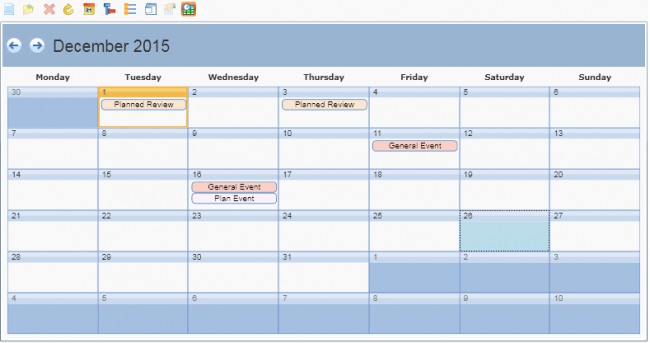
Clicking the  button will toggle between the list view and the calendar view.
To add an entry:
- Click the
 button at the top of the Diary screen.
 - Select the entry type from the drop-down list (for employers there is only the Visit option) and click OK.
- Enter details as required. Some fields allow you to search for a value (such as an assessor or trainee). Click the
 button to open the search dialogue.
 - When finished, click Save. The entry will now be added to the diary.
- If you select a diary entry, its key details will be shown (they can also be edited here). To open the entry to see and edit all details, click Edit. To remove an entry, click Delete.
Visits File Upload
Files can be uploaded against visits in Maytas. See the Visits File Upload page for details on how to configure this.
Trainees / Assessors
This tab contains a grid which allows you to assign the employer to trainees and assessors.
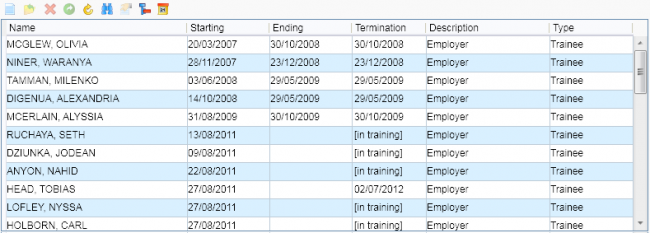
- To add an assessor:
- Click the
 button on the grid and choose Personnel to add a new row.
 - Click the
 button at the end of the Assessor row to search for an assessor.
 - Enter a search term and click
 to search. Select an assessor from the list and click OK.
 - Select a start date for the assessor-employer association to begin. Enter an end date if required (the default date of 31/12/2199 indicates that the association is open-ended).
- Select the appropriate type(s) by checking each relevant box.
- When finished, click OK.
- The assessor row will now be added to the grid. To edit a row, select it and click Edit.
- Click the
- To add a trainee:
- Click the
 button on the grid and choose Trainee to add a new row.
 - Click the
 button at the end of the Trainee row to search for a trainee.
 - Enter a search term and click
 to search. Select a trainee from the list and click OK.
 - Select a start date for the trainee-employer association to begin. Enter an end date if required (the default date of 31/12/2199 indicates that the association is open-ended).
- Select the appropriate type(s) by checking each relevant box.
- The Job Info tab lets you choose a job title, job category, job type and source (personnel).
- When finished, click OK.
- The trainee row will now be added to the grid. To edit a row, select it and click Edit.
- Click the
Contact Log
The contact log allows you to record contact to / from the employer.
Vacancy
The Vacancy tab shows a list of vacancies associated with the employer.
Invoices
The Invoices tab shows a list of invoices associated with the employer. See here for information on creating an employer invoice.
Employer Migration
Data associated with an employer can be migrated to another employer. To do this:
-
Open an employer record and go to Tools | Migrate Employer.
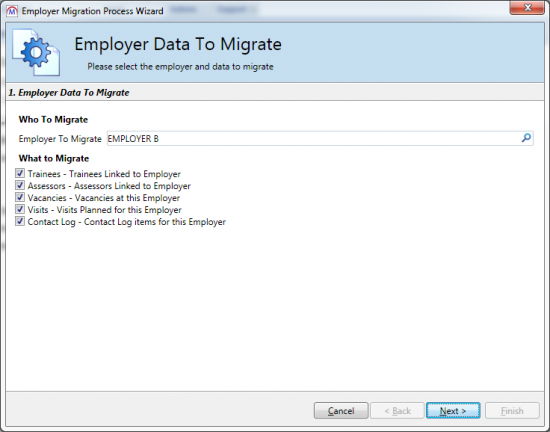
- At the top of the wizard you can change the employer to migrate from (this will default to the currently opened employer record). Underneath this you can choose the data categories to migrate: trainees, assessors, vacancies, visits and contact log. Choose the appropriate categories and click Next.
- Choose the employer to migrate to. If you simply want to close off the existing data and not migrate to another employer, select None.
- Choose the date on which the migration will take effect.
- Choose whether to migrate all visits associated with the employer or only migrate visits attached to specified assessors or trainees (these can be specified later in the wizard).
- Choose whether to migrate all contact log records associated with the employer or only migrate contact log records attached to specified assessors or trainees (these can be specified later in the wizard).
- Click Next.
- Choose the learners you wish to migrate and click Next.
- Choose the assessors you wish to migrate and click Next.
- Choose the vacancies you wish to migrate and click Next.
- You will now see a summary of the data to be migrated. Click Next to begin the migration.
- Click Finish.
Employer Contacts
Contacts can be entered against an employer, and a learner can then be assigned one of those contacts as their key contact for the employer. Whenever a data collection form is assigned to an employer to complete on behalf of a learner, the form will be sent to the learner's key contact for completion. If a learner does not have a key contact specified, the form will be sent to the employer user instead.
To publish the Employer Contacts tab:
- Go to Tools on the toolbar and click New / Load on the Screens panel of the ribbon.
- Select Employer on the left and double-click Employer Contacts on the right.
- Tick the Published box on the left. If you want the tab to also be available in the Maytas Hub Employer Editor, tick the Employer box.
- Click Apply.
- Go to Home on the toolbar and click Sync.
The tab can be found by opening an employer record and selecting Employer Contacts on the left:

Click the  button to add a new contact.
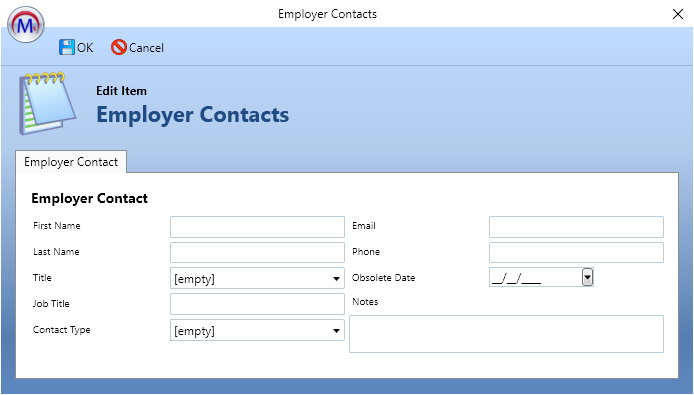
Complete the details as required and click OK, then click Apply to save the changes.
Once contacts have been set up for an employer, a learner at that employer can be assigned a key contact:
- Open a learner record and go to the Summary tab.
- Add or edit the employer row in the Employer / Personnel grid.
-
The contact can be selected from the Key Contact dropdown.
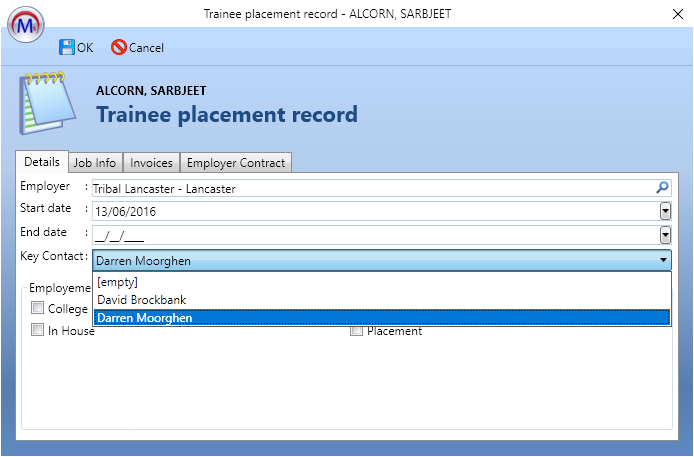
- Click OK, then click Apply to save changes.
Employer Contacts at Branch Level
A configuration option is available which allows employer contacts to be set at branch level as well as at parent employers. Additionally, the key contact for a branch can be set to a contact at the parent employer.
To set the config:
- Go to the M5 button at the top-left and select Options.
- Go to Employer Login on the left (under the Maytas Hub Online header).
- In the General section, tick the box for the Allow parent employer contacts at branches setting on the right and ensure the toggle button is set to ON.
- Click OK.